1. Introduction
In today’s fast-paced digital landscape, creating high-quality mobile and web applications efficiently is crucial. FlutterFlow, a powerful platform, caters to this need by offering a visual, drag-and-drop interface. This tool enables users, regardless of coding skills, to build fully functional apps quickly and easily.

One essential feature modern applications often require is the ability to generate PDF documents. Whether for invoices, reports, or contracts, having a reliable PDF generator integrated into your app is indispensable. This is where CraftMyPDF, a versatile PDF generation API, comes into play.
The purpose of this blog post is to provide a step-by-step guide on generating PDFs in FlutterFlow using CraftMyPDF.
By following this guide, you’ll learn how to seamlessly incorporate PDF generation capabilities to create Business Contracts within your FlutterFlow projects, enhancing your application’s functionality and user experience.
2. Introduction to FlutterFlow and CraftMyPDF
2.1 FlutterFlow
FlutterFlow is a robust platform designed for building mobile and web applications using a visual, drag-and-drop interface. It allows users to create fully functional apps without extensive coding knowledge.
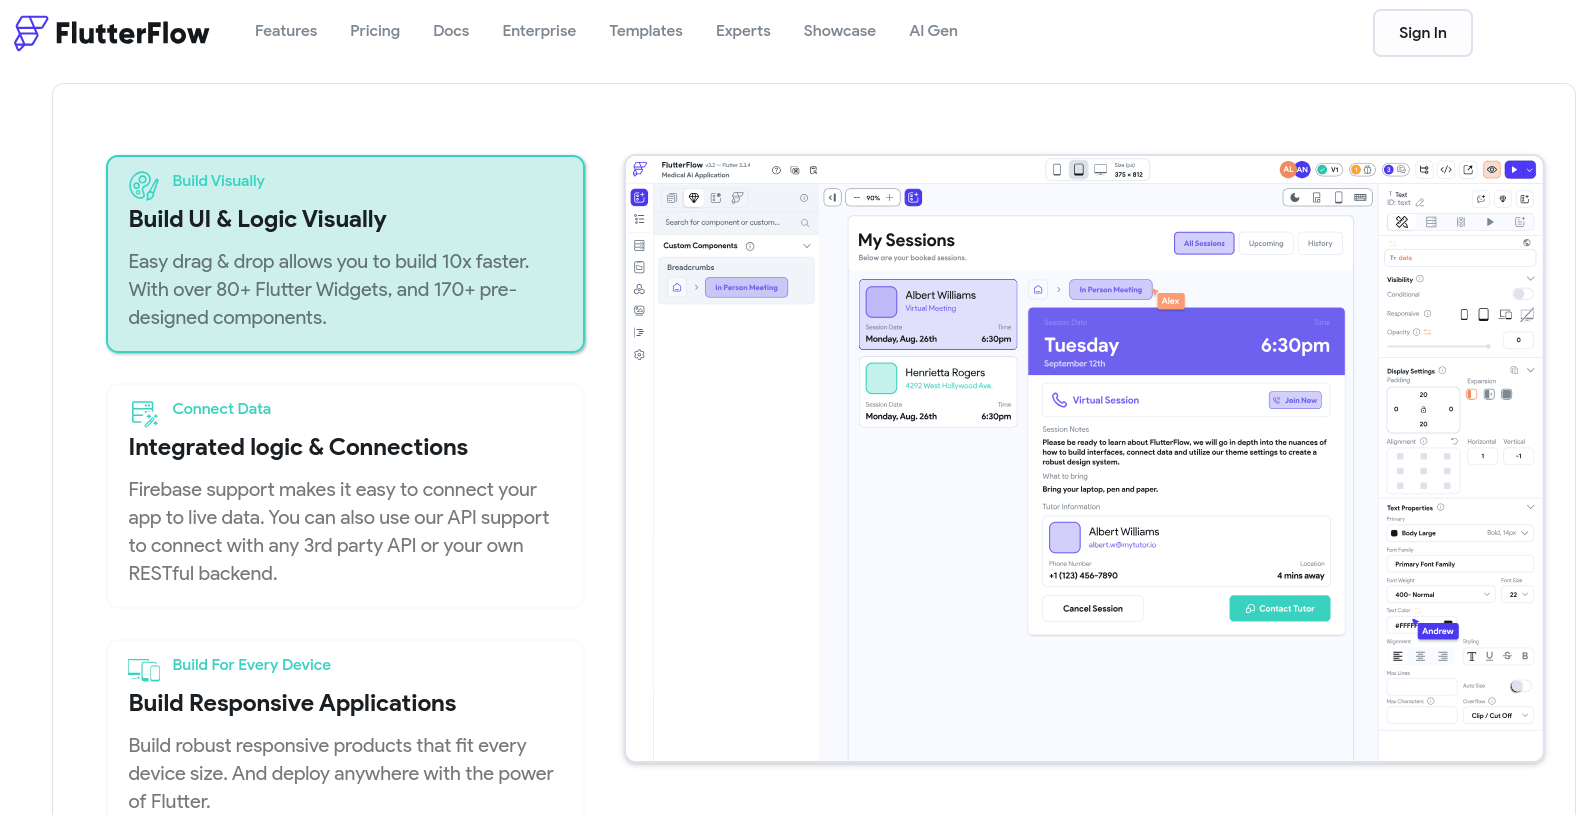
Key features include:
- Visual Development: Over 65 pre-built widgets and 150 professionally designed screen templates.
- Real-Time Collaboration: Teams can edit and design together in real-time.
- Code Generation and Export: Automatically generates clean Flutter code.
- Integrations: Supports Firebase, Stripe, Algolia, and external APIs.
- Deployment Options: Direct deployment to App Store, Play Store, or web.
- Design Consistency: Allows for design libraries and consistent styling across projects.
- Advanced Features: Supports authentication, data management, custom actions, Google Maps integration, and more.
- Testing and Feedback: Includes a testing mode for live data and feedback collection.
FlutterFlow aims to make app development accessible and efficient, providing all the necessary tools for creating professional-grade applications.
2.2 CraftMyPDF
CraftMyPDF is a user-friendly platform designed to simplify PDF generation and customization. It provides a web-based drag-and-drop interface, making it easy to create customizable PDF templates.
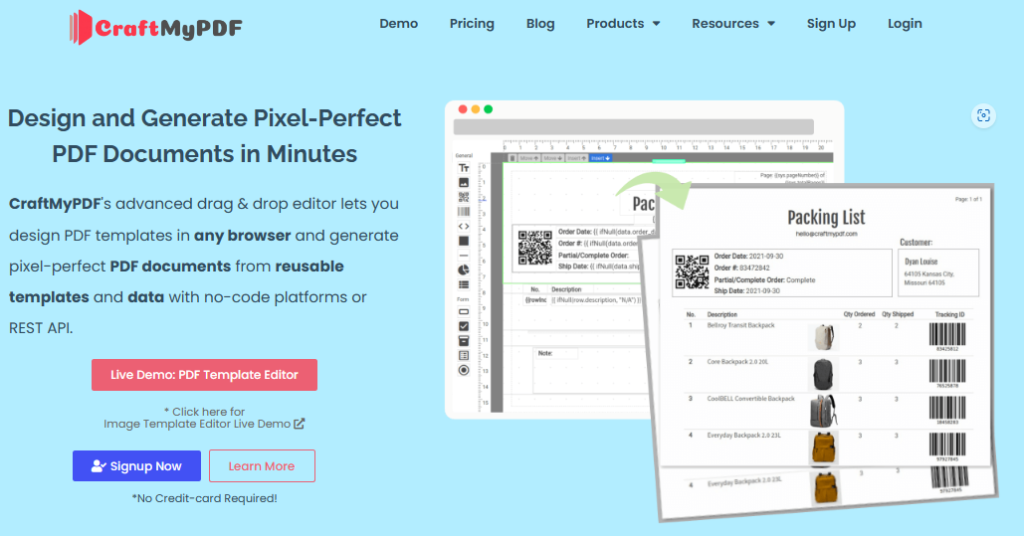
Key features include:
- Drag & Drop Editor: Customize PDF templates with labels, images, QR codes, barcodes, and charts.
- Import Existing PDFs: Add new elements while preserving the original layout.
- Expressions & Formatting: Supports date-time, currency, custom formatting, and JavaScript for complex calculations.
- Regional API Endpoints: Available in the US, EU, Singapore, and Australia.
- PDF Generation API: Efficiently generates PDF documents with our PDF Generation API or images (JPEG/PNG) at scale.
- Integrations and Automation: Integrates with Zapier, Make.com, Bubble.io and REST API for easy automation.
CraftMyPDF streamlines the process of creating and managing PDF documents, offering a powerful PDF generation API that integrates seamlessly with various platforms.
By combining the capabilities of FlutterFlow and CraftMyPDF, developers can enhance their applications with robust PDF generation features, creating a more versatile and user-friendly experience.
3. Generate PDFs for FlutterFlow and CraftMyPDF
Here is our use case for this article: Whenever someone fills out the form on the application and clicks on the “Generate Business Contract” button, the details entered by the user will be used to create a Business contract PDF.
Step 1: Getting Started with FlutterFlow
The first step is to set up the FlutterFlow project. Here’s how to do that:
1. Register on FlutterFlow: Create an account.

2. Sign in: Access the FlutterFlow dashboard.
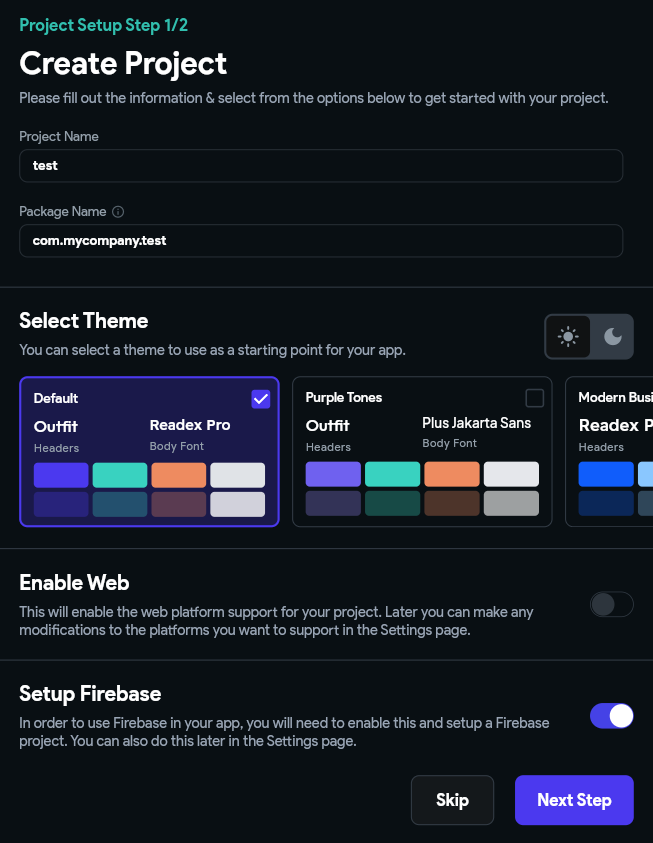
3. Create New Project:
- Click on the “Create New” button in the top right corner.
- Name your project and select a template or create a blank project. For this article, I am creating a blank project.
4. Project Setup: Customize the theme and select necessary options if needed, but we’ll skip additional setup for this article.
5. Design Application:
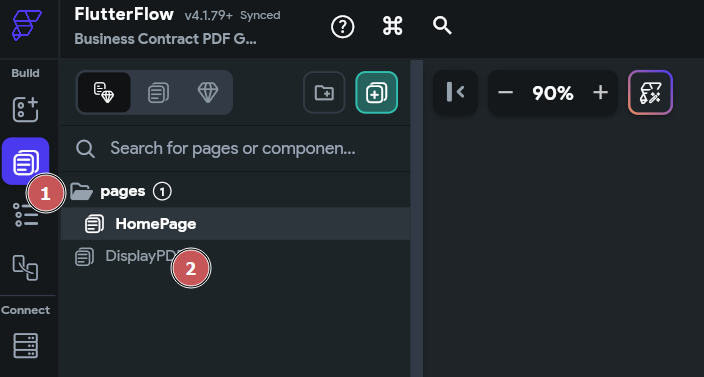
- Create a basic layout with input boxes and a button on the first page.
- Add another page and add a PDFViewer widget on a second page to display the generated PDF.
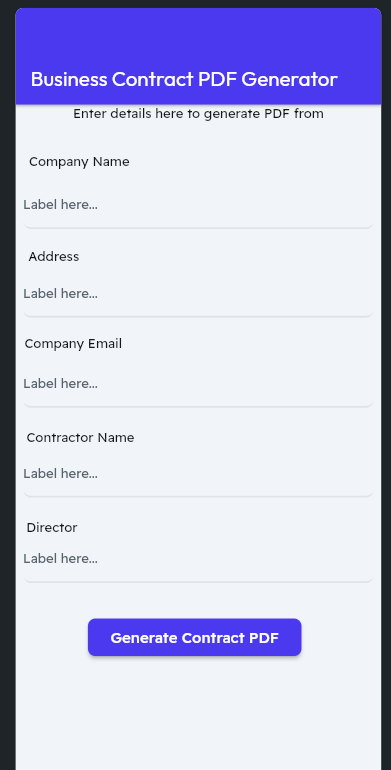
This completes the design part of our application.
Step 2: Designing the PDF Layout with CraftMyPDF
1. Register on CraftMyPDF: Sign in to your account.
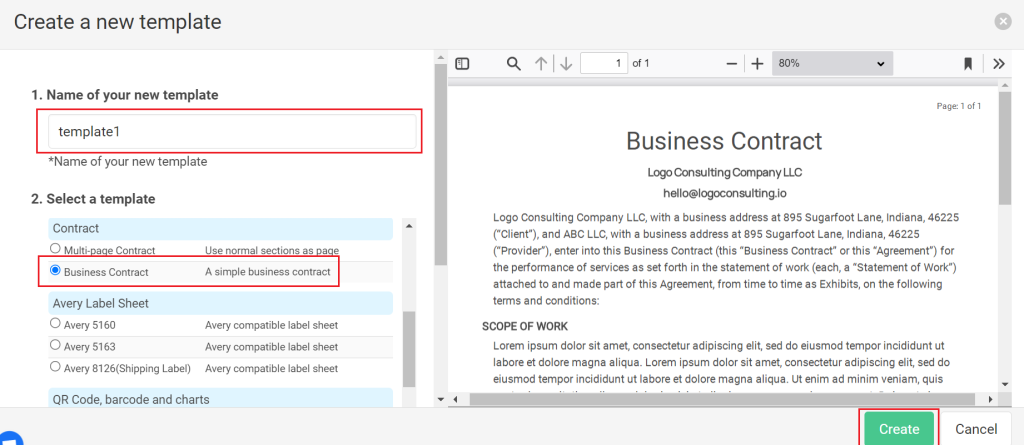
2. Create PDF Template:
- Click on “New PDF Template”.
- Name the template and select “Business Contract”.
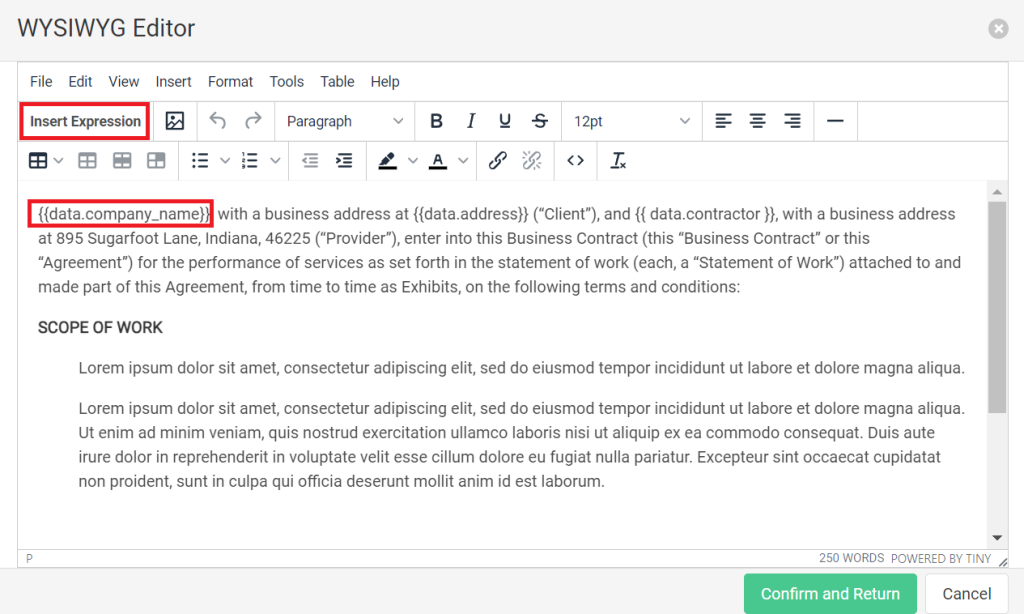
3. Edit Template:
– Use the WYSIWYG Editor to customize the content. Double click on text in the template to open the WYSIWYG Editor.
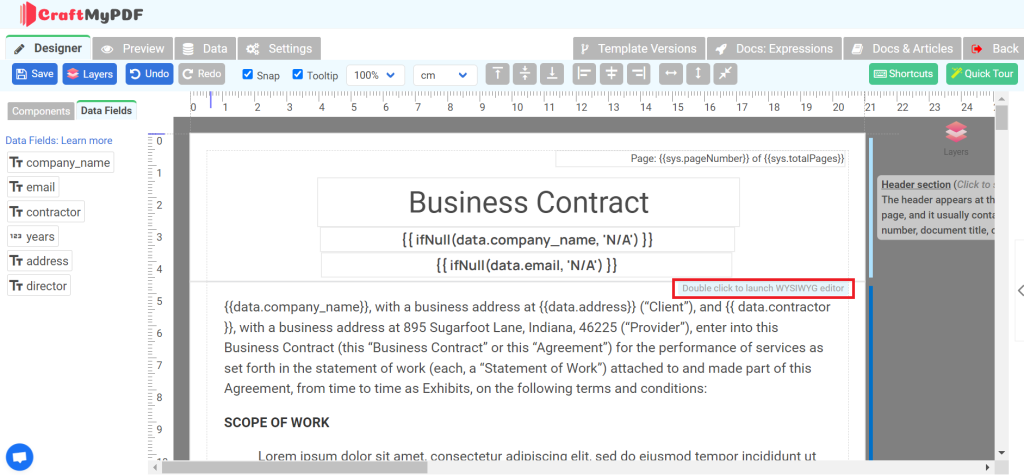
- Add scope, duration, and terms of your contract.
- Replace dynamic information with expressions. For this you need data fields to be added in the “Data” tab as JSON. Once they are in place, in editor you can use the insert expressions button to insert the right data field expression at the right place in your text.
4. Add Components: Insert images, QR codes, barcodes, etc., where needed.
5. Save Template: Click on Save to save the pdf template design.
Now our PDF template is ready.
Step 3: Implementing PDF Generation Logic in FlutterFlow
Now that we have application design and PDF template ready, the next step is to start connecting pieces together. Let’s first create an API call to generate PDFs from the template designed in CraftMyPDF using the data entered by the user in our application inputs.
i. Create an API Call
1. API Setup:
- Click on “API Calls” in the side panel.
- Click on “Add+” to add a new API Call named “Create PDF”.
- Use POST method with endpoint `https://api.craftmypdf.com/v1/create`.
2. Add Headers:
- `x-api-key: [YOUR API KEY]`
- `Content-Type: application/json`
The API Key can be obtained from the API Integration tab in CraftMyPDF.
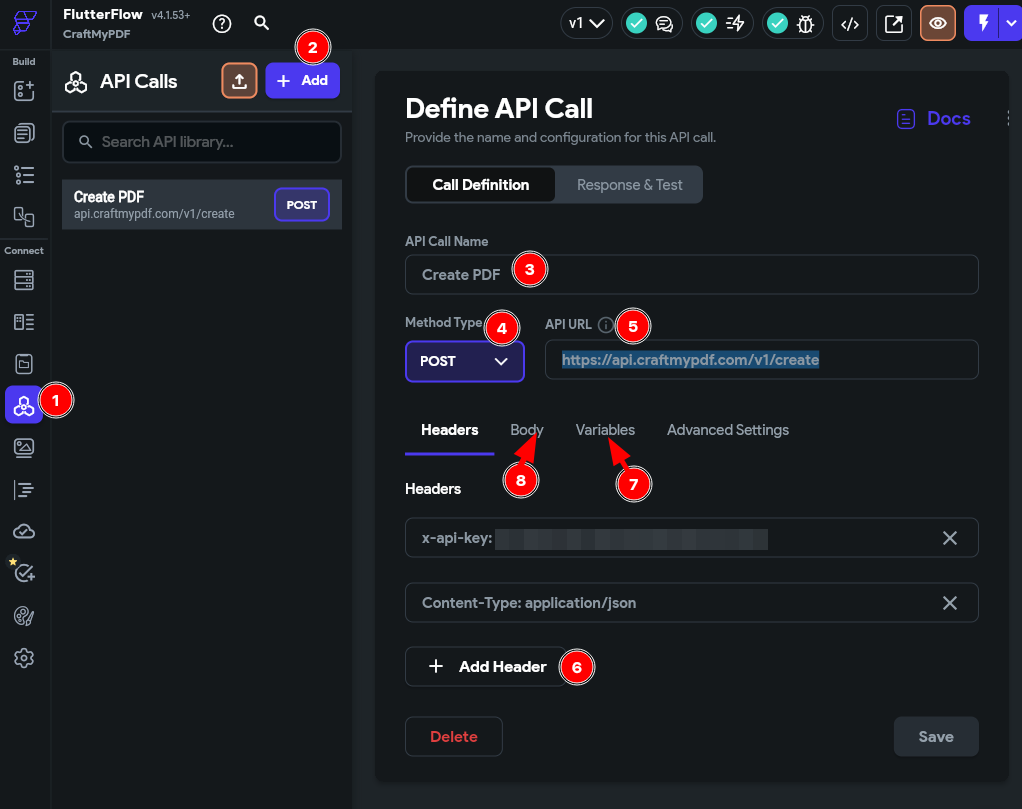
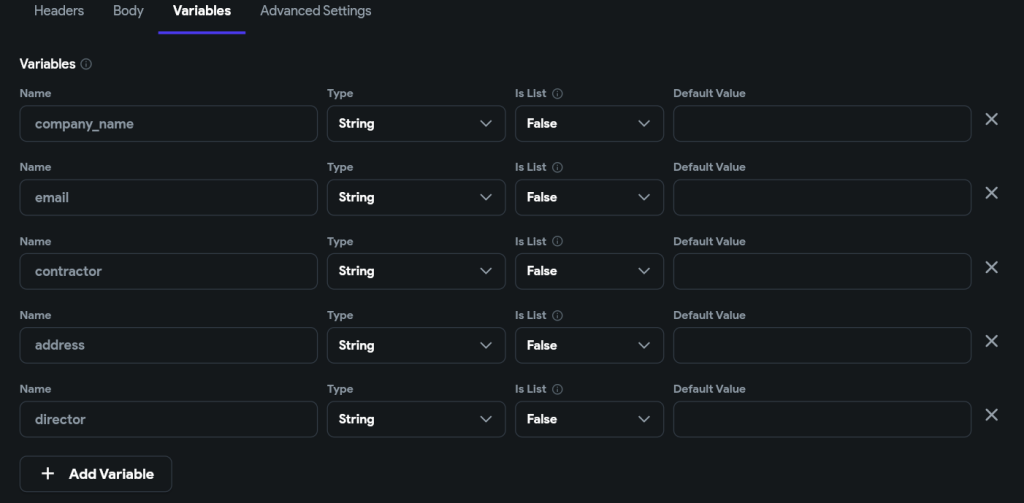
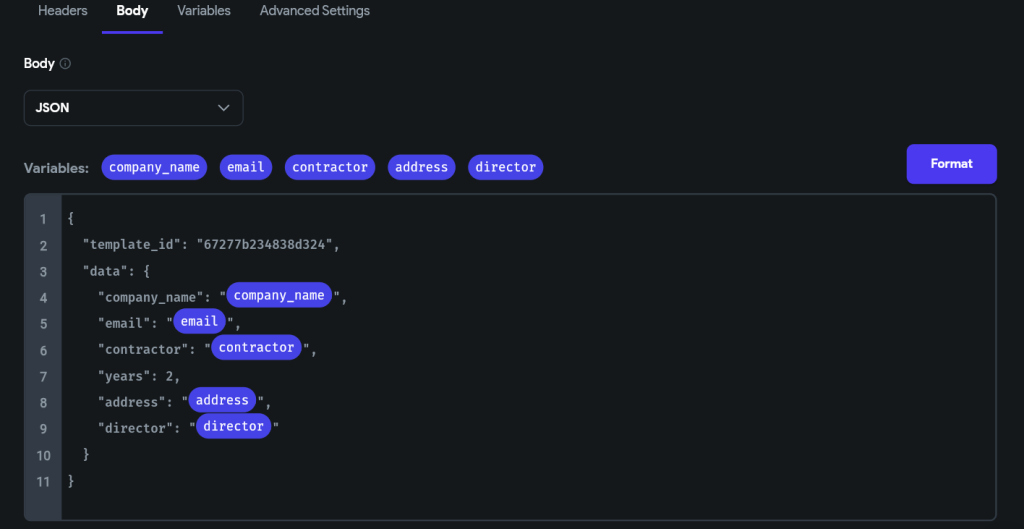
3. Variables and Body:
- Click on the Variables tab and add the necessary dynamic variables.
- Click on the Body tab to enter the template ID and data in the Body. You can use the dynamic variables that were added in the previous step.
4. Save API Call.
ii. Create a Data Schema
Now lets create a data schema for storing API responses.
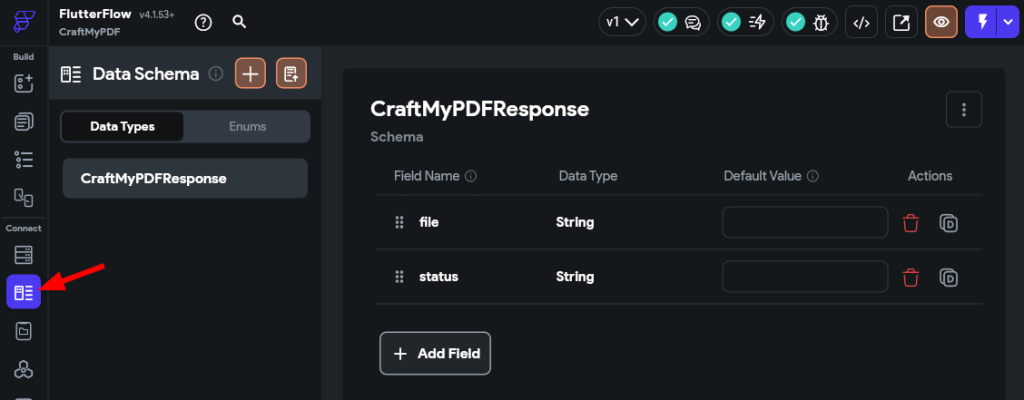
1. Data Schema Setup:
- In the “Data Types” tab, create a new schema named “CraftMyPDFResponse”.
- Add the following fields to this schema: `file` and `status`.
iii. Response and Test
Now that we have API call and Data Schema ready, lets connect the response of API call to Data Schema.
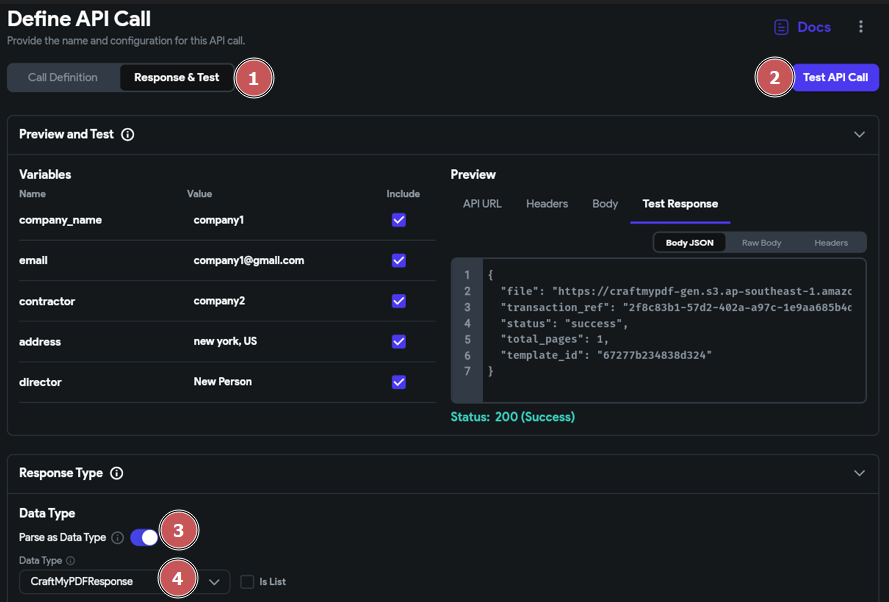
1. Connect API to Data Schema:
- In “API Calls”, select “Response & Test” for the API Call created above.
- Click on “Test API Call” to test the API Call and select “Parse as Data Type” to parse it as “CraftMyPDFResponse”.
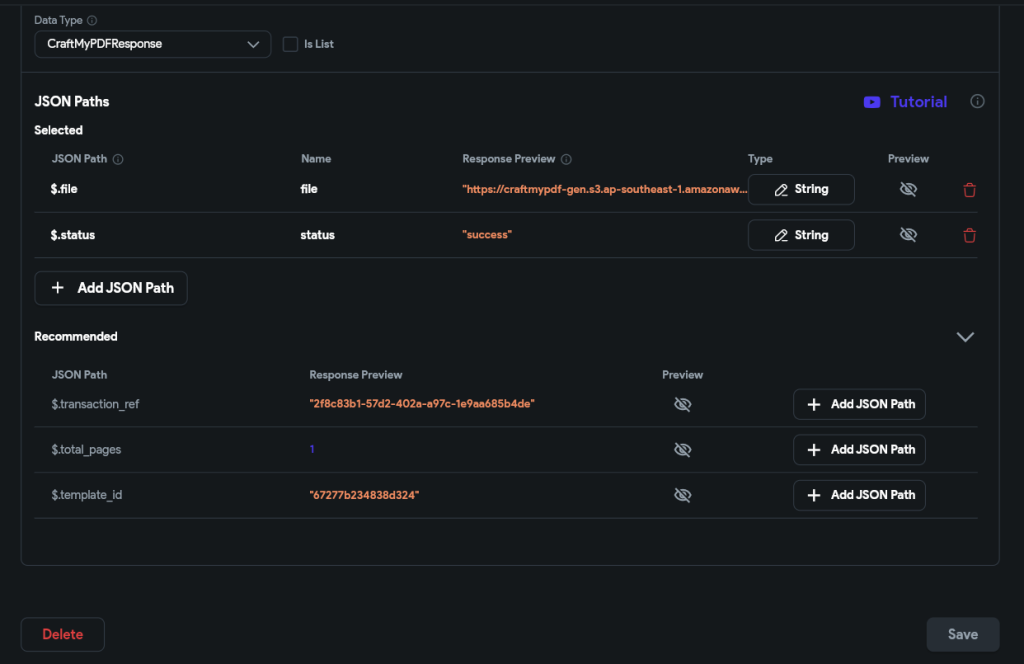
- Then click on “Add JSON Path” for the fields that you want to map to the response, you may select $.file and $status
Now that we have created an API call, Data Schema and connected both together, lets configure our application to trigger this API call and once executed fetch the details to show the PDF generated.
iv. Integrating the PDF generation logic
- Click on the button “Generate Contract PDF” and go to Actions from the right side properties panel.

- Click on “Open” next to “Action Flow Editor”
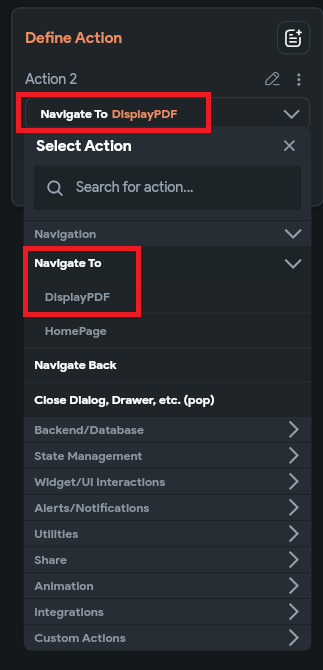
- In “On Tap” tab, click “Add Action”
- Under “Select Action” choose “Navigate to” and then choose the second page we used for displaying PDF.
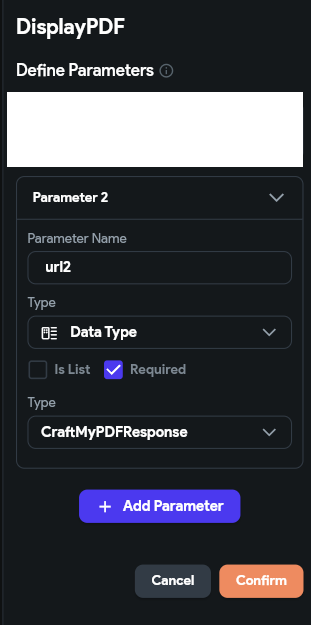
- Now on the same action click on “Define” in “Parameters” section and then click on “Add Parameter” in the window you presented on the right panel.
- Give the parameter a name, select “Data Type” in Type and choose “CraftMyPDFResponse” in the next dropdown which is the data type we created while creating an API call above. And click on “Confirm”.
- Click on the “Pass” button that you will see now on navigate action’s parameter section to pass the created parameter to the second page while navigating.
- Expand the dropdown of the parameter being passed and set value as follows
Now your first action is set and ready to use. Let’s set a second action now on the same button.
- Click on the + icon at the bottom of the first action and select “Add Action”.
- In the Select Action search box, type “API” and select “API Call” as our action. This is because we have to make an API call to CraftMyPDF whenever someone clicks on this button to generate the PDF.
- Set variables for inputs on our form to be passed in order to replace values while PDF generation and set output variables of API call a name.
- Now all our configurations are done for the first page.
So let’s move on to the second page. Select our second page we created above from the page selector on the left panel.
- Select the “PDFViewer” widget added on this page and in the right properties panel go to “Network Path”
This completes all our configuration and application settings on flutterflow. Now we have to test this.
Step 4: Testing and Debugging the FlutterFlow App
Before going live and publishing your app, let’s test the application if it is working well. To do this, we have to start running our application in test mode of FlutterFlow.
Click on the button in the top right corner of your FlutterFlow window to start the test and debug mode.
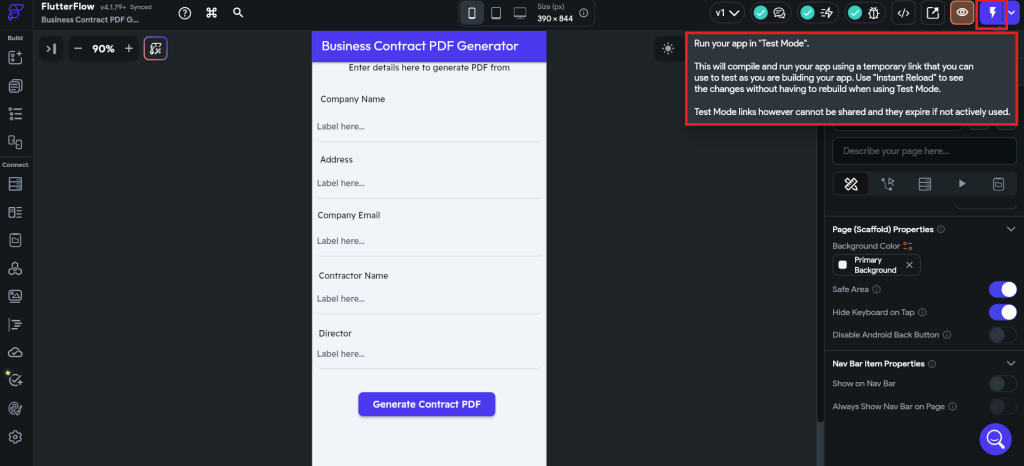
It takes some time to load the application in test mode and has the time limit of 12 minutes per session. After which you have to start a new test session.
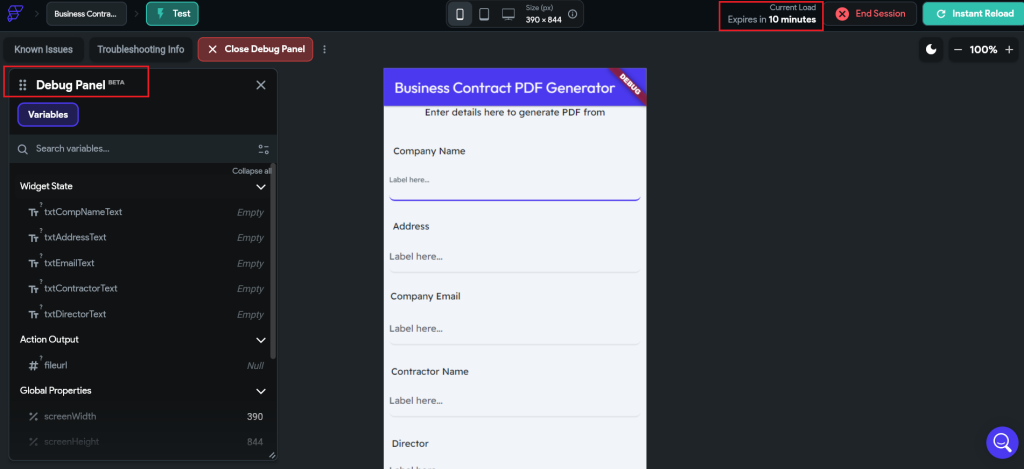
In the test session, simply enter all your inputs on the form of the application we designed and then click on the button. This should generate the PDF with all those inputs which you have given in the PDF template we created on CraftMyPDF and then show you the business contract PDF on screen.
It also shows you what are the values being set in runtime, so that in case of any error, you can go and check where the error lies.
Step 5: Enhancing the PDF Generation Feature
In order to customize PDF templates further and add advanced tools such as Barcode, QR code, or charts, etc. you have relevant tools on CraftMyPDF’s component section.
You can drag them onto your pdf as per your requirement and configure them.

Here is the documentation that can help you learn more about adding these to PDF template-
https://support.craftmypdf.com/components-basic
Step 6: Deploying Your Application
Finally, deploy the application for live use.
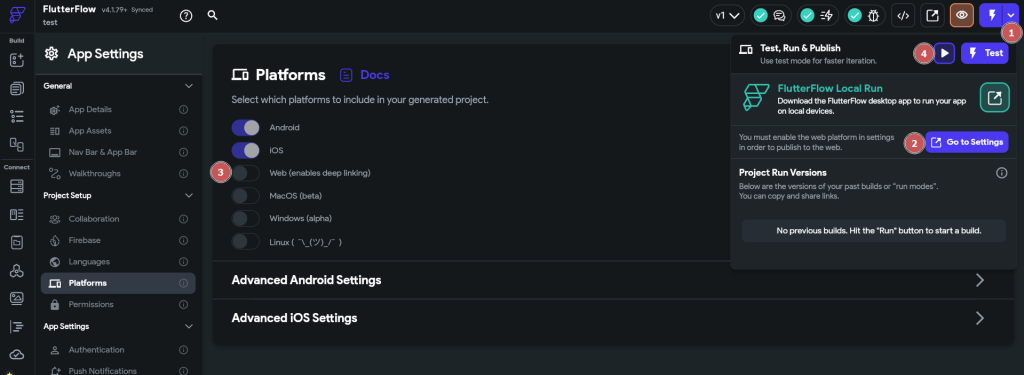
1. Deploy:
- Click the drop-down in the top right corner and select “Go to Settings”.
- Switch on “Web (enables deep linking)”
- Click on the Run arrow button to share a stable version.
- Next, click the Upload button to publish your app to the web.
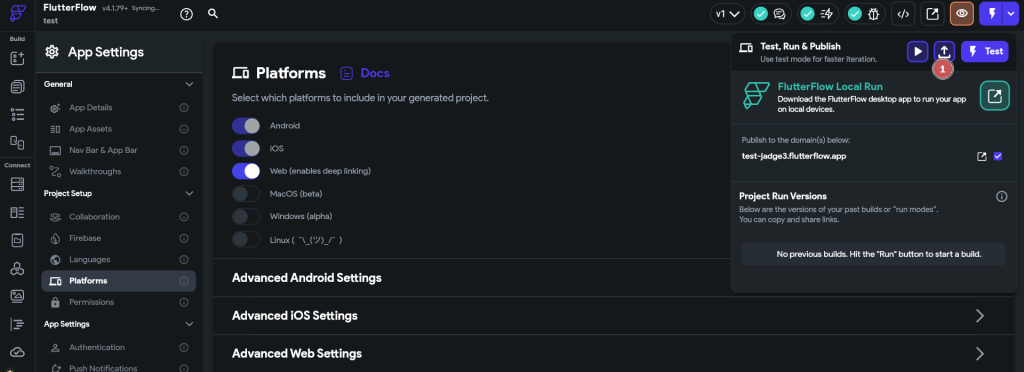
2. Share URL: Copy the URL from the same dropdown in the “Publish to the domain(s) below” section and share it with anyone to give access to your application.
Conclusion
Generating PDF documents with FlutterFlow and CraftMyPDF significantly enhances your app’s capabilities. By following the steps to set up, design, implement, test, and deploy, you can seamlessly integrate robust PDF generation features into your projects.
To fully leverage the power of CraftMyPDF, we encourage you to sign up and experiment with its features. The platform offers a versatile PDF generation API that integrates seamlessly with FlutterFlow, making it an excellent choice for developers.
For further learning, check out these additional resources:
We hope this guide helps you integrate PDF generation into your FlutterFlow projects effortlessly. Sign up now to experience the features of CraftMyPDF. Happy coding!