Have you ever wanted to generate a PDF from your Wix website? Well, now you can with the CraftMyPDF API!
Wix is a popular website builder that allows users to create beautiful websites without needing to code. The Velo app is a Wix app that allows developers to build custom solutions on top of the Wix platform.
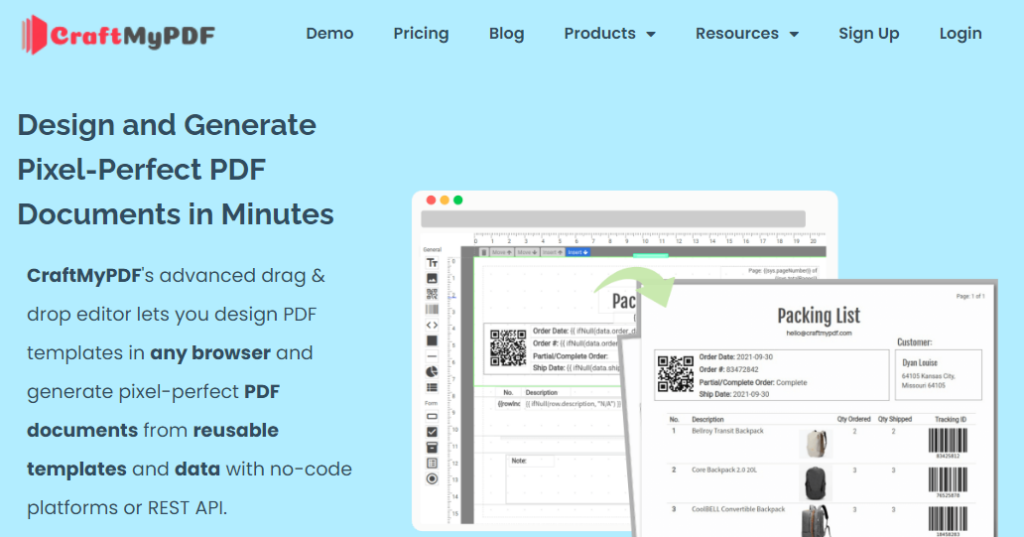
The CraftMyPDF PDF & image generation API is a simple, yet powerful API that allows you to generate PDFs and images from your Wix website or Wix Velo App.
If you want to customize document layouts visually before integrating them into your Wix application, the PDF template editor lets you build and manage reusable templates without manually designing PDFs in code.
In this tutorial, we will show you how to get started with the CraftMyPDF API and how to use it to generate PDFs, and images from your Wix website, and we will also explore other features such as template management.
Getting Started with Wix
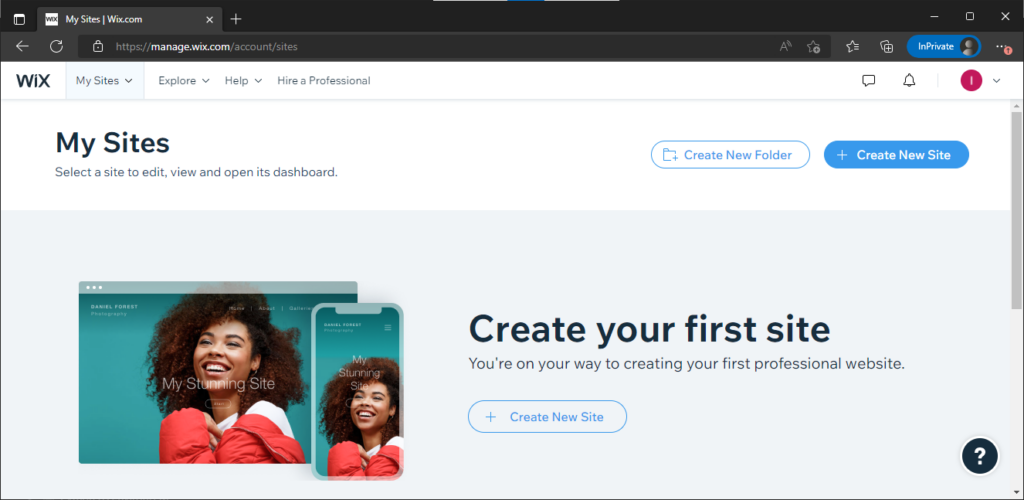
If you don’t have a Wix account, you can sign up for one here. Once you have a Wix account, you will need to create a new Velo project. To do this, log into your Wix account and click on the Create New Site button.
Enter a project name, and description and select a template, then click on the Edit button to start editing the template.
Setting up CraftMyPDF
Now that you have a Wix account and a Velo project, you will need to sign up for a CraftMyPDF account.
To sign up for a CraftMyPDF account, go to the CraftMyPDF website and click on the “Sign Up” button.
Once you have signed up for a CraftMyPDF account, you will need to copy your API key. To do this, click on the API Integration link in the navigation bar.
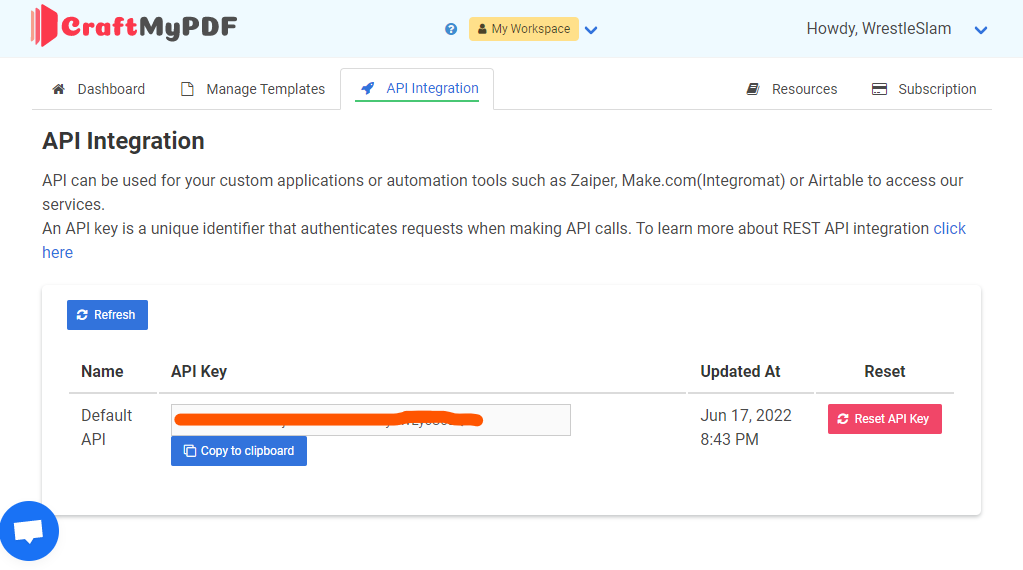
Copy your API key and save it in a safe place, as you will need it later.
How to Generate PDFs in Wix
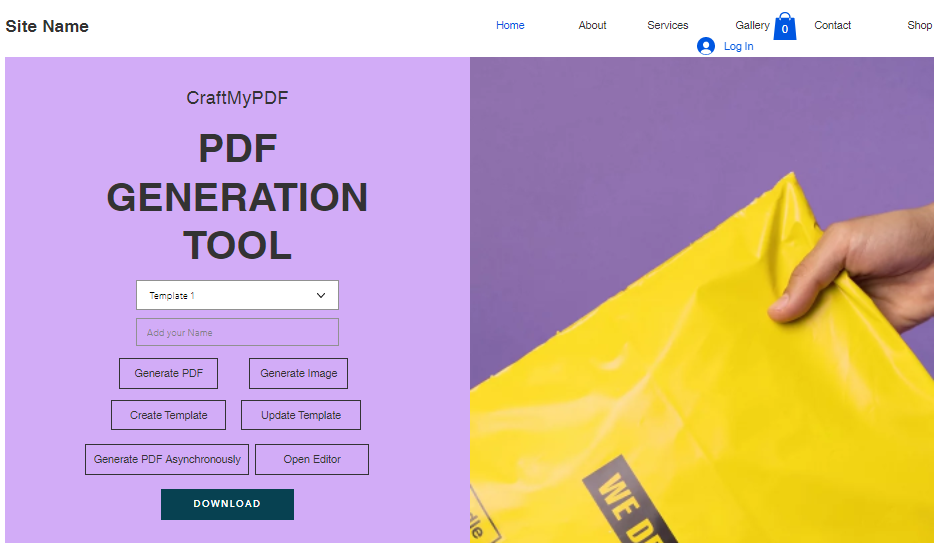
Now that you have the CraftMyPDF API set up, you can use it to generate PDFs from your Wix website. For this tutorial, we have added 1 dropdown, 1 textfield, and 7 buttons in our app.
If you want a broader overview of endpoints, authentication, template management, and implementation examples beyond this Wix tutorial, the PDF generation API guide covers everything you need to start building document generation into your own applications.
Use Velo’s Secrets Manager
The first step is to use Velo’s Secrets Manager to store your CraftMyPDF API keys. To do this, navigate to Dashboard > Developer Tools > Secrets Manager.
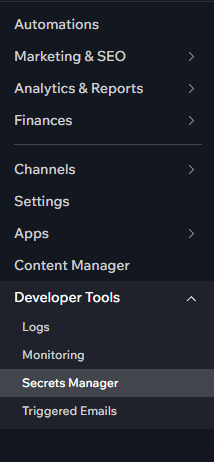
Enter a name for the secret and paste your CraftMyPDF API Key. Then, click on the Add button to save the secret.

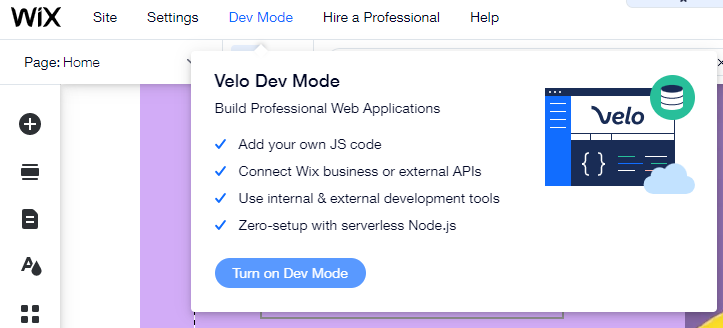
Activate Dev Mode
Next, you will need to activate Dev Mode in your Velo project. To do this, click on the Dev Mode option in the navigation bar, then click on the Turn on Dev Mode button.
API Functions
1. Listing templates
Once Dev Mode has been enabled, you can use the /v1/list-templates endpoint to list all of the available templates in our dropdown.
To do this, we will create a backend file with the name generatePdf.jsw. We will use this file to make API requests to the CraftMyPDF API.
In the generatePdf.jsw file, add the below code:
import {fetch} from 'wix-fetch';

export async function getTemplates() {

		const api_key = await getSecret("api_key");
    return fetch("https://api.craftmypdf.com/v1/list-templates?limit=300&offset=0",
    {"method": 'GET',"headers":{'Content-Type': 'application/json',
    "X-API-KEY": api_key}})
    .then(response => response.json())
    .then(json => {
        var options = [];
        (json.templates).forEach((template) => {

        options.push({
          value: template.template_id,
          label: template.name
        });
      })
      return options
    });

}
In the above code, we are using the fetch method to make a GET request to the /v1/list-templates endpoint. We are also passing in our API key in the X-API-KEY header.
The fetch method returns a Promise. We are using the .then method to wait for the Promise to resolve and then we are parsing the JSON response.
We are then creating an options array which we will use to populate the dropdown menu in our frontend file.
Now we’ll display the templates in our dropdown. For this, add the below code in the Home page:
import { getTemplates } from 'backend/generatePdf.jsw';
var template_id = ""
var data = {
      'invoice_number': 'INV38379',
      'date': '2021-09-30',
      'currency': 'USD',
      'total_amount': 82542.56
    }

$w.onReady(function () {

  getTemplates().then((options) => {
    $w("#dropdown1").options = options;
    $w("#dropdown1").value = template_id;
  });

  $w("#dropdown1").onChange((event) => {
    template_id = event.target.value;
  });

});
In the above code, we are first importing the getTemplates function from our generatePdf.jsw file.
We are then creating a data object which contains the information that we want to populate our PDF with.
Next, we are using the $w.onReady function to wait for our page to be ready. Once the page is ready, we are calling the getTemplates function and passing in the options array.
We are then using the $w("#dropdown1").options method to populate the dropdown with the templates.
Finally, we are using the $w("#dropdown1").onChange function to get the template_id when the user selects a template from the dropdown.

2. Generate PDF
Now that we have the template_id, we can use it to generate a PDF.
To do this, we will use the /v1/create endpoint.
Add the below function in the generatePdf.jsw file:
export async function getPDF(template_id, data){

    const api_key = await getSecret("api_key");
    var json_payload = JSON.stringify({
		  "data": data,
		  "output_file": "output.pdf",
		  "export_type": "json",
		  "expiration": 10,
		  "template_id": template_id
		});

    return fetch("https://api.craftmypdf.com/v1/create",
    {"method": 'POST',"headers":{'Content-Type': 'application/json',
    "X-API-KEY": api_key},
    "body":json_payload
    })
    .then(response => response.json())
    .then(json => {
        return json.file
    });

}
In the above code, we are using the /v1/pdf/{template_id} endpoint to generate a PDF. We are also passing in the template_id and data object that we created earlier.
The /v1/pdf/{template_id} endpoint returns a Promise. We are using the .then method to wait for the Promise to resolve and then we are parsing the JSON response.
We are then returning the file object which contains the URL of the generated PDF.
To connect it with the buttons add the below code in the Home page:
import { getTemplates, getPDF } from 'backend/generatePdf.jsw';
var template_id = ""
var data = {
      'invoice_number': 'INV38379',
      'date': '2021-09-30',
      'currency': 'USD',
      'total_amount': 82542.56
    }

$w.onReady(function () {

  getTemplates().then((options) => {
    $w("#dropdown1").options = options;
    $w("#dropdown1").value = template_id;
  });

  $w("#dropdown1").onChange((event) => {
    template_id = event.target.value;
  });

  $w('#button1').onClick(() => {

    $w('#button9').label = "Generating PDF...";

    getPDF(template_id,data).then((file) => {
      $w("#button9").label = "Download PDF";
      $w("#button9").link = file;
    });

  });

});
In the above code, we are first importing the getTemplates and getPDF functions from our generatePdf.jsw file.
We are then using the $w('#button1').onClick function to call the getPDF function when the user clicks the Generate PDF button.
The getPDF function returns a Promise. We are using the .then method to wait for the Promise to resolve and then we are setting the file object as the link for the Download PDF button.

3. Generate PDF Asynchronously
If you want to generate a PDF asynchronously, you can use the /v1/create-async endpoint.
Add the below function in the generatePdf.jsw file:
export async function asynchronousPDF(template_id, data){

    const api_key = await getSecret("api_key");
    var json_payload = JSON.stringify({
      "data": data,
      "webhook_url":"https://alamimran21510.wixsite.com/craftmypdf",
      "expiration": 10,
      "template_id": template_id
    })
    console.log(json_payload)
    return fetch("https://api.craftmypdf.com/v1/create-async",
    {"method": 'POST',"headers":{'Content-Type': 'application/json',
    "X-API-KEY": api_key},
    "body":json_payload
    })
    .then(response => response.json())
    .then(json => {
        console.log(json)
        return json
    });

}
After that add the below code inside your onready() function in the Home page:
import { getTemplates, getPDF, asynchronousPDF } from 'backend/generatePdf.jsw';
var template_id = ""
var data = {
      'invoice_number': 'INV38379',
      'date': '2021-09-30',
      'currency': 'USD',
      'total_amount': 82542.56
    }

$w.onReady(function () {
	 ....

   $w('#button11').onClick(() => {

    $w('#button9').label = "Generating PDF...";

    asynchronousPDF(template_id,data).then((file) => {
      $w("#button9").label = "Download PDF";
    });

  });

});
In the above code, we are using the asynchronousPDF function to generate a PDF asynchronously. We are passing in the template_id and the data object as parameters.
We are also using the $w('#button11').onClick function to trigger the asynchronousPDF function when the user clicks on the Generate PDF button.

4. Generate Image
If you want to generate an image from your PDF, you can use the /v1/create-image endpoint.
Add the below function in the generatePdf.jsw file:
export async function getImage(template_id, data){

		const api_key = await getSecret("api_key");
    var json_payload = JSON.stringify({
		  "data": data,
		  "output_file": "output.jpg",
		  "export_type": "json",
		  "expiration": 10,
		  "template_id": template_id
		});
    console.log(json_payload)
    return fetch("https://api.craftmypdf.com/v1/create-image",
    {"method": 'POST',"headers":{'Content-Type': 'application/json',
    "X-API-KEY": api_key},
    "body":json_payload
    })
    .then(response => response.json())
    .then(json => {
        console.log(json.file)
        return json.file
    });

}
After that, add the below onClick function on your Home page:
import { getTemplates, getPDF, getImage, asynchronousPDF } from 'backend/generatePdf.jsw';
var template_id = ""
var data = {
      'invoice_number': 'INV38379',
      'date': '2021-09-30',
      'currency': 'USD',
      'total_amount': 82542.56
    }

$w.onReady(function () {

  ...

  $w('#button7').onClick(() => {

    $w('#button9').label = "Generating Image...";

    getImage(template_id,data).then((file) => {
      $w("#button9").label = "Download Image";
      $w("#button9").link = file;
    });

  });

   ...

});
5. Create a new template
If you want to create a new template, you can use the /v1/create-template endpoint.
To do this, we will need to make a POST request and pass in the template name and template id.
In the generatePdf.jsw file, add the below code:
export async function createTemplate(name,template_id){

		const api_key = await getSecret("api_key");
    var json_payload = JSON.stringify({
      "template_id": template_id,
      "name": name
    });
    console.log(json_payload)
    return fetch("https://api.craftmypdf.com/v1/new-template-from",
    {"method": 'POST',"headers":{'Content-Type': 'application/json',
    "X-API-KEY": api_key},
    "body":json_payload
    })
    .then(response => response.json())
    .then(json => {
        console.log(json)
    });

}
After that, add the below onClick function on your Home page:
import { getTemplates, getPDF, getImage, createTemplate, asynchronousPDF } from 'backend/generatePdf.jsw';
var template_id = ""
var data = {
      'invoice_number': 'INV38379',
      'date': '2021-09-30',
      'currency': 'USD',
      'total_amount': 82542.56
    }

$w.onReady(function () {
  ...

  $w('#button10').onClick(() => {

    $w('#button9').label = "Creating Template...";

    createTemplate($w("#input13").value, template_id).then((url) => {
      $w("#button9").label = "Template Created";
    });

  });

  ...

});
In the above code, we are using the createTemplate function to create a new template. We are passing in the name and template_id as arguments.
We are then using the $w("#button10").onClick function to trigger the createTemplate function when the user clicks on the Create Template button.
6. Update template
If you want to update an existing template, you can use the /v1/update-template endpoint.
To do this, we will need to make a POST request and pass in the template name and template ID in the request body.
In the generatePdf.jsw file, add the below code:
export async function updateTemplate(template_id,name){

		const api_key = await getSecret("api_key");
    var json_payload = JSON.stringify({
      "template_id": template_id,
      "name": name
    });
    console.log(json_payload)
    return fetch("https://api.craftmypdf.com/v1/update-template",
    {"method": 'POST',"headers":{'Content-Type': 'application/json',
    "X-API-KEY": api_key},
    "body":json_payload
    })
    .then(response => response.json())
    .then(json => {
        console.log(json)
    });

}
After that, add the below onClick function on your Home page:
import { getTemplates, getPDF, getImage, updateTemplate, createTemplate, asynchronousPDF } from 'backend/generatePdf.jsw';
var template_id = ""
var data = {
      'invoice_number': 'INV38379',
      'date': '2021-09-30',
      'currency': 'USD',
      'total_amount': 82542.56
    }

$w.onReady(function () {

  ...

  $w('#button6').onClick(() => {

    $w('#button9').label = "Updating Template...";

    updateTemplate(template_id, $w("#input13").value).then((url) => {
      $w("#button9").label = "Template Updated";
    });

  });

	...

});
7. Open Editor/Create Editor Session
If you want to open the PDF editor for a particular template, you can use the /v1/create-editor-session endpoint.
In the generatePdf.jsw file, add the below function:
export async function startEditor(template_id){

    const api_key = await getSecret("api_key");
    var json_payload = JSON.stringify({
      "expiration": 1440 ,
      "template_id": template_id,
      "canSave": true,
      "canCreatePDF": true,
      "canViewSettings": true,
      "canPreview": true,
      "canEditJSON": true,
      "canShowHeader": true,
      "backURL": "https://alamimran21510.wixsite.com/craftmypdf"
    });
    console.log(json_payload)
    return fetch("https://api.craftmypdf.com/v1/create-editor-session",
    {"method": 'POST',"headers":{'Content-Type': 'application/json',
    "X-API-KEY": api_key},
    "body":json_payload
    })
    .then(response => response.json())
    .then(json => {
        console.log(json)
        return json.url
    });

}
After that, add the below code on your Home page:
import { getTemplates, getPDF, getImage, startEditor, updateTemplate, createTemplate, asynchronousPDF } from 'backend/generatePdf.jsw';
var template_id = ""
var data = {
      'invoice_number': 'INV38379',
      'date': '2021-09-30',
      'currency': 'USD',
      'total_amount': 82542.56
    }

$w.onReady(function () {

  getTemplates().then((options) => {
    $w("#dropdown1").options = options;
    $w("#dropdown1").value = template_id;
  });

  $w("#dropdown1").onChange((event) => {
    template_id = event.target.value;
  });

  $w('#button1').onClick(() => {

    $w('#button9').label = "Generating PDF...";

    getPDF(template_id,data).then((file) => {
      $w("#button9").label = "Download PDF";
      $w("#button9").link = file;
    });

  });

  $w('#button7').onClick(() => {

    $w('#button9').label = "Generating Image...";

    getImage(template_id,data).then((file) => {
      $w("#button9").label = "Download Image";
      $w("#button9").link = file;
    });

  });

  $w('#button8').onClick(() => {

    $w('#button9').label = "Starting Editor...";

    startEditor(template_id,data).then((url) => {
      $w("#button9").label = "Open Editor";
      $w("#button9").link = url;
    });

  });

  $w('#button6').onClick(() => {

    $w('#button9').label = "Updating Template...";

    updateTemplate(template_id, $w("#input13").value).then((url) => {
      $w("#button9").label = "Template Updated";
    });

  });

  $w('#button10').onClick(() => {

    $w('#button9').label = "Creating Template...";

    createTemplate($w("#input13").value, template_id).then((url) => {
      $w("#button9").label = "Template Created";
    });

  });

   $w('#button11').onClick(() => {

    $w('#button9').label = "Generating PDF...";

    asynchronousPDF(template_id,data).then((file) => {
      $w("#button9").label = "Download PDF";
    });

  });

});
In the above code, we are using the startEditor function to open the editor for the selected template.
We are also passing in the template_id and the data object.
The startEditor function returns a Promise. We are using the .then method to wait for the Promise to resolve and then we are opening the editor in a new window.

Conclusion
In this article, we have seen how to use the CraftMyPDF API to generate PDFs and images from your Wix Velo website. We have also seen how to open the PDF editor for a particular template.
You can find the source code for this article on GitHub.
You can also visit the website using this link.