1. Introduction
Event planning can be stressful for many reasons – demanding clients, and the chaos of the event environment make it one of the most high-pressure jobs as an event organizer.
We know it’s quite challenging to align and manage event activities when one individual has to take the role of multiple. Take a moment to calm yourself, this guide is meant for you – We help you to automate event passes and boost your productivity by 10x!

Before we get started, if you are new to event planning, you must know that event passes act as a ticket to attend an event and is a great tool to restrict the entrance of unauthorized and unregistered individuals in the premises of the venue.
To ensure the smooth flow of activities aligned for the event, this guide will help in creating event passes and saving a lot of time.
The key takeaways of the tutorial:
- Learn how to use the Scripting app of Airtable
- Learn how to use button field type to create a custom action
- Generate PDF event passes with CraftMyPDF and store the PDFs in Airtable
2. What are Airtable and CraftMyPDF?
Airtable is a platform that makes creating bespoke, sophisticated applications simple. These tools can automate almost any process, workflow, or project—and the best part is that you can create them without ever learning to code.
Airtable makes it simple to construct a database that holds the data you need for your job, then use it to power the visualizations, workflows, and integrations that make up a custom app that’s completely yours.
CraftMyPDF provides a drag-and-drop web-based PDF template editor that allows you to create pixel-perfect PDF documents and images using reusable templates.
CraftMyPDF integrates with no-code platforms such as Zapier and Make.com, it makes generating PDFs and images in your automation workflows easy and simple without writing a single line of code.
3. Overview of the Workflow
This guide will set up a workflow to automate the creation of event ID passes for the trade show attendees with Airtable and CraftMyPDF. Each event ID pass contains the required information on the cards about the attendees.
The followings are the overview of the automation:
- Data is stored in and retrieved from an Airtable table
- With a click of a button, Airtable sends the dynamic information to CraftMyPDF to generate a PDF event pass
- The generated event pass PDF is stored in the attachment field
The following is the final event pass generated by Airtable and CraftMyPDF:

4. Steps to Generate Event Passes with Airtable and CraftMyPDF
Step 1: Create a new PDF Template in CraftMyPDF
Sign in to your CraftMyPDF account first. Sign up for an account if you do not have one.
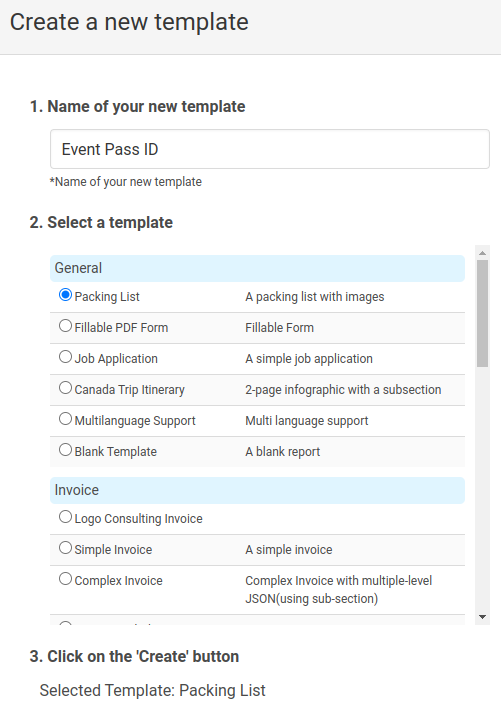
Then navigate to the Manage Templates page, and click on the New PDF Template to look for available PDF templates. Next, select a PDF template for an Event Pass from the template list that meets your requirements. Name the template Event Pass ID.
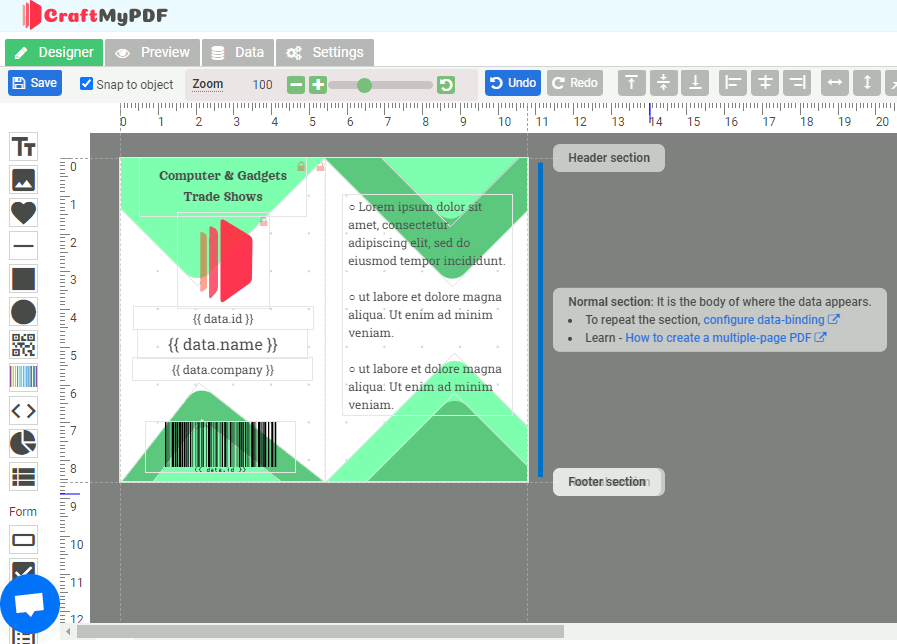
Step 2: Design an Event Pass PDF Template
CraftMyPDF offers a drag-and-drop editor that allows you to create your templates and customize the template by adding elements and changing their properties.
A common event pass consists of the following information:
- Name of the Participant
- Company Name
- Event Name
- The ID of the event pass
- Date/time of the event
- Details of the event such as location or venue (Optional)
- Terms and conditions (Optional)
We are incorporating the information into the event pass ID design. The following is a PDF template designed with the CraftMyPDF drag-and-drop editor and the PDF template will be used to generate the PDF event passes.
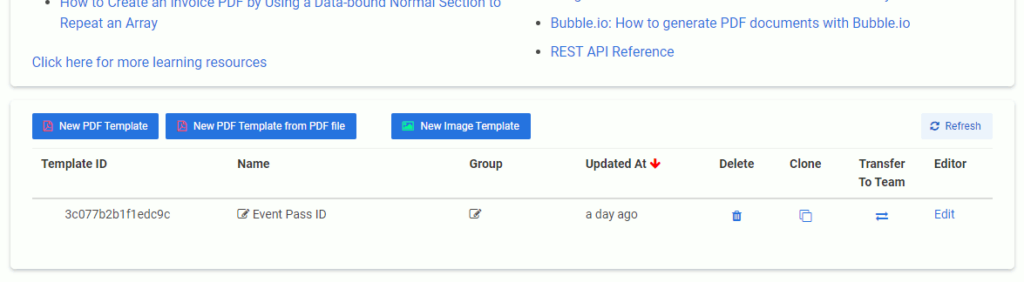
Step 3: Copy the Template ID and the API Key
Once you have created the PDF template, copy the Template ID in the Manage Templates tab, which will later be used in the script.
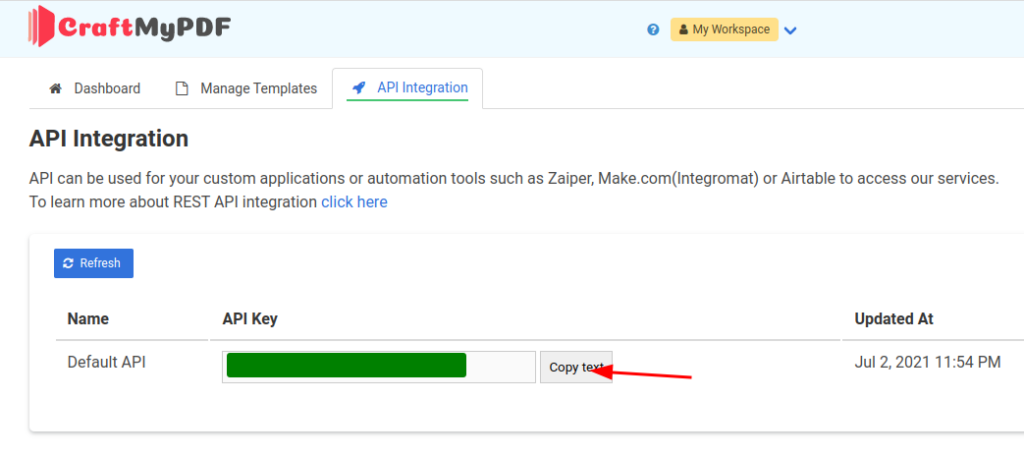
Another piece of important information is the API Key, it’s used to authenticate the session.
To copy the API Key, navigate to the API Integration tab and click on the Copy text button
Step 4: Create an Airtable Event Passes List and Import Data
To start with Airtable, visit the website Airtable and log in to your account. If you don’t have an account, please consider signing up for one.
After you have created an Airtable account, create a list of attendees. Make a new table with a list of fields in your Airtable base.
Give your table and base a unique name to differentiate between tables. In this tutorial, we give our table the name Event Passes.
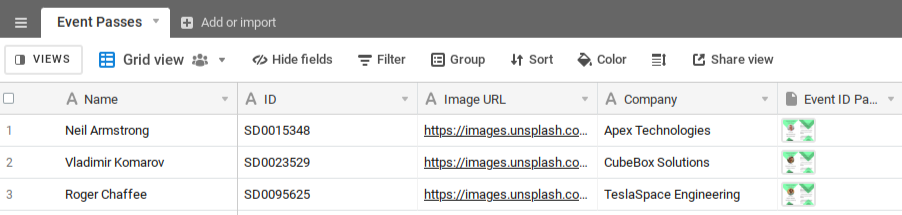
Next, based on the required information, we start creating the fields as follows:
- Name – Name of the visitor
- ID
- Company Name
- Image URL – Profile image of the attendees
- Event ID Pass – Attachment field to store the generated PDF
Then, enter the event pass information or import them from a CSV or Microsoft Excel.
You may also consider automating it by collecting the information with
- Jotform – connect Airtable and Jotform or other apps with Zapier or Make.com
- or set up an Airtable form for the attendees to submit their information.
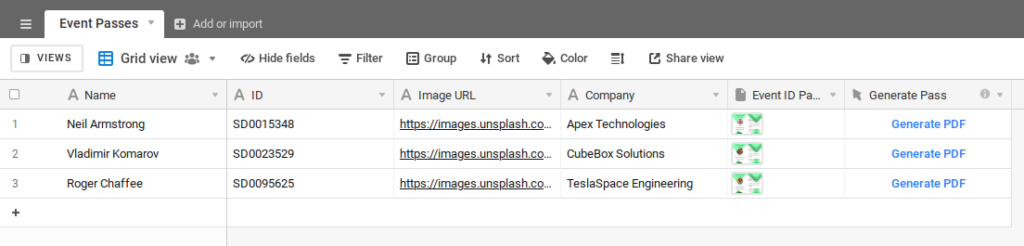
The following is the Airtable with the created fields and information:
Step 5: Create a Button Field for PDF Generation
An exclusive feature of Airtable is creating a button field and the button field allows you to perform custom operations.
To do so, add a new field and explore the field options, select Customize field type, and change the field type to a button. You can give the button a label and a style in the field configuration dialogue. Lets give the button a label Generate PDF
The button field will appear as a clickable button in your Airtable table after it has been created. The following is the complete Airtable table:
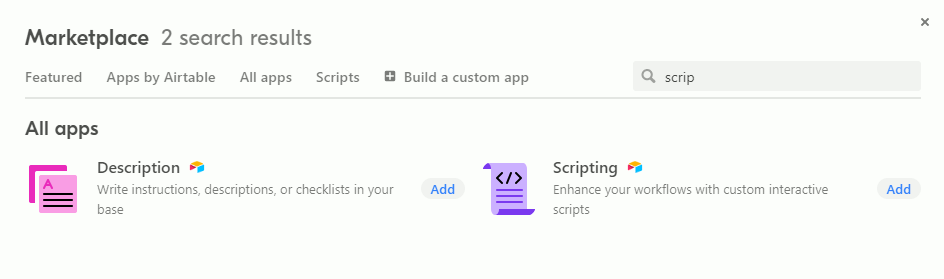
Step 6: Install the Scripting app
Next, install a Scripting app and add it to a dashboard in your base to get started.
To do so, select +Add an app
Then, search “script” and choose the Scripting app from the marketplace.
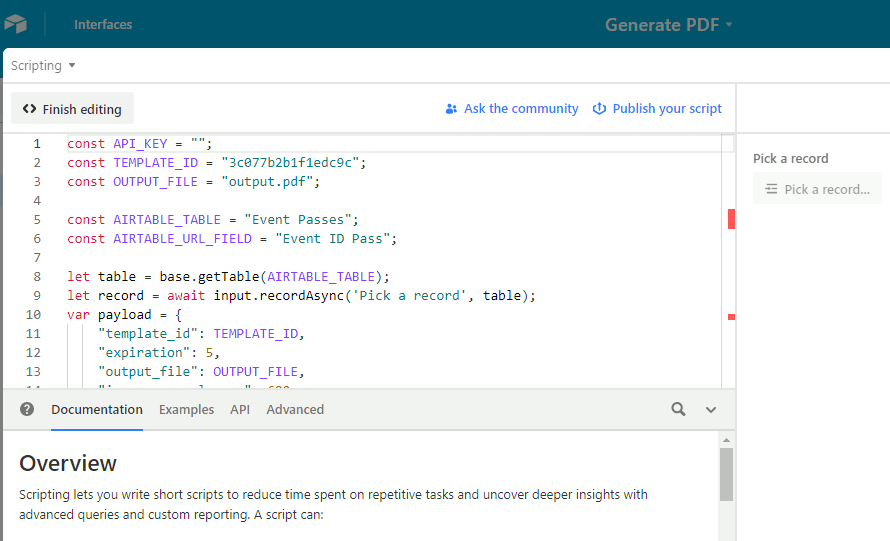
Step 7: Add Script
The following is the script, copy the code snippet below and paste it over to the scripting app. You may consider customizing the script by changing the API Key, Template ID, Output filename, mapping of fields etc.
The script sends a REST POST request to the CraftMyPDF API endpoint and the API returns with a PDF URL. The PDF URL will be uploaded to the attachment field defined in the variable AIRTABLE_URL_FIELD
const API_KEY = "";
const TEMPLATE_ID = "3c077b2b1f1edc9c";
const OUTPUT_FILE = "output.pdf";

const AIRTABLE_TABLE = "Event Passes";
const AIRTABLE_URL_FIELD = "Event ID Pass";

let table = base.getTable(AIRTABLE_TABLE);
let record = await input.recordAsync('Pick a record', table);
var payload = {
    "template_id": TEMPLATE_ID,
    "expiration": 5,
    "output_file": OUTPUT_FILE,
    "image_resample_res": 600,
    "data": {
        "name": record.getCellValueAsString('Name'),
        "id": record.getCellValueAsString('ID'),
        "company": record.getCellValueAsString('Company'),
        "image_url": record.getCellValueAsString('Image URL')
    }
}

let response = await fetch("https://api.craftmypdf.com/v1/create", {
  method: "POST",
  body: JSON.stringify(payload),
  headers: {
    "Content-Type" : "application/json",
    "X-API-KEY" : API_KEY
  }
})
let resp = await response.json();

row = {}
row[AIRTABLE_URL_FIELD] = [{"url": resp.file, "filename": OUTPUT_FILE}]

await table.updateRecordAsync(record.id, row);
Variables to customize in the script
API_KEYis the API Key from the API Integration tab on CraftMyPDF.
TEMPLATE_IDis the template ID of the PDF Template that you get from the Manage Template page on CraftMyPDF.AIRTABLE_TABLEis the name of your Airtable table, change this to match your Airtable table name.AIRTABLE_URL_FIELDis your Airtable field to store the generated PDF.
- The data field in the payload is the modifications you want to make to the template, you can change the properties of elements such as text, image URL, color, etc. The data fields are mapped to the Airtable fields by using
record.getCellValueAsString
Step 8: Running the Script
The last step is to run the script – click on the Run button on the upper right-hand to run the script.
If you run the script alone, it prompts you to select a row. However, if you run the script from a button field, it skips the prompt and utilizes the record from where the button was clicked.
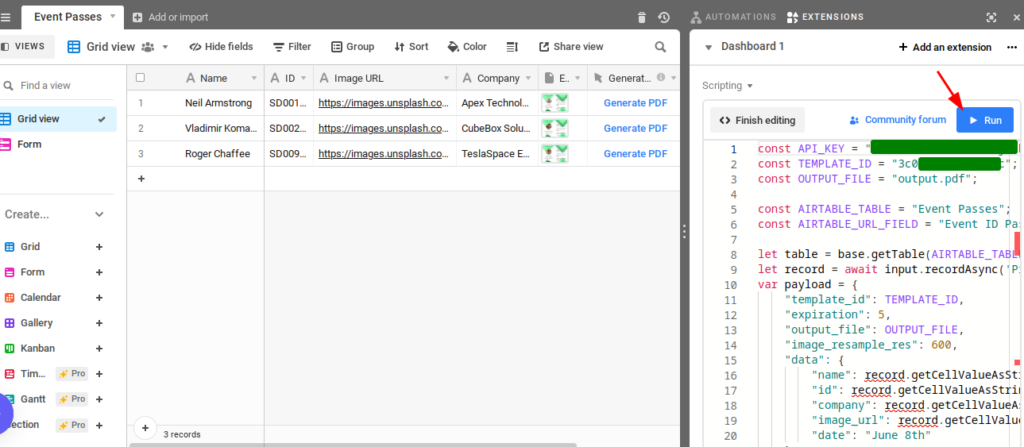
By clicking the Generate PDF button in the GridView, the script will connect to CraftMyPDF to generate a PDF then update the PDF to the attachment field Event Pass, you will be able to see the thumbnail of the generated PDFs, click on the thumbnail to view the full PDF.
That concludes our tutorial. This field type can now be used to run scripts directly. Scripts will be more accessible and seamlessly integrated with existing workflows.
4. What’s Next for the Automation?
After you’ve finished generating the event passes, here are a few ideas you could make use of the event passes and the information in your Airtable base:
(i) Email the event pass PDFs out to the attendees along with a calendar invite. You may achieve this by creating a custom Airtable automation.
(ii) You may print them out and distribute or mail the event passes to the companies and attendees.
(iii) Add a QRCode with a verification code to the event pass, it lets the attendees scan the QRCode and verify the passes at the event venue.
(iii) Make use of the Airtable base during the event to collect information such as surveys or update the relevant information.
(iv) Integrate your Airtable with no-code platforms like Zapier, and Make.com to extend your workflow to other systems to connect apps like Jotform, Mailchimp, etc.
5. Generate PDFs in Airtable with CraftMyPDF Extension
Besides using Scripting extension to automate PDF event passes, you can also generate PDF documents directly inside Airtable using the CraftMyPDF extension. This is useful if you want a simpler workflow where your team can select records, generate PDFs, and save the generated files back into Airtable without setting up a full automation scenario.
We’ve published a step-by-step guide here: How to Generate PDF Documents from Airtable Using CraftMyPDF
In that tutorial, you’ll learn how to prepare your Airtable base, add the CraftMyPDF extension, design a reusable PDF template, and generate PDF documents directly from your Airtable records.
6. Wrapping Up
This guide is an exemplary but step-by-step representation of how can you create event passes, invitation cards, billing slips, inventory, and much more with the help of Airtable and CraftMyPDF. You can follow the steps and easily create passes for your event.