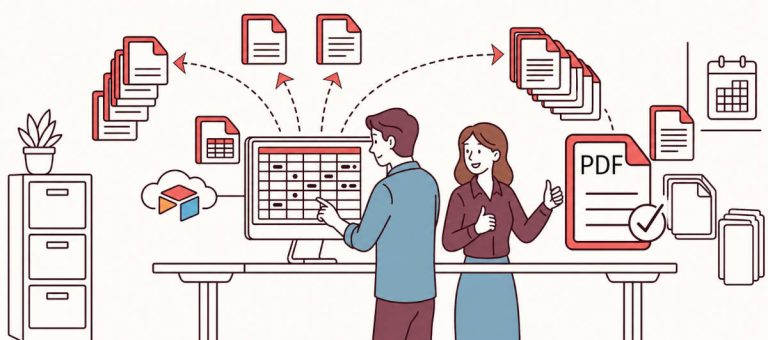
In today’s world of consumer goods, it’s crucial to provide customers with clear and complete information about the products they use.
That’s where product information sheets come in. These simple, easy-to-read documents give an overview of a product’s key features and explain how to use it safely in specific markets.
Think of a product information sheet as a quick guide that helps consumers understand what makes a product special. It highlights the product’s features and sets out any requirements for safe use, empowering people to make informed buying decisions with confidence.
Thanks to automation, the process of creating and updating these sheets is now faster and more accurate. Automation ensures that the information is always up-to-date, saving time and helping consumers stay informed about the products they’re interested in.
In this article, we’ll explore how businesses can tackle the challenges of manually creating and managing product information sheets (like shipping labels) and also automate shipping label generation by using automation tools such as Airtable, CraftMyPDF, and Zapier.
1. Benefits of automating in E-commerce
The benefits of automating product information sheet cannot be overemphasized. This helps businesses streamline their workflow and improve customer engagements.
Here are some of the benefits of automation product information sheets for e-commerce businesses:
- Saving time and improving productivity: Saving time is one of the key benefits of product information sheet automation. With this, employees can focus effectively on using their time and intellectual resources. As a result, workers can assign repetitive and recurring duties to automated applications like Zapier and focus on solving strategic problems.
- Cost-effectiveness and scalability: By eliminating the need for human intervention, businesses can lower labor expenses and allocate resources to more value-added activities. Automation can significantly reduce labor costs by automating repetitive tasks that would otherwise require manual work.
- Improved accuracy and consistency: Automation of PIS(Product Information Sheets) in e-commerce may help businesses by increasing the quality and accuracy of their data. By automating data collection and processing, we can reduce the possibility of human mistakes and ensure that data is consistently reliable and correct. This may improve decision-making and ensure that the business is using the most recent data possible.
Another benefit is that with automation, product information sheets can be updated in real-time, reflecting the latest product specifications, features, and availability.
This ensures that customers are always provided with up-to-date and accurate information, reducing confusion and potential dissatisfaction.
2. The Challenges
The manual creation and management of PIS(product information sheets) can be a difficult task. Not only is it time-consuming, but it also opens the door to potential errors, which can lead to customer dissatisfaction despite investing significant effort.
Recognizing these challenges, it becomes clear why employing automation tools for creating and managing product information sheets is the way forward.
Here are some of the challenges and reasons why you should take advantage of automation tools:
- Difficulties in updating and maintaining PIS across multiple platforms: Operating an e-commerce store entails the need to swiftly update and maintain product information sheets across various platforms. Particularly during significant sales events, ensuring an effective marketing push requires extensive data entry from catalogues to websites.
- Creating PIS manually is time-consuming: Manually filling out product information sheets can be an incredibly time-consuming process. Not only does it take time to locate specific information when needed, but organizing and accessing them can also be a laborious task.
- Error-prone manual processes: Automating tasks can bring significant benefits to businesses by reducing errors and improving efficiency. Humans, being prone to mistakes and fatigue, may struggle with repetitive tasks, unlike machines that can follow instructions without tiring.
However, embracing automation offers compelling advantages such as:
- Accuracy: It minimizes the risk of human error, ensuring precise execution and reliable data management.
- Efficiency: It streamlines processes, freeing up time for more strategic tasks and boosting overall productivity.
- Centralized Data: It consolidates data management, providing a centralized system for improved collaboration and decision-making.
- Real-Time Updates: It enables instant updates across systems and channels, ensuring customers receive up-to-date and accurate information.
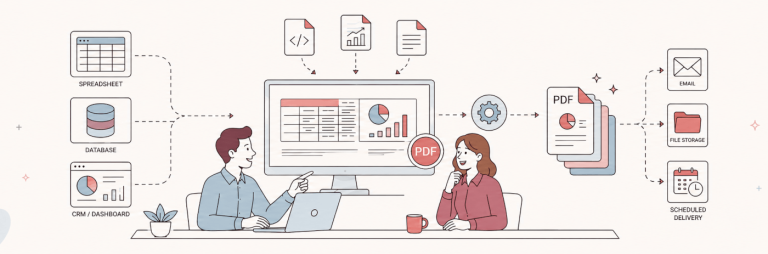
The Steps to Automate Shipping Labels
The following are the steps to automate shipping label generation with Zapier, Airtable and CraftMyPDF.
3. Configuring Airtable for data management
Airtable is an innovative and user-friendly low-code database solution that offers the unique ability to establish robust relationships between multiple tables.
Its seamless integration with a diverse range of applications elevates Airtable to an unparalleled position as the optimal choice for a database.
Here are the steps needed to get started with Airtable:
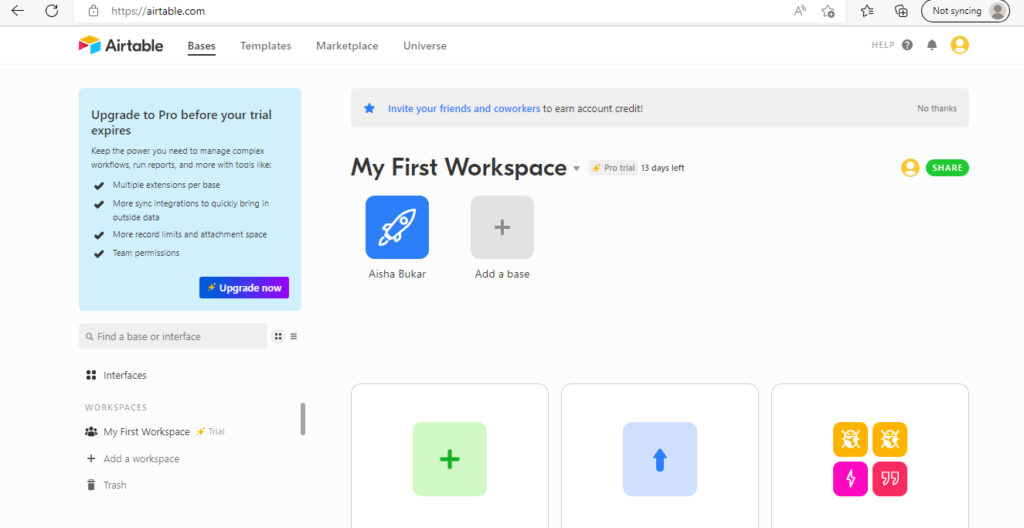
3.1. Sign up for an Airtable account
To get started with Airtable, all you need to do is sign up for an Airtable account. The process of creating an account is incredibly straightforward and hassle-free.
There is no requirement to provide credit card information or navigate through complex steps. Simply provide a valid email address, follow the registration process, and you’ll be ready to dive right in!
3.2. Create Airtable base
Once you have successfully created an account, the next step is to “Add a base” in Airtable. A base serves as the designated workspace where all data manipulations take place.
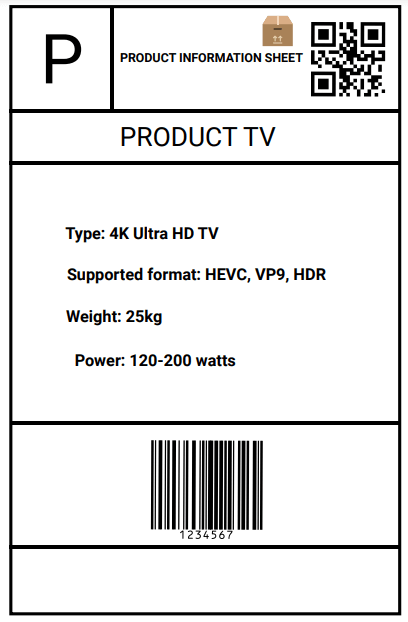
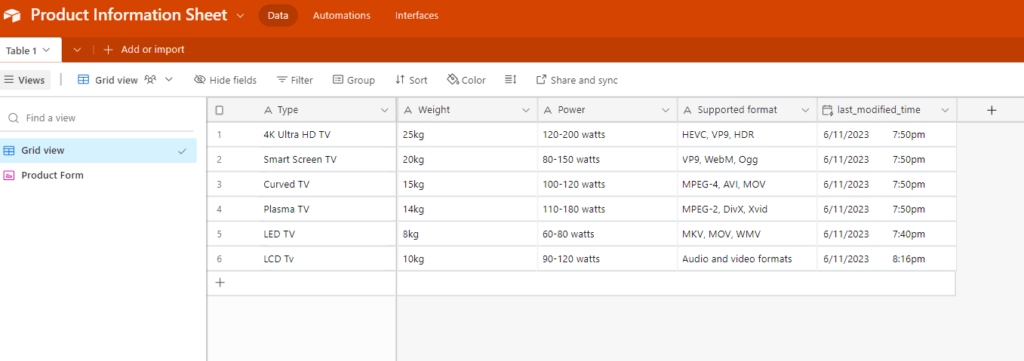
In order to create our product information sheet (PIS), it is essential to establish a base. For illustrative purposes, let’s consider a product like a TV as an example.
In the Airtable base, we will define specific fields that are relevant to our PIS, such as Type, Weight, Power, Supported Format, and last_modified_time .
These fields will provide structured categories for organizing the data. To ensure a comprehensive representation, we will also populate the Airtable base with sample data, serving as descriptions for these fields.
3.3. Configuring Form
To streamline the process of inputting information into your Airtable, we need to configure a form. Here’s how to do this:
i. Locate the form option located at the left corner of your Airtable interface.
ii. Configure a form view that suits your requirements. This will enable you to conveniently input information by providing a readily accessible URL.
iii. Once your form is set up, it’s essential to ensure that all your Airtable fields are properly configured. To do this, initiate a test response by clicking on the “Open form” option and fill in the necessary information. After submitting the form, you should be able to view the response on your Airtable base.
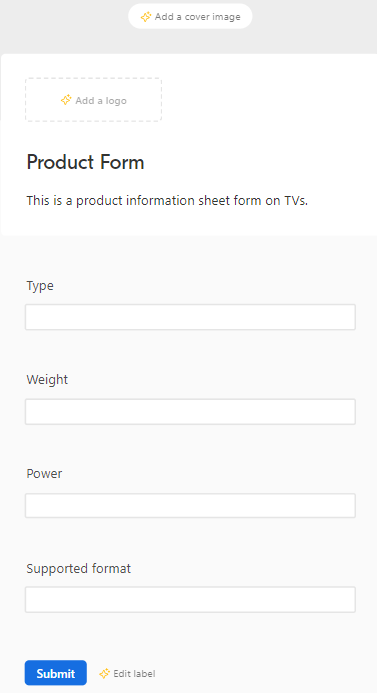
iv. If everything works as desired, you can select “Share form” to obtain the URL that allows you or others to submit responses using any device.
4. Creating a template with CraftMyPDF
CraftMyPDF is a robust online tool designed to cater to individuals seeking to create personalized PDF templates. With its comprehensive set of features and options, it provides a seamless experience for designing templates that exude professionalism and cater to specific requirements.
A notable advantage of CraftMyPDF is its cloud-based storage, enabling easy access to templates from anywhere while facilitating convenient modifications.
CraftMyPDF proves invaluable for businesses in need of invoices, product information sheets, receipts, and other document types. Here are the steps needed to get started:
4.1. Sign up for a CraftMyPDF account
If you already have a registered CraftMyPDF account, you can proceed to the next step. However, if you haven’t created an account yet, simply visit craftmypdf.com and click on the “Sign Up” button located at the top of the page.
Follow the provided instructions to complete the registration process, providing the necessary details. It’s worth noting that you have the option to sign up for a free account, granting you access to all the templates without requiring your credit card information.
Alternatively, you can choose to sign up for one of the paid plans, which offers exceptional premium features for an enhanced experience.
4.2. Select “Manage Templates”
Once your registration is complete, you will be redirected to your personalized dashboard. From there, navigate to the top of the page and click on “Manage Templates”.
This will take you to the dedicated “Manage Templates” page. On this page, select “New PDF Template” to proceed with creating a Product Information Sheet (PIS).
4.3. Select “New PDF Template”
The New PDF template page allows you to find various PDF templates available on CraftMyPDF. If you wish, you can modify the name of your template using the ‘Name of your new template’ field. It is also perfectly fine to keep the default name.
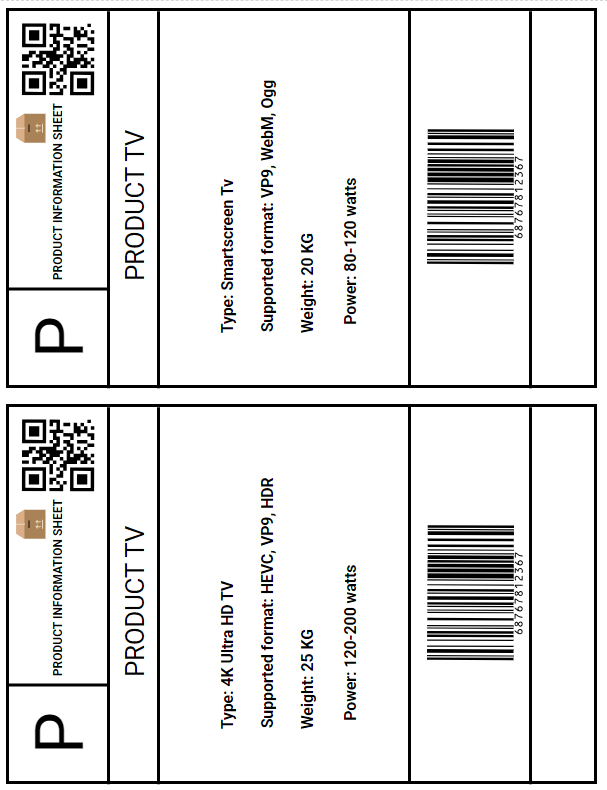
To proceed, navigate to ‘Select a template’. We would use the Avery 8126 shipping label template under the Avery Label Sheet to create our product information sheet. Select the Avery 8126 shipping label template and click on the ‘Create’ button.
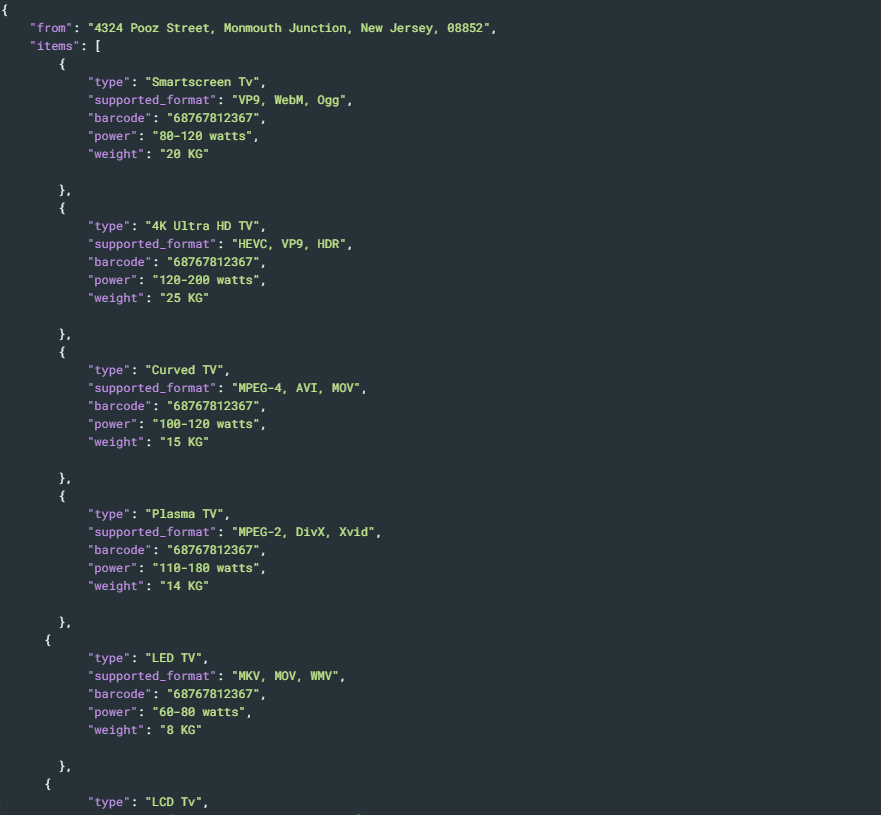
Now, we can modify the default JSON data to match the data in our Airtable base.
CraftMyPDF offers a user-friendly interface that allows you to edit text, add images, modify colors, and make adjustments to other design elements. This helps us modify our template to match the product information sheet we intend to create. The product information sheet template should look similar to this, this would then be added to our workspace.
5. Automating with Zapier
Zapier is a powerful platform that seamlessly automates tasks and workflows across various web applications, making your work life more efficient.
By integrating Airtable and CraftMyPDF, you can effortlessly generate your product information sheet template. Let’s explore the steps to get started with automation using Zapier
5.1. Create an account
Setting up an account with Zapier is a breeze. To get started, go to the Zapier website, and on the homepage, locate the “Sign Up” button, usually found in the upper right corner.
Click on it. You’ll be presented with some options to either sign up with Google or sign up with your email. Choose the option that best suits your preferences.
Fill in the required information in the registration form, including your full name and email address. Choose a strong password for your account. Optionally, you can subscribe to Zapier’s newsletter to stay updated with the latest automation tips and trends.
Zapier may require you to verify your email address. Check your inbox for a verification email and follow the instructions provided. After verifying your email, you’ll be redirected to your Zapier account dashboard.
Congratulations! Your account is now set up and ready to use.
5.2. Create Zap
After creating an account with Zapier, we would need to create a Zap where we can set up our triggers and action. On your dashboard, navigate to the Create Zap button to create one. After creating a zap, we can start our configurations:
5.2.1. Create a trigger
In Zapier, a trigger serves as the spark that ignites an automated workflow that helps perform tasks seamlessly. Think of it as a domino effect happening right within your applications. Let’s explore an example to illustrate its power:
Imagine you have an e-commerce store and want to automate the process of notifying your team whenever a new order is placed. Instead of manually checking your store’s dashboard, you can set up a trigger in Zapier that monitors your e-commerce platform for new orders.
Once the trigger detects a new order, it sets off your Zap, triggering a series of actions you’ve defined. For instance, it can send a notification to your team via your preferred communication channel, update your inventory management system, or even generate a personalized thank-you email to the customer.
The beauty of Zapier lies in its extensive app ecosystem, boasting over 3,000 integrations. These apps can serve as triggers or actions, enabling you to connect your favorite tools and automate a plethora of tasks effortlessly.
In our case, we’ll use these triggers to automate the process of adding information to our product information sheet and generating a new template. Now, let’s dive into the necessary steps:
- i. Choose an app: Type and add Airtable as your app.
- ii. Add an event: Type and choose “New or Updated Record” as the event to trigger new or updated records in your Airtable base.
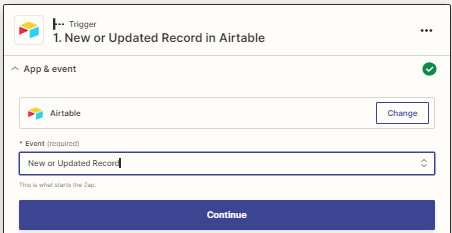
- iii. Fill in the necessary details: Add the necessary details required to finish configuring your Zapier. You would need to add details like your table name, and your Airtable base. It is important to connect your Airtable base to your Zapier account, all you need to do is follow the link provided by Zapier to set up the configuration.
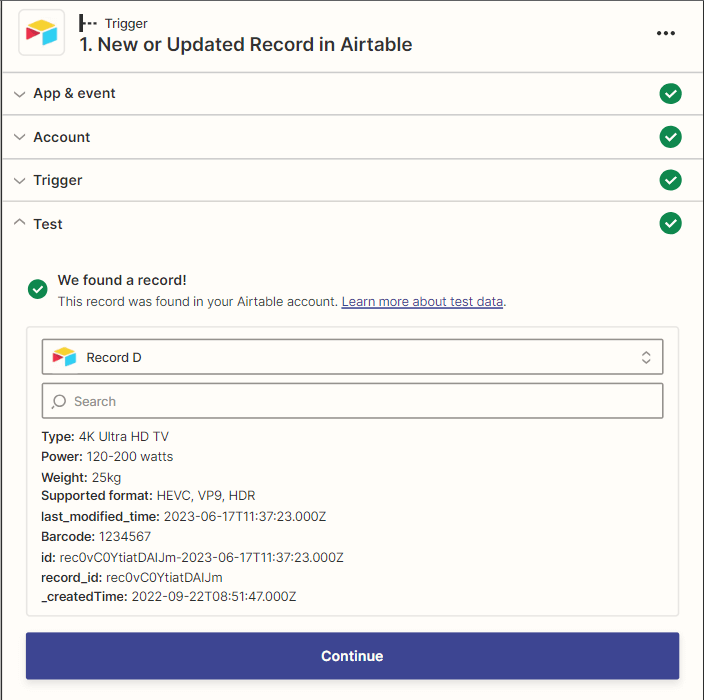
- iv. Test trigger: Test your Trigger to ensure that Airtable has been successfully connected to Zapier.
5.2.2 Add a new Action to Create PDF in CraftMyPDF
The next step is to set up the action using CraftMyPDF. Here are the steps you need to take:
- Choose an app: Type and choose CraftMyPDF as the app
- Add an event: Select Create PDF as the event since we are trying to generate a Product Information Sheet.
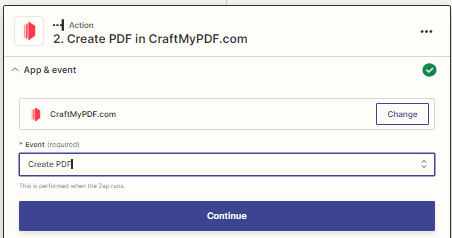
- Connect CraftMyPDF account: Add your CraftMyPDF account to set up the action.
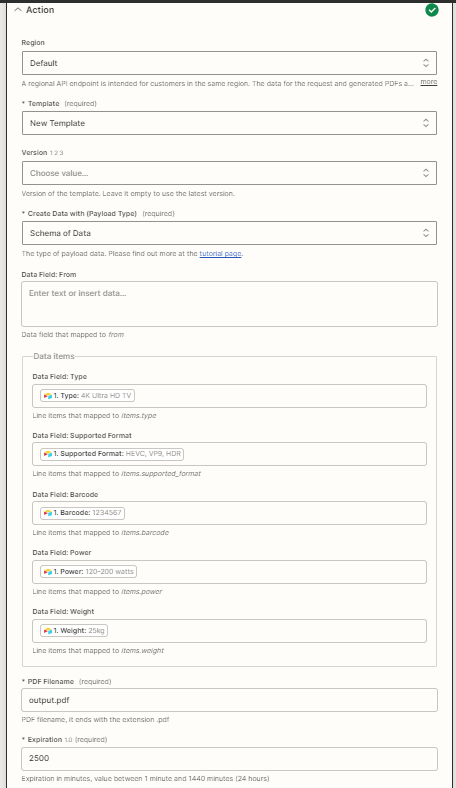
- Set up action: We would need to connect a few things:
- Template: Choose the template we previously created on CraftMyPDF.
- Create Data with (Payload type): Select “Schema of data” as your payload type. This selection is necessary as this payload type effectively handles nested objects and arrays.
- Data Field: We will use our Airtable data fields as the input data.
- Expiration: By default, the expiration time is set to 5 minutes, but we have the option to extend it. I personally increased mine to 2500 minutes to ensure that the image does not expire before we can post it. Proceed by clicking on “Continue”.”
- Test: Test action to make sure everything works. You should get similar results to the screenshot below
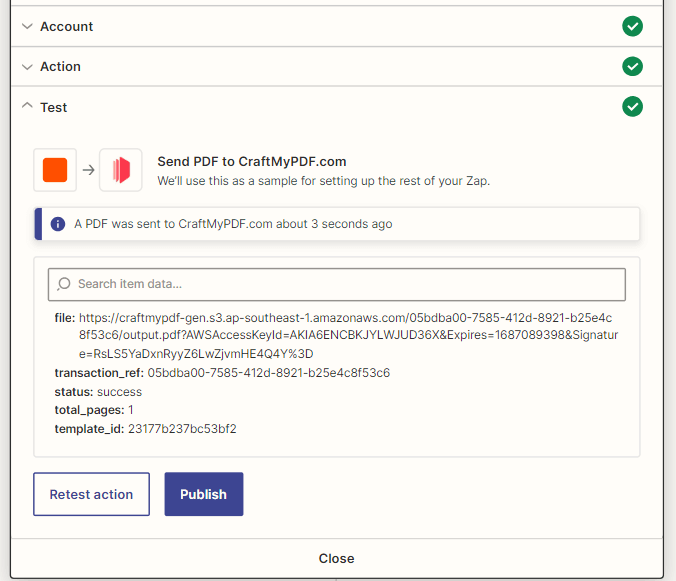
Print your PDF by copying the link in the “file”. You should be able to view a PDF similar to the screenshot below.
6. Conclusion
In conclusion, automating product information sheets is a game-changer for e-commerce businesses. It brings a host of benefits, like improving the accuracy and consistency of product details, reducing errors, and enhancing the overall customer experience.
With tools like Airtable, CraftMyPDF, and Zapier, businesses can easily move away from the hassle of manual product information management. These tools help streamline the process, making it more efficient and customer-friendly.
Ready to take your business to the next level? Sign up for CraftMyPDF today and see how automation can help you scale with ease while improving your operations!