Generating PDFs is one of those tasks that shows up in almost every C# project sooner or later – invoices, reports, receipts, contracts. The catch is there’s no single “right” way to do it. The best approach depends on whether you’re building documents from code, converting HTML, or offloading the whole job to an API.
This guide walks through 8 ways to generate PDFs in C#, each with working code you can drop straight into your project. We’ll cover code-first libraries like iText 7, PdfSharp, and QuestPDF; HTML-to-PDF rendering with Puppeteer Sharp; built-in .NET classes and Microsoft Office Interop; Crystal Reports for data-heavy reports; and a cloud-based API (CraftMyPDF) if you’d rather skip the rendering infrastructure entirely.
By the end, you’ll know which method fits your use case — and have the code to ship it.
1. Using a Library (iTextSharp & PdfSharp)
One of the most popular ways to generate PDFs with C# is to use a library such as iTextSharp or PdfSharp. Both of these libraries provide an easy way to generate PDFs from scratch using C# code.
- Using iTextSharp: iTextSharp (now known as iText 7) is an open-source library that provides an easy way to generate PDFs from C# code. It has a wide range of features and supports a variety of fonts, images, and text formats. To use iTextSharp, you need to first add a reference to the iText 7 DLL in your project. Below is the complete code for generating a simple PDF with iText 7.
using System;
using System.IO;
using iText.Kernel.Pdf;
using iText.Layout;
using iText.Layout.Element;

public class Program
{
    public static void Main()
    {
        string pdfPath = "MyPDF.pdf";
        using (PdfWriter writer = new PdfWriter(pdfPath))
        {
            using (PdfDocument pdf = new PdfDocument(writer))
            {
                Document document = new Document(pdf);
                document.Add(new Paragraph("Hello, World!"));
                document.Close();
            }
        }

        Console.WriteLine("PDF generated successfully using iText 7.");
    }
}
In the above code, we create a new Document object, which is an iText 7 class, and use the PdfWriter class to create a PDF file. We then add a simple “Hello, World!” paragraph to the document and close it.
You can also add images, tables, and other content to your PDFs using iText 7. Below is an example of how to add an image to a PDF.
using System;
using System.IO;
using iText.Kernel.Pdf;
using iText.Layout;
using iText.Layout.Element;
using iText.IO.Image;

public class Program
{
    public static void Main()
    {
        string pdfPath = "MyPDF.pdf";
        using (PdfWriter writer = new PdfWriter(pdfPath))
        {
            using (PdfDocument pdf = new PdfDocument(writer))
            {
                Document document = new Document(pdf);
                ImageData imageData = ImageDataFactory.Create("MyImage.jpg");
                Image image = new Image(imageData);
                document.Add(image);
                document.Close();
            }
        }

        Console.WriteLine("PDF with image generated successfully using iText 7.");
    }
}
- Using PdfSharp: PdfSharp is another open-source library for generating PDFs in C#. It is similar to iTextSharp in many ways, but it provides more features such as support for multiple page sizes, page orientations, and page margins. You can use PdfSharp in the same way as iTextSharp, by adding a reference to the library in your project and then using the provided classes and methods to generate the PDF. Below is the complete code for generating a simple PDF with PdfSharp.
using System;
using System.Text;
using PdfSharpCore.Pdf;
using PdfSharpCore.Drawing;

public class Program
{
    public static void Main()
    {
        // Ensure the encoding provider is registered
        Encoding.RegisterProvider(CodePagesEncodingProvider.Instance);

        // Create a new PDF document
        PdfDocument document = new PdfDocument();
        document.Info.Title = "My PDF";

        // Create an empty page
        PdfPage page = document.AddPage();

        // Get an XGraphics object for drawing
        XGraphics gfx = XGraphics.FromPdfPage(page);

        // Create a font
        XFont font = new XFont("Verdana", 20, XFontStyle.Bold);

        // Draw the text
        gfx.DrawString("Hello, World!", font, XBrushes.Black, new XRect(0, 0, page.Width, page.Height), XStringFormats.TopLeft);

        // Save the document
        const string filename = "MyPDF.pdf";
        document.Save(filename);

        // Optional: Confirm successful creation
        Console.WriteLine("PDF generated successfully using PdfSharp.");
    }
}
In the above code, we create a new PdfDocument object, which is a PdfSharp class, and use the AddPage method to add a new page to the PDF. We then use the XGraphics class to draw a “Hello, World!” string on the page and save the PDF.
There are chances that you’ll face an error System.NotSupportedException: No data is available for encoding 1252.. To solve it, you need to install the below module:
dotnet add package System.Text.Encoding.CodePages2. Using a Third-Party Cloud-Based API
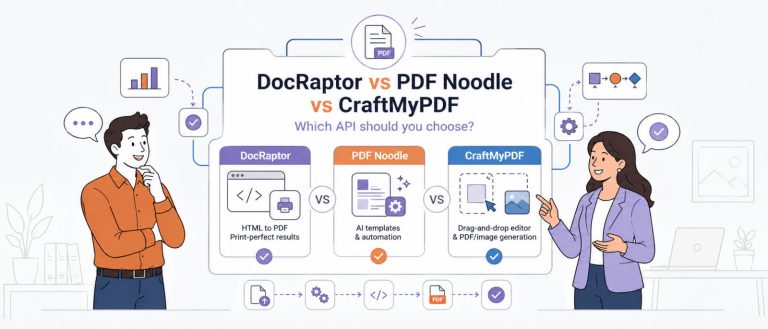
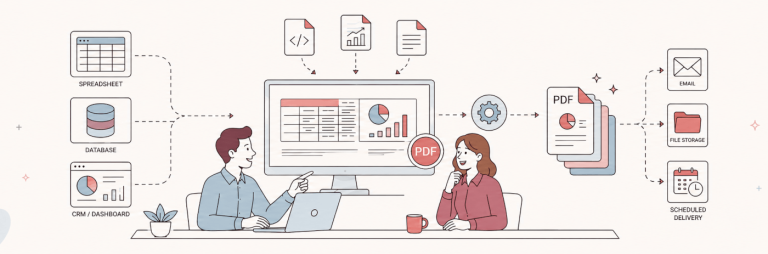
Another option for generating PDFs with C# is to use a third-party cloud-based API such as CraftMyPDF. CraftMyPDF is a powerful tool that makes it easy to create professional-quality images and PDF documents.
With CraftMyPDF, you can easily generate PDFs from existing templates and customize them with your own text and images. CraftMyPDF have many features including:
- Drag & Drop Editor: The template editor allows your users to easily customize and create PDF documents using a drag-and-drop interface. This makes it quick and simple to achieve the desired results.
- PDF & Image Generation API: The CraftMyPDF template editor not only supports PDF templates, but it also has an image generation API that allows your users to create custom images as well. This gives you even more flexibility and customization options.
- Automate with Nocode or Lowcode Platforms: The CraftMyPDF template editor can be easily integrated with no-code or low-code platforms such as Make.com or Zapier, allowing you to automate tasks and streamline workflows.
- Support of Fillable Components: The template editor supports fillable components, such as text fields, checkboxes, and dropdown lists, making it easy for your users to create interactive and customizable PDF documents.
- Expressions & Formatting Support: The template editor also offers support for expressions and formatting, allowing your users to create dynamic and visually appealing documents.
To use CraftMyPDF, you need to first create a free account on their official website. After that, you will be redirected to the dashboard, where you need to click on the API Integration tab and copy the API key. This API key will be needed to access the CraftMyPDF APIs.
Once you have the API key, you need to go to the Manage Template page and click on “New PDF Template”. Here, you can select from existing pre-built templates or create your own template. After that, you need to copy the Template ID. This Template ID will be needed to access the CraftMyPDF APIs.
Now, we have everything set up. To generate a PDF with CraftMyPDF, you need to install the CraftMyPDF module and use the below code.
var options = new RestClientOptions("")
{
  MaxTimeout = -1,
};
var client = new RestClient(options);
var request = new RestRequest("<https://api.craftmypdf.com/v1/create>", Method.Get);
request.AddHeader("X-API-KEY", "YOUR_API_KEY");
request.AddHeader("Content-Type", "application/json");
var body = @"{" + "\\n" +
@"    ""data"": {" + "\\n" +
@"        ""order_number"": ""65738379""," + "\\n" +
@"        ""order_date"": ""2021-09-30""," + "\\n" +
@"        ""currency"": ""USD""," + "\\n" +
@"        ""gross_total"": 82542.56" + "\\n" +
@"    }," + "\\n" +
@"    ""load_data_from"": null," + "\\n" +
@"    ""template_id"": ""TEMPLATE_ID""," + "\\n" +
@"    ""version"": 8," + "\\n" +
@"    ""export_type"": ""json""," + "\\n" +
@"    ""expiration"": 60," + "\\n" +
@"    ""output_file"": ""output.pdf""," + "\\n" +
@"    ""is_cmyk"": false," + "\\n" +
@"    ""image_resample_res"": 600," + "\\n" +
@"    ""direct_download"": 0," + "\\n" +
@"    ""cloud_storage"": 1" + "\\n" +
@"}" + "\\n" +
@"";
request.AddStringBody(body, DataFormat.Json);
RestResponse response = await client.ExecuteAsync(request);
Console.WriteLine(response.Content);
In the above code, first we are creating an instance of the RestClient class with the API key and then creating an instance of the RestRequest class with the API endpoint and the Template ID. After that, we are setting the parameters for the request body and sending the request. The response will contain a PDF file, which can be downloaded and used.
Don’t forget to replace YOUR_API_KEY with the API key that you copied earlier and TEMPLATE_ID with the Template ID that you copied earlier.
3. Using the .NET Framework
The .NET framework also provides a few built-in classes for generating PDFs in C#. The most commonly used class is the System.Drawing.Printing.PrintDocument class, which provides an easy way to generate PDFs from scratch.
- Using PrintDocument: The PrintDocument class provides a simple way to generate PDFs in C#. It allows you to create a PDF document from a set of commands, such as adding text, images, and shapes. To use the PrintDocument class, you need to first create a PrintDocument object and then use the Print method to generate the PDF. Below is the complete code for generating a simple PDF with the PrintDocument class.
using System;
using System.Drawing.Printing;
using System.Drawing;

public class Program
{
     public static void Main()
    {
        PrintDocument document = new PrintDocument();
        document.PrintPage += new PrintPageEventHandler(OnPrintPage);
        document.Print();
    }

    private static void OnPrintPage(object sender, PrintPageEventArgs e)
    {
        e.Graphics.DrawString("Hello, World!", new Font("Arial", 20), Brushes.Black, 0, 0);
    }
}
In the above code, we create a PrintDocument object and use the PrintPage event handler to add a “Hello, World!” string to the PDF. We then call the Print method to generate the PDF.
Benefits of using PrintDocument include:
- Easy to use: With PrintDocument, you can easily generate PDFs using a few simple commands.
- Flexible: PrintDocument provides a lot of flexibility when it comes to generating PDFs. You can easily add text, images, and shapes to the PDF.
- Portable: PrintDocument is supported on all major platforms, so you can generate PDFs with it on any platform.
4. Using Microsoft Office Interop
You can also use the Microsoft Office Interop library to generate PDFs using Microsoft Word. Microsoft Office Interop is a library that allows developers to access the features of Microsoft Office from .NET applications. It provides an easy way to create and manipulate Word, Excel, PowerPoint, and other documents. The library is often used to automate the creation of documents or to extract data from documents.
To use Microsoft Office Interop, you need to first add a reference to the library in your project and then use the provided classes and methods to generate the PDF. Below is the complete code for generating a simple PDF with the Microsoft Office Interop library.
using System;
using Microsoft.Office.Interop.Word;

public class Program
{
    public static void Main()
    {
        Application application = new Application();
        Document document = application.Documents.Add();
        Range range = document.Range(0, 0);
        range.Text = "Hello, World!";
        document.SaveAs2("MyPDF.pdf", WdSaveFormat.wdFormatPDF);
        document.Close();
        application.Quit();
    }
}
In the above code, we create a new Application object and then use the Add method to create a new Word document. We then use the Range class to add a “Hello, World!” string to the document and save it as a PDF. Note that, you’ll need to have Microsoft Word installed on your computer for the above code to work.
Here, it’s possible that you’ll get an error Range' is an ambiguous reference between 'Microsoft.Office.Interop.Word.Range' and 'System.Range. This is because the Range class is defined in both the Microsoft Office Interop and the System namespace. To fix this error, you can specify the full namespace of the class, like this:
Microsoft.Office.Interop.Word.Range range = document.Range(0, 0);You can also use other Microsoft Office applications, such as Excel and PowerPoint, to generate PDFs using Microsoft Office Interop.
5. Using Crystal Reports
Crystal Reports is a powerful reporting tool that allows you to generate PDFs from data stored in different sources, such as databases and spreadsheets. To use Crystal Reports in C#, you need to first install the NuGet package Crystal Reports for .NET.
dotnet add package CrystalDecisions.CrystalReports --version 13.0.32Once you have done this, you can use the package’s classes and methods to generate PDFs from data. Below is the complete code for generating a simple PDF with Crystal Reports.
using System;
using CrystalDecisions.CrystalReports.Engine;

public class Program
{
    public static void Main()
    {
        ReportDocument document = new ReportDocument();
        document.Load("MyReport.rpt");
        document.ExportToDisk(ExportFormatType.PortableDocFormat, "MyPDF.pdf");
    }
}
In the above code, we first create a ReportDocument object, which is a Crystal Reports class, and use the Load method to load a Crystal Reports file. We then use the ExportToDisk method to export the report to a PDF file.
Benefits of Using Crystal Reports:
Using Crystal Reports to generate PDFs has a few advantages over other methods:
- Crystal Reports allows you to generate PDFs from data stored in different sources, such as databases and spreadsheets.
- It provides powerful features, such as the ability to create complex reports with charts and graphs.
- It is easy to use and has good documentation and support.
If you want to learn how to embed a chart in a PDF, read this full guide.
There are many other files and methods available in the Crystal Reports library, so be sure to explore the documentation to find out what else you can do.
6. Using QuestPDF
QuestPDF is a modern .NET library designed for generating PDF documents. It provides a fluent API, making it easy to create complex PDFs with custom layouts and styles. QuestPDF is known for its simplicity and flexibility, allowing developers to design professional-quality documents with minimal effort.
Installing QuestPDF
To get started with QuestPDF, you need to install the package via NuGet. You can do this using the NuGet Package Manager in Visual Studio or by running the following command in the Package Manager Console:
dotnet add package QuestPDFUsing QuestPDF
Once you have QuestPDF installed, you can use it to generate a PDF document. Below is an example of how to create a simple PDF with QuestPDF:
using QuestPDF.Fluent;
using QuestPDF.Helpers;
using QuestPDF.Infrastructure;

public class InvoiceDocument : IDocument
{
    public void Compose(IDocumentContainer container)
    {
        container
            .Page(page =>
            {
                page.Size(PageSizes.A4); // Sets the page size to A4
                page.Margin(2, Unit.Centimetre); // Adds a 2cm margin
                page.PageColor(Colors.White); // Sets the page color to white
                page.DefaultTextStyle(x => x.FontSize(20)); // Default text style with font size 20

                page.Header()
                    .Text("Invoice")
                    .SemiBold().FontSize(36).FontColor(Colors.Blue.Medium); // Adds a styled header

                page.Content()
                    .PaddingVertical(1, Unit.Centimetre)
                    .Column(column =>
                    {
                        column.Item().Text("Client: John Doe"); // Client info
                        column.Item().Text("Product: Example Product"); // Product info
                        column.Item().Text("Price: $100"); // Price info
                    });

                page.Footer()
                    .AlignCenter()
                    .Text(x =>
                    {
                        x.Span("Page ");
                        x.CurrentPageNumber();
                        x.Span(" of ");
                        x.TotalPages(); // Page numbers in the footer
                    });
            });
    }
}

public class Program
{
    public static void Main(string[] args)
    {
        QuestPDF.Settings.License = LicenseType.Community; // Configure the license

        var document = new InvoiceDocument();
        document.GeneratePdf("invoice.pdf"); // Generate the PDF and save it as "invoice.pdf"
    }
}
In the above code, we are creating an invoice document with the following steps:
- Set Page Properties: Define the page size, margin, and background color.
- Default Text Style: Set a default font size for the text.
- Header: Add a header with styled text (“Invoice”).
- Content: Add client, product, and price information in a column layout.
- Footer: Include page numbers in the footer.
- License Configuration: Set the license type to Community.
- Generate PDF: Create and save the PDF as “invoice.pdf”.
Benefits of Using QuestPDF
Using QuestPDF to generate PDFs has a few advantages:
- Ease of Use: QuestPDF’s fluent API makes it easy to design and generate PDF documents without a steep learning curve.
- Flexibility: The library allows for highly customizable layouts and styles, making it suitable for a wide range of document types.
- Performance: QuestPDF is optimized for performance, ensuring that your PDFs are generated quickly and efficiently.
- Modern Features: With support for advanced features such as tables, images, and complex layouts, QuestPDF provides everything you need to create professional-quality documents.
Many developers and students also organize technical documentation more efficiently by converting their study material and coding summaries into interactive notes to flashcards systems for faster revision and long-term retention. This approach is especially useful when managing large programming concepts and PDF-related workflows.
7. Using wkhtmltopdf
wkhtmltopdf is a command-line tool that converts HTML and CSS content into PDF documents using the Webkit rendering engine. It is a popular choice for generating PDFs from web content because it can accurately render complex layouts and styles.
Installing wkhtmltopdf
To get started with wkhtmltopdf, you need to install the tool on your system. You can download it from the official website or use a package manager. For macOS, you can use Homebrew:
brew install wkhtmltopdfFor Ubuntu or other Linux distributions, you can use the following commands:
sudo apt-get update
sudo apt-get install -y wkhtmltopdf
Using wkhtmltopdf in C#
Once you have wkhtmltopdf installed, you can use it in your C# project to convert HTML content to PDF. Below is an example of how to create a simple PDF with wkhtmltopdf using a process call in C#:
using System;
using System.Diagnostics;

public class Program
{
    public static void Main(string[] args)
    {
        // Define the HTML content
        string htmlContent = @"
        <html>
        <head>
            <style>
                body { font-family: Arial, sans-serif; margin: 20px; }
                h1 { color: blue; }
                p { font-size: 18px; }
            </style>
        </head>
        <body>
            <h1>Invoice</h1>
            <p>Client: John Doe</p>
            <p>Product: Example Product</p>
            <p>Price: $100</p>
        </body>
        </html>";

        // Save HTML content to a temporary file
        string htmlFilePath = "temp.html";
        System.IO.File.WriteAllText(htmlFilePath, htmlContent);

        // Define the output PDF file path
        string pdfFilePath = "invoice.pdf";

        // Use wkhtmltopdf to convert HTML to PDF
        ProcessStartInfo processStartInfo = new ProcessStartInfo
        {
            FileName = "wkhtmltopdf",
            Arguments = $"{htmlFilePath} {pdfFilePath}",
            RedirectStandardOutput = true,
            UseShellExecute = false,
            CreateNoWindow = true
        };

        Process process = new Process { StartInfo = processStartInfo };
        process.Start();
        process.WaitForExit();

        // Clean up the temporary HTML file
        System.IO.File.Delete(htmlFilePath);

        Console.WriteLine("PDF generated successfully.");
    }
}
In the above code, we are creating an invoice document by defining HTML content, saving it to a temporary file, and using the Process class to call wkhtmltopdf for conversion to a PDF. After conversion, the temporary HTML file is deleted.
Benefits of Using wkhtmltopdf
- Accurate Rendering: Uses the Webkit rendering engine to accurately convert HTML and CSS to PDF.
- Flexibility: Allows for complex layouts and styles, making it suitable for web content.
- Command-Line Tool: Can be easily integrated into different programming languages and environments.
- Open Source: Free to use and actively maintained by the community.
wkhtmltopdf is a great choice for generating PDFs from HTML content, especially when you need to maintain the look and feel of web pages. Its accurate rendering and flexibility make it a valuable tool for various PDF generation tasks.
8. Using Puppeteer Sharp
Puppeteer Sharp is a .NET port of the popular Node.js library Puppeteer which provides a high-level API to control headless Chrome or Chromium browsers. It is widely used for generating PDFs from HTML content due to its robust rendering capabilities.
Installing Puppeteer Sharp
To get started with Puppeteer Sharp, you need to install the package via NuGet. You can do this using the NuGet Package Manager in Visual Studio or by running the following command in the Package Manager Console:
dotnet add package PuppeteerSharpUsing Puppeteer Sharp in C#
Once you have Puppeteer Sharp installed, you can use it to generate a PDF document. Below is an example of how to create a simple PDF with Puppeteer Sharp:
using System;
using System.IO;
using System.Threading.Tasks;
using PuppeteerSharp;
using PuppeteerSharp.Media;

public class Program
{
    public static async Task Main(string[] args)
    {
        try
        {
            // Specify the Chromium revision if necessary
            var browserFetcher = new BrowserFetcher();
            await browserFetcher.DownloadAsync();

            // Launch a headless browser
            using var browser = await Puppeteer.LaunchAsync(new LaunchOptions { Headless = true });
            using var page = await browser.NewPageAsync();

            // Define the HTML content
            string htmlContent = @"
            <html>
            <head>
                <style>
                    body { font-family: Arial, sans-serif; margin: 20px; }
                    h1 { color: blue; }
                    p { font-size: 18px; }
                </style>
            </head>
            <body>
                <h1>Invoice</h1>
                <p>Client: John Doe</p>
                <p>Product: Example Product</p>
                <p>Price: $100</p>
            </body>
            </html>";

            // Set the HTML content
            await page.SetContentAsync(htmlContent);

            // Define the output PDF file path
            string pdfFilePath = "invoice.pdf";

            // Generate the PDF
            await page.PdfAsync(pdfFilePath, new PdfOptions
            {
                Format = PuppeteerSharp.Media.PaperFormat.A4,
                PrintBackground = true
            });

            Console.WriteLine("PDF generated successfully.");
        }
        catch (Exception ex)
        {
            Console.WriteLine($"An error occurred: {ex.Message}");
        }
    }
}
In the above code, we are creating an invoice document by launching a headless Chrome browser, setting the HTML content, and generating a PDF from that content. The PDF is saved to a specified file path. This architecture closely mirrors standard data harvesting routines, where a programmatic Playwright scraper initializes an isolated virtual browser context to inspect, modify, and render complex dynamic page views.
Benefits of Using Puppeteer Sharp
- Accurate Rendering: Leverages Chrome’s rendering engine for accurate HTML and CSS to PDF conversion.
- Flexibility: Can handle complex web content and supports advanced features like JavaScript execution.
- High Performance: Provides fast and reliable PDF generation with headless browser capabilities.
- Cross-Platform: Works on various platforms, making it versatile for different environments.
Puppeteer Sharp is an excellent choice for generating PDFs from HTML content, offering high accuracy and flexibility with its powerful headless browser capabilities.
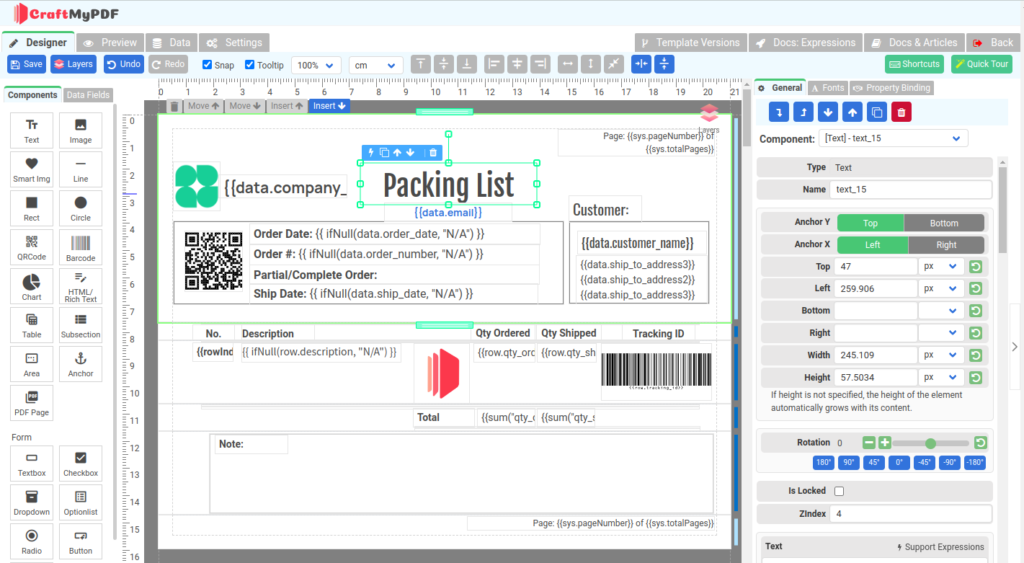
No-code alternative: If you prefer not to build and maintain PDF layouts in code, a drag-and-drop template editor lets you visually design templates and generate PDFs without changing your application code.
Conclusion
There are several ways to generate PDFs with C#, including libraries like iTextSharp, PdfSharp, and QuestPDF; cloud-based APIs such as CraftMyPDF; the .NET Framework’s PrintDocument class; the Microsoft Office Interop library; Crystal Reports; and tools like wkhtmltopdf and Puppeteer Sharp.
Each method has its own advantages and limitations, so it’s important to choose the one that best fits your needs. If you prefer a hosted PDF generation API, you can avoid managing rendering libraries and infrastructure while still generating professional-quality PDFs from templates. Libraries like iTextSharp, PdfSharp, and QuestPDF are feature-rich and easy to use. The PrintDocument class is straightforward but limited.
The Office Interop library and Crystal Reports offer powerful features for complex reports. Tools like wkhtmltopdf and Puppeteer Sharp are excellent for converting HTML content to PDFs with high accuracy.
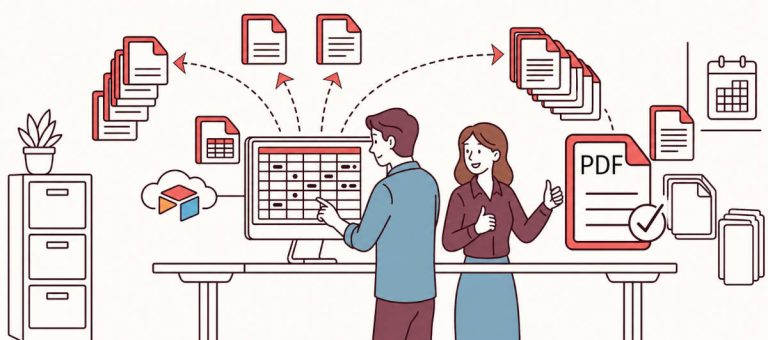
If your application needs to create thousands of documents instead of generating one PDF at a time, it’s worth considering a bulk PDF generator. It can automate high-volume PDF creation from templates, reduce infrastructure overhead, and make large-scale document generation much easier to manage.
If you are looking for an easy-to-use solution that allows you to create professional-looking PDFs quickly, CraftMyPDF is definitely worth a try. Signing up is easy and free, and you will get access to ready-made templates and customization options.