With CraftMyPDF’s Zapier integration, it’s easy to create PDF templates with a drag-and-drop designer and automate your PDF generation from reusable templates.

There are 2 types of payload for Zapier integration, you can either use a Dictionary(flat-structured JSON, key-value pairs) or JSON data. The JSON payload is for complex hierarchical data.
This tutorial will walk you through the steps of generating a PDF document with Zapier, CraftMyPDF, and Google spreadsheet(Using JSON payload).
Step 1. Google Spreadsheet
Prepare your data and save the data on a Google spreadsheet. The data will be used for generating a PDF invoice.

Step 2. Create a CraftMyPDF PDF template
Create a PDF template on CraftMyPDF
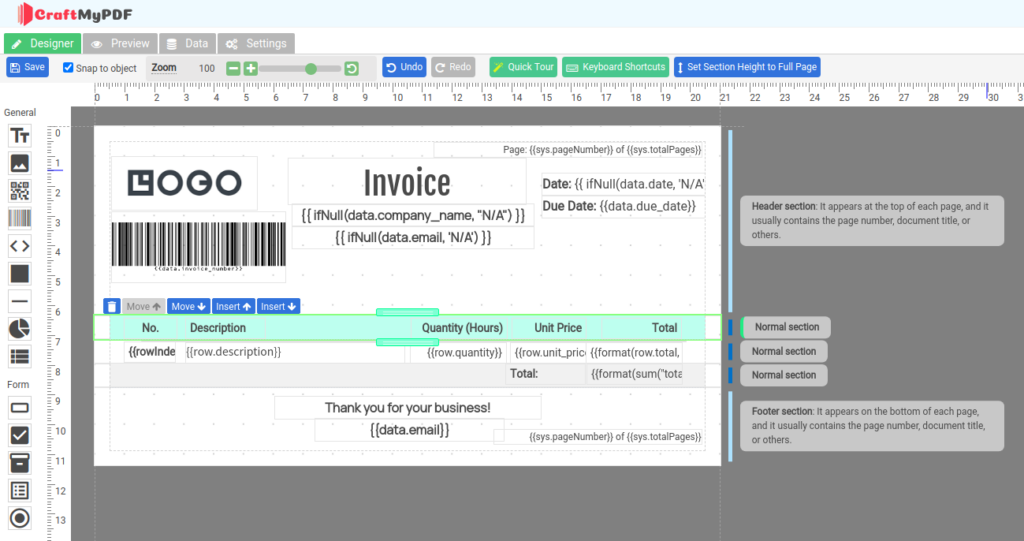
The JSON data

Step 3. Zapier workflow
3.1. Create a Zap and setup a trigger
First, set up your trigger. For demo purposes, we will use the Zapier Chrome extension, you may use any event that starts your Zap.

3.2. Get data from Google Spreadsheet
3.2.1 Set up app & event
(i) Search for Google Sheets on Zapier and select Google Sheets
(ii) Select Get Many Spreadsheet Rows(Advanced, With Line Item Support) for Action Event and click Continue

3.2.2 Choose account
Connect your Google Sheets account to Zapier and click Continue

3.2.3 Set up the action
Now is to configure how you want to get the rows in the Google spreadsheet.
Select your Google drive and fill in all the required fields. In the Google spreadsheet, we enter the value 2 for the First Row, if you don’t have a header just set the value to 1. The max number of rows that can be retrieved is 20.

3.2.4 Test action
Now is the time to run and test the action. We will use raw_rows in the next action.

3.3. Building JSON string
We are going to use Code by Zapier to build the JSON string
3.3.1 Choose app & event
(i) First, search for Code by Zapier, select the option.
(ii) Then, select Run Javascript for the Action Event and press Continue

3.3.2 Set up action
In the Input Data section, provide the keys and values:
google_rows: bind the value to Raw Rows(Click on Get Many Spreadsheet Rows… and Show all options)
invoice_no: Invoice number or a value that you want to display in the PDF.

The following is the Javascript code that generate the JSON string.
let rows = JSON.parse(inputData.google_rows);

// Filter out rows that first cilumn is empty
rows = rows.filter((obj)=>obj[0].length>0);

// Create items
rows = rows.map((obj)=>{
  return {
    description: obj[0],
    quantity: obj[1],
    unit_price: obj[2],
    total: obj[3]
  }
});

// Serialize the object and return the JSON string
output = [{
  output_json: JSON.stringify({
    invoice_no: inputData.invoice_no,
    items: rows
 })}];
3.3.3 Test the action
Run and test the action, the action will produce a JSON string that can be used for CraftMyPDF.

3.4. Generate PDF with CraftMyPDF
3.4.1 Choose app & event
(i) First, search for CraftMyPDF, select the option.
(ii) Then, select Create PDF for the Action Event and press Continue

3.4.2 Choose account
Connect your CraftMyPDF account to Zapier and click Continue (To get the API Key, visit CraftMyPDF’s API Integration page)

3.4.3 Set up action
Select your PDF template and select JSON for the Payload Type.
In the JSON Payload field, select Output Json

3.4.4 Test the action
Run and test the action,


