1. Introduction
CraftMyPDF is designed to work with array type data in JSON data and we make it easy for you to handle the collection of data. Once a normal section is configured to bind to an array, the data-bound section is repeated once per record.
In this tutorial, we are going to walk you through the detailed steps of how to bind an array to a normal section and configure the data-bound section to display the data in each row.
We will also create an expression to automatically calculate the grand total for the total amount field.
In the last section of the tutorial, we are going to explore briefly how to generate an invoice PDF with REST API and Integromat.
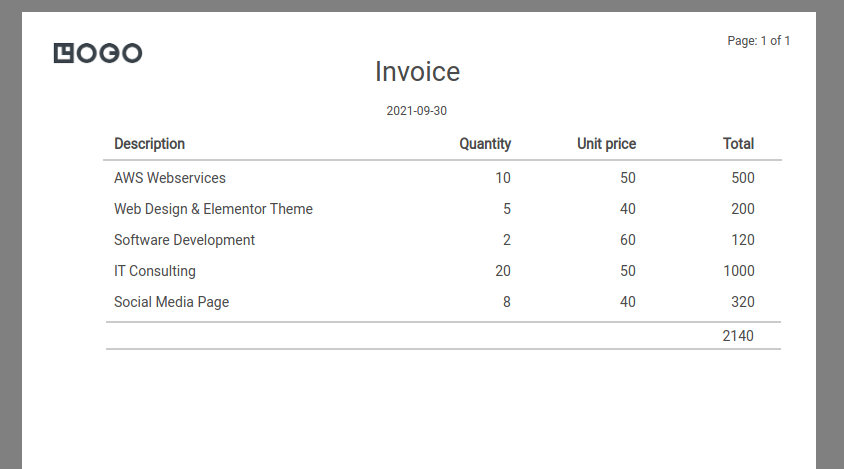
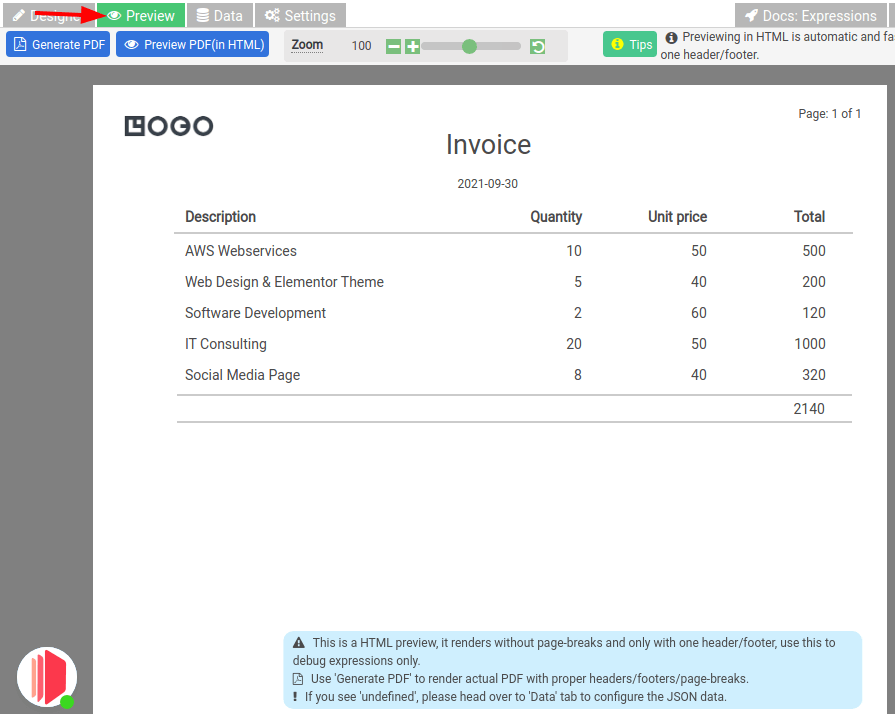
The following is the PDF report we are going to build for this tutorial.
2. Create CraftMyPDF PDF template and configure data-bound section
In this section, we are going to create a PDF template and also configure data-binding for a section.
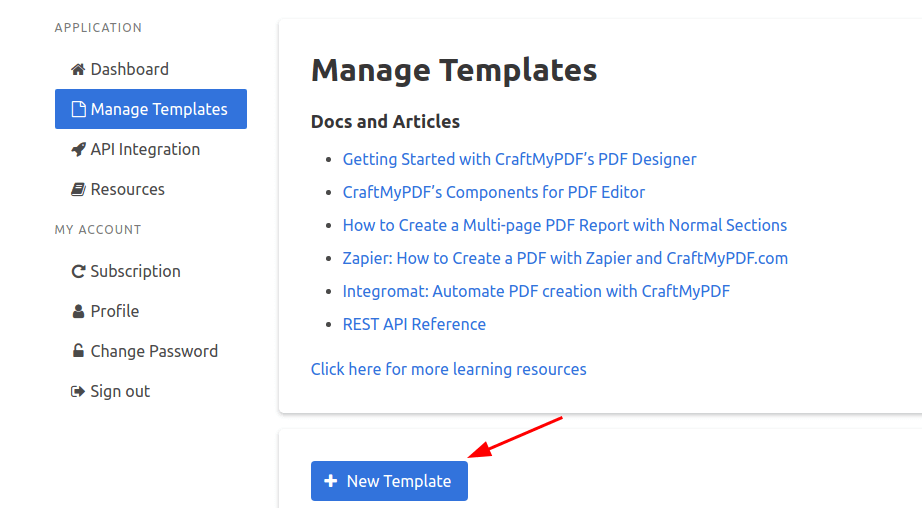
Step 1. Create a new template
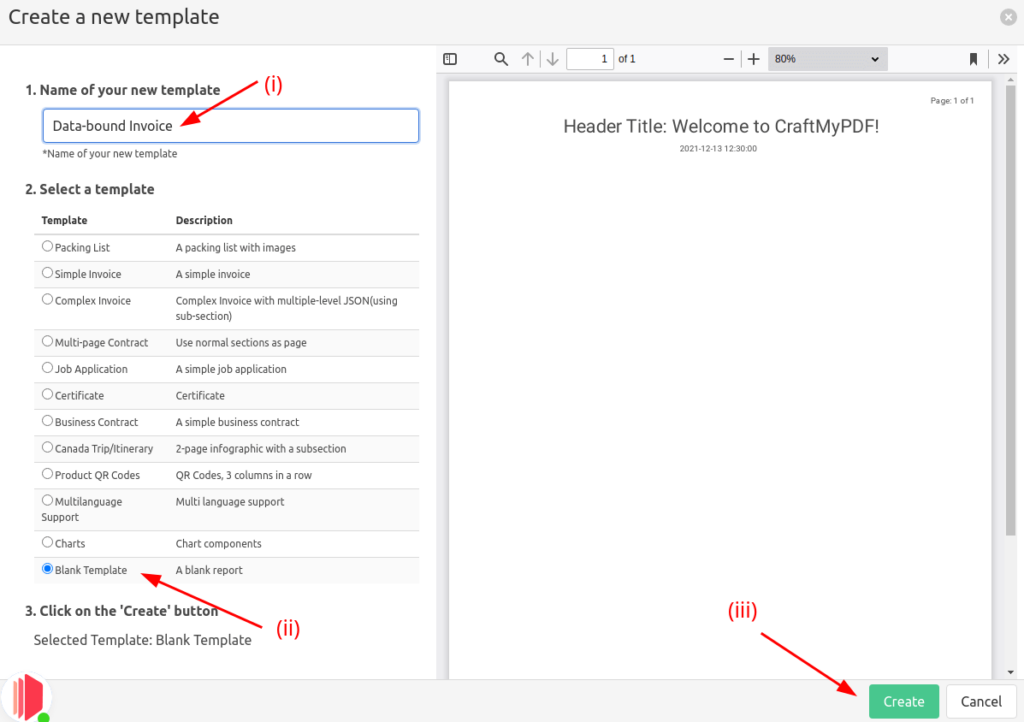
On the Manage Template page, click on New Template to create a new PDF template.
Give a descriptive name to your template. Then, select a blank template and click on the Create button to create a new PDF template
Step 2. Get your JSON data ready
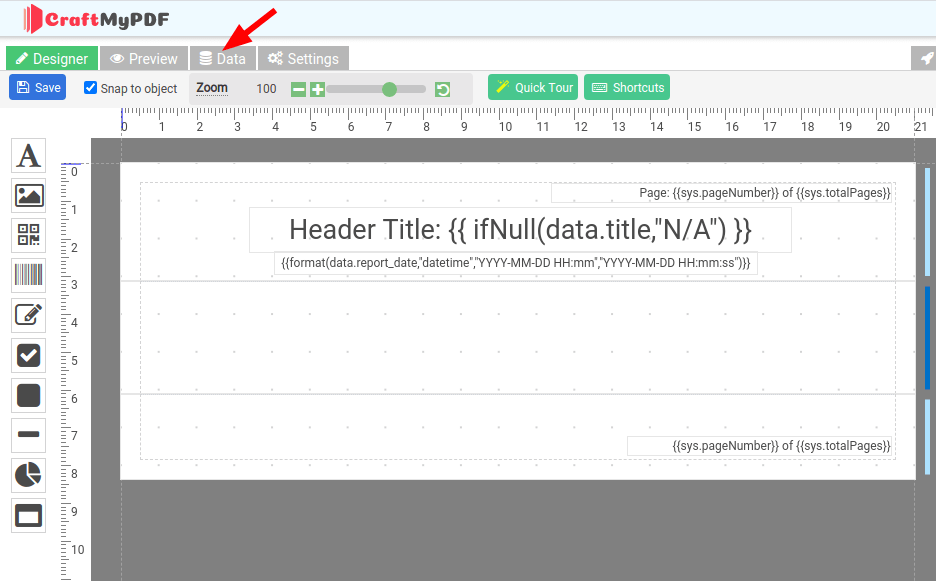
After the template is created, on the Manage Template page click on the Edit button to launch the PDF template Editor.
The first thing to do in a new PDF template is to set up the JSON data. Click on the Data tab to get the JSON data ready.
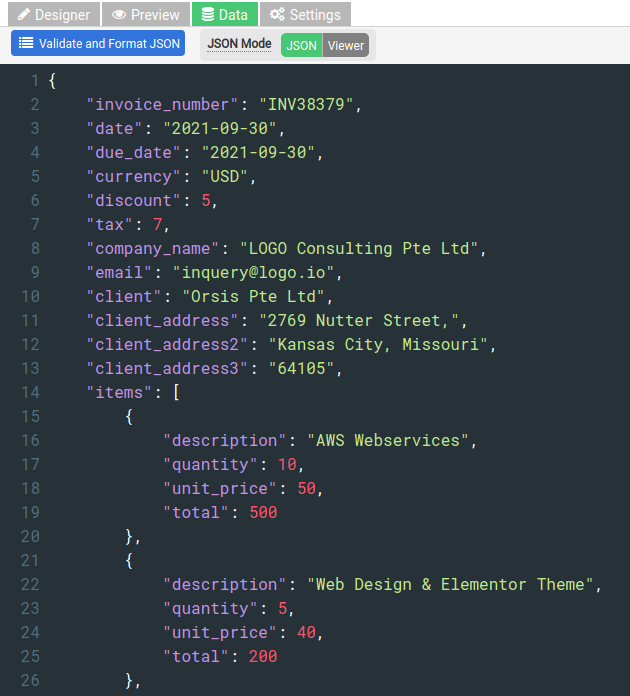
The following is a sample JSON data, copy and paste it into the JSON editor.
{
    "invoice_number": "INV38379",
    "date": "2021-09-30",
    "due_date": "2021-09-30",
    "currency": "USD",
    "discount": 5,
    "tax": 7,
    "company_name": "LOGO Consulting Pte Ltd",
    "email": "[email protected]",
    "client": "Orsis Pte Ltd",
    "client_address": "2769 Nutter Street,",
    "client_address2": "Kansas City, Missouri",
    "client_address3": "64105",
    "items": [
        {
            "description": "AWS Webservices",
            "quantity": 10,
            "unit_price": 50,
            "total": 500
        },
        {
            "description": "Web Design & Elementor Theme",
            "quantity": 5,
            "unit_price": 40,
            "total": 200
        },
        {
            "description": "Software Development",
            "quantity": 2,
            "unit_price": 60,
            "total": 120
        },
        {
            "description": "IT Consulting",
            "quantity": 20,
            "unit_price": 50,
            "total": 1000
        },
        {
            "description": "Social Media Page",
            "quantity": 8,
            "unit_price": 40,
            "total": 320
        }
    ],
    "gross_total": 25055
}
You may use the button Validate and Format JSON to validate and beautify your JSON data.
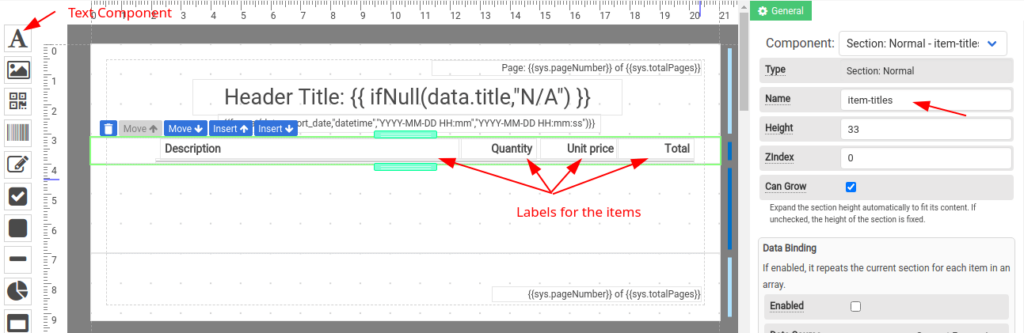
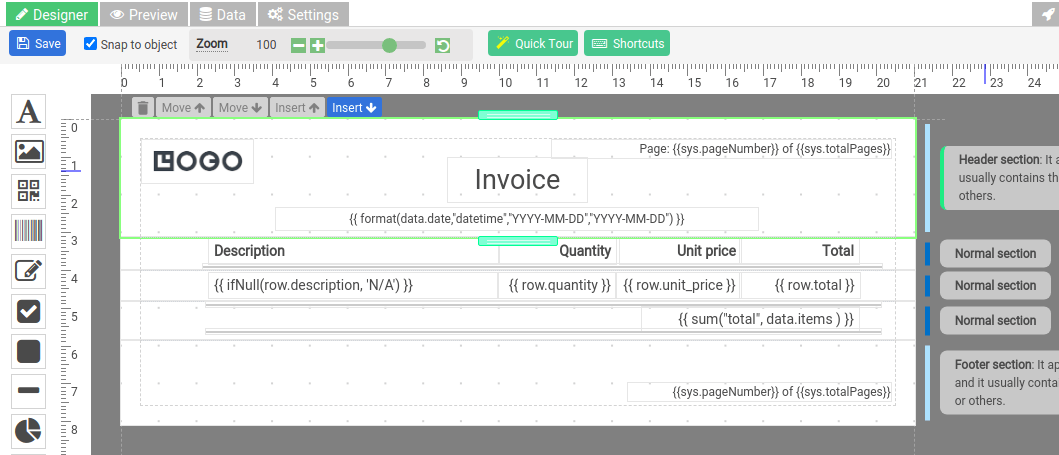
Step 3. Add a new section for the data header
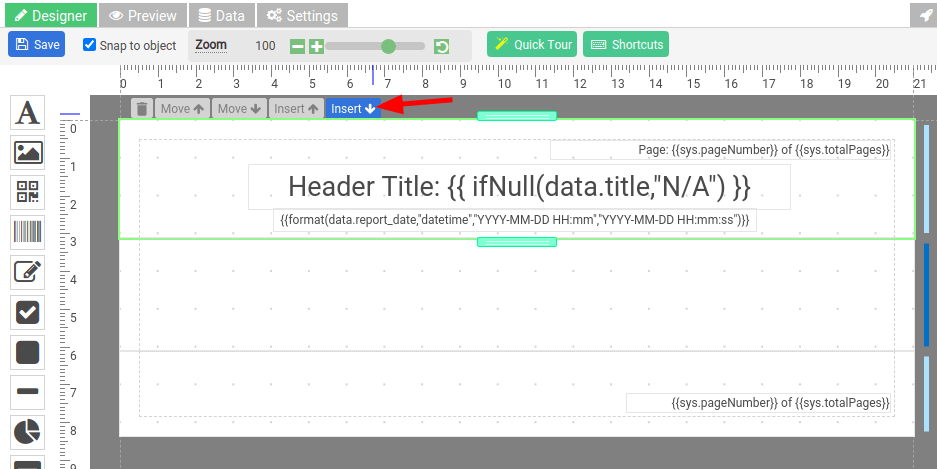
Now head back to the Designer by clicking the Designer tab. Then, select the page header section first and click on the Insert(Below) button to create a new normal section.
Give the new section a name and drag-and-drop text components to create the labels. We are going to create 4 labels: Description, Quantity, Unit Price, and Total. You may adjust the alignment, font-weight, and font size for the text labels.
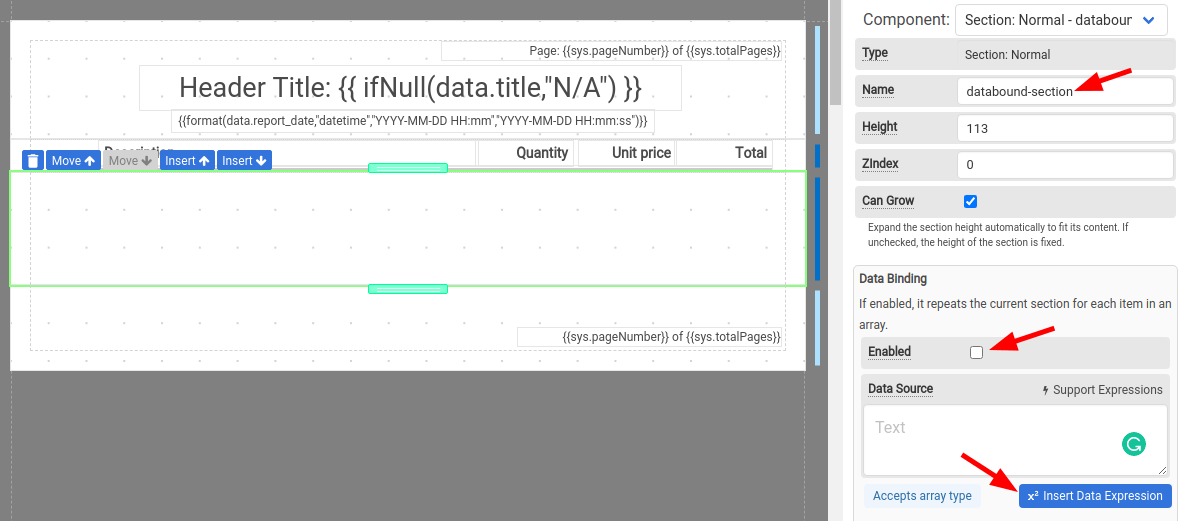
Step 4. Configure the data-bound section
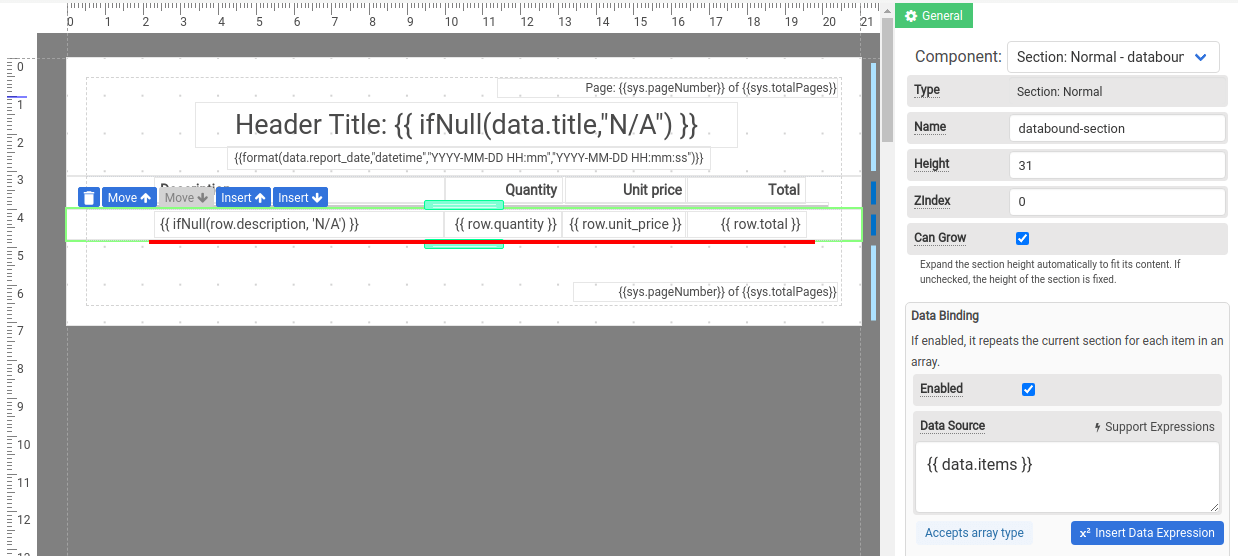
We have done setting up the header in the previous step. Next, select the next normal section to configure data-binding, it’s an existing normal section that comes in the blank template.
First, name the section databound-section. Click on the Enabled checkbox to enable data-binding for the section. Then, click the button Insert Data Expression to insert an expression to bind an array to the section.
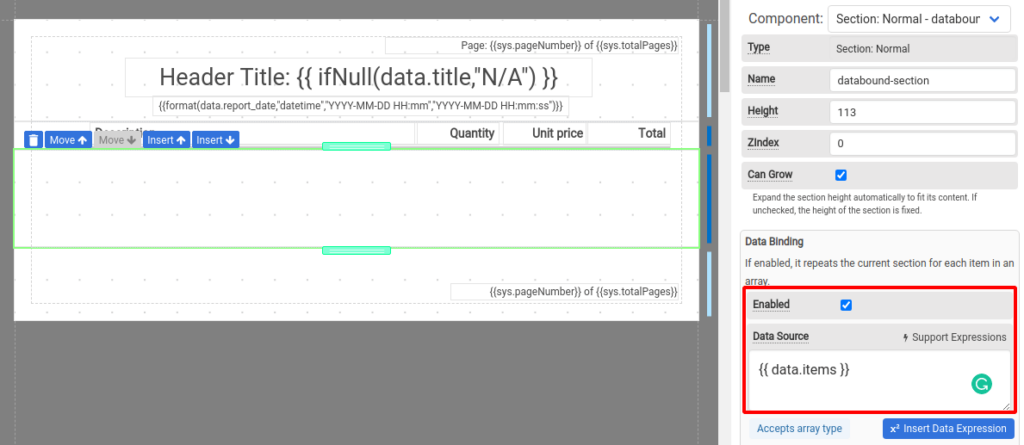
In the expression builder, select the array items that you want to bind to the section. Click on Use this to apply.

This is how it looks like after you have configured the data-binding for the section.
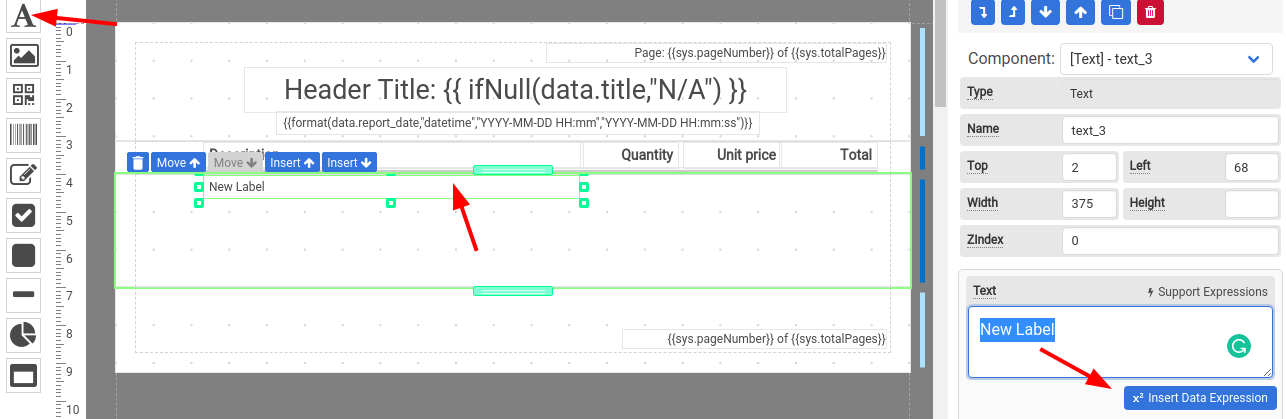
Step 5. Display row data in the data-bound section
Now the section is bound to the array items. The next step is to add the row fields by dragging and dropping text components to the data-bound section.
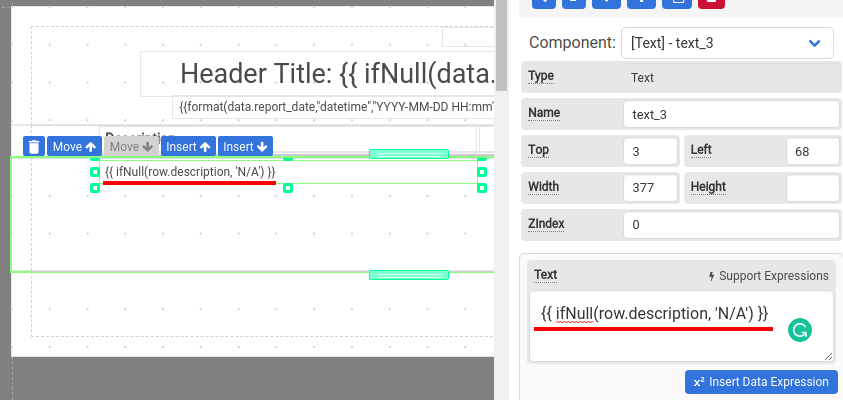
We will start by creating a text component for the description field first.
Drag and drop a text component from the toolbar on the left to create a text field. Then, click on the new text component to select. On the property panel, click on Insert Data Expression to bind the description to the text component.
When you click on the Insert Data Expression, an expression builder dialog will pop up. Follow the steps in the expression builder to build an expression.
(i) Select Element in a data-bound section
(ii) Select description field
(iii) Then, format it as Replace with N/A if Null …. . if the description field is null, empty or undefined then it will be replaced with N/A
(iv) Click on Use this for the Expression For Element to use the expression
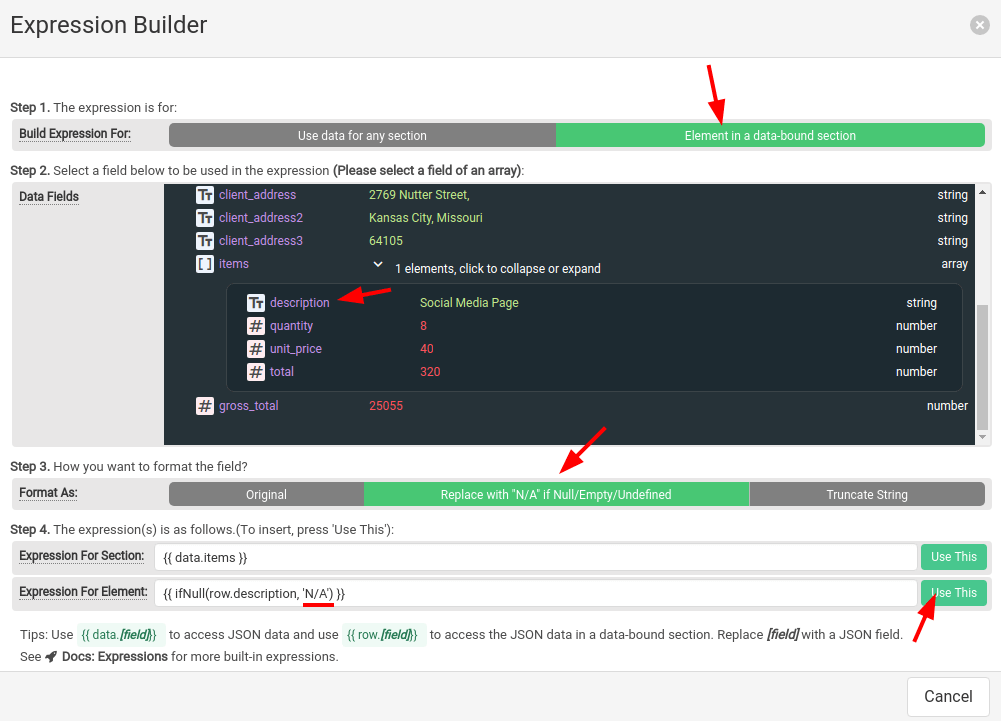
This is how the expression looks like. The row variable is unique in a data-bound section, the data-bound section iterates the array items(in your JSON data) and assigns them to the variable row.
Repeat the steps for other data fields: quantity, unit_price, and total. Adjust the alignment, font size accordingly.
We have done the configuration for the data-bound section. The next step is to set up a new section for the grand total and use an expression to calculate the grand total.
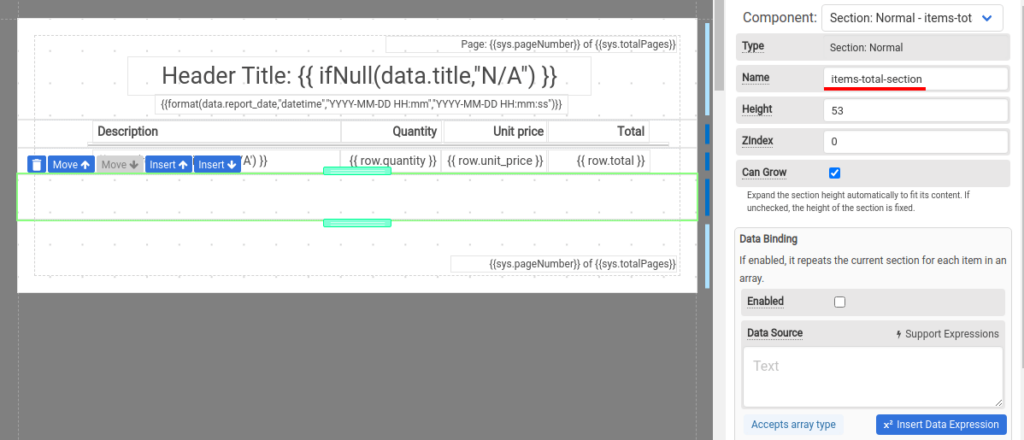
Step 6. Insert a new section for the total
We will create a new section for the grand total, it’s below the data-bound section and above the footer section. Select the footer section and click on Insert(Above) to create a new section.
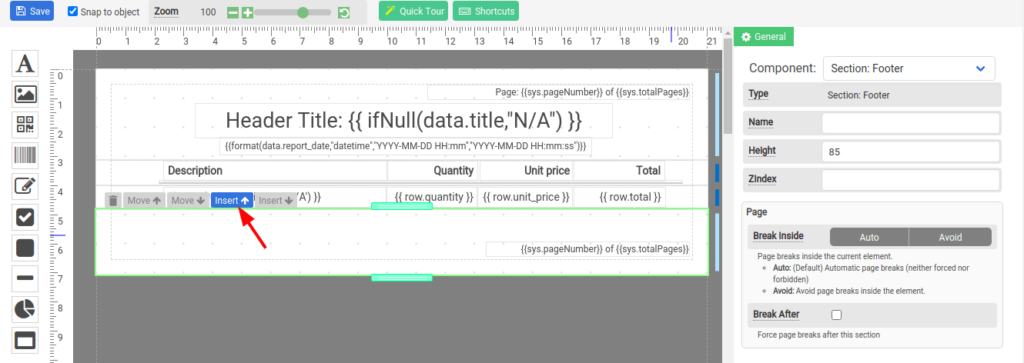
Name the new section item-total-section
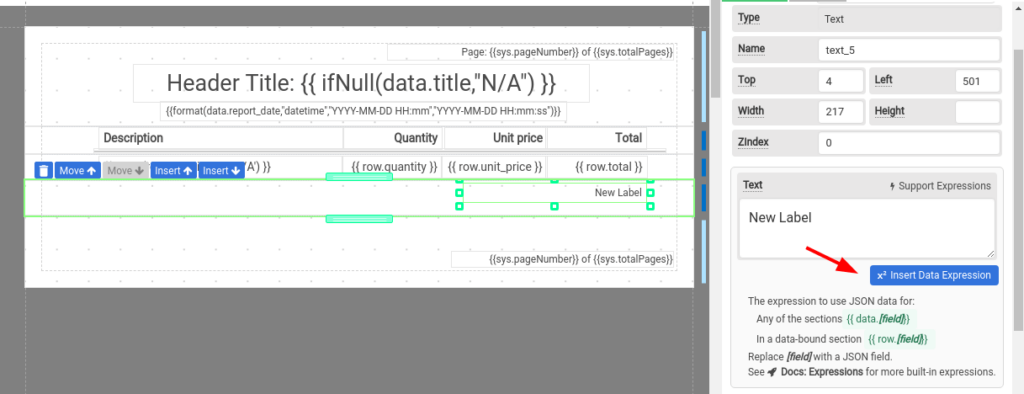
Drag-and-drop a text component to the new section and click on Insert Data Expression
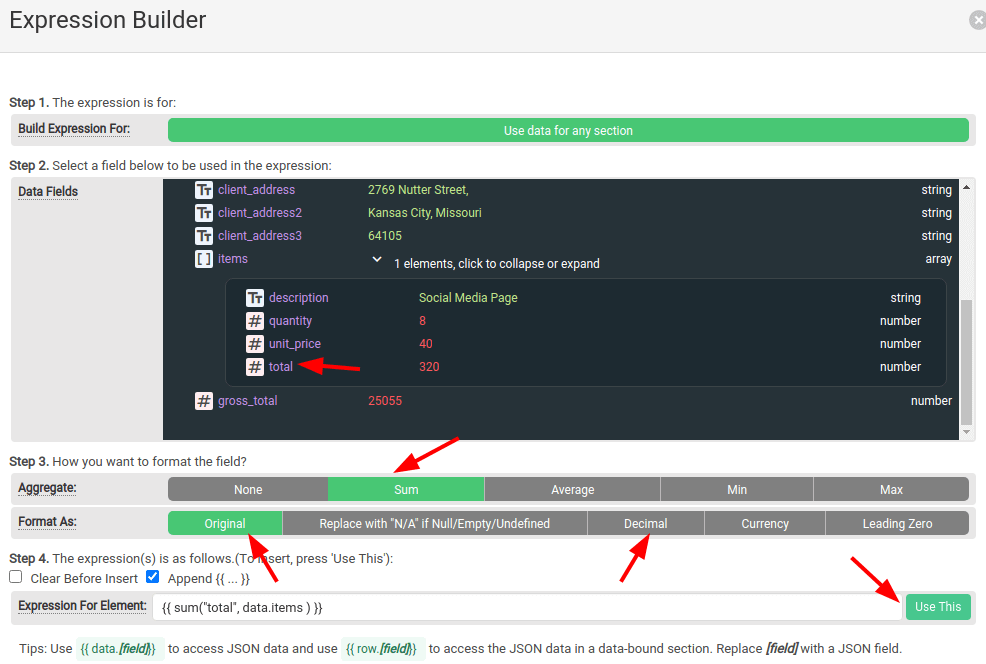
Follow the steps in the Expression Builder
(i) In the Data Fields select total field
(ii) In the Aggregate section, select Sum. Next, in the Format As you can keep it as original or format it as Currency.
(ii) Click on Use This to use the expression.
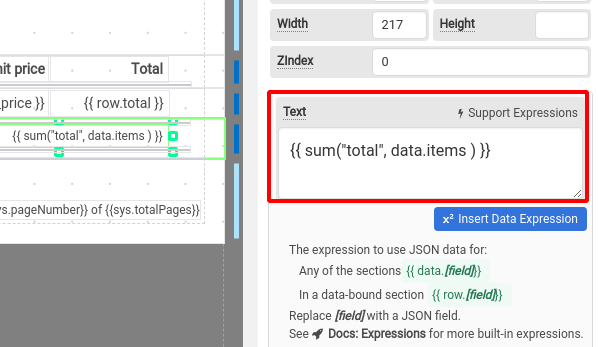
The following is the expression for the grand total text component.
Step 7. Additional info for the page header
You may add a logo or other information to the page header such as the date and the page number.
Step 8. Preview and generate the PDF
Click on the Preview tab to preview the PDF in HTML.
P/S: The Preview PDF(In HTML) button renders without page breaks and only with one header/footer, use this to debug expressions only.
Use the button Generate PDF to render actual PDF with proper headers, footers, and page breaks.

Step 9. (Optional) Running row index
You may use the following expression for the running row index
{{rowIndex + 1 }}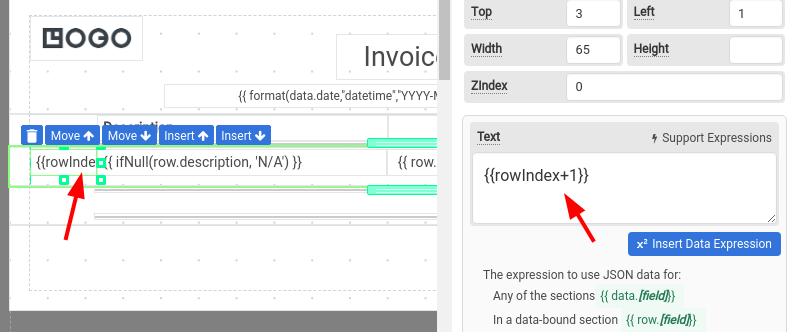
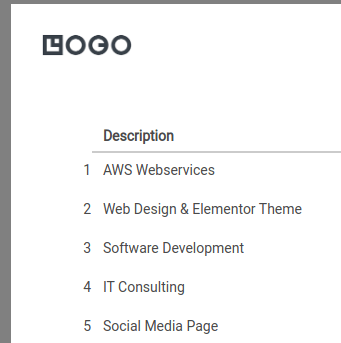
The preview of the running index
3. Automate the PDF creation
Once the invoice template is created and ready, the next step is to automate the PDF creation.
3.1 Generate PDF with PDF generation API
We support REST API for PDF generation. To find out more, visit our API reference for more details.
curl -X POST \
  --header "Content-Type: application/json"  \
  --header 'X-API-KEY: 7832MjA6MTE6UjlkM3h4emxpTExzeFR0aQ=' \
  --data '{ \"invoice_number\": \"INV38379\", \"date\": \"2021-09-30\", \"due_date\": \"2021-09-30\", \"currency\": \"USD\", \"discount\": 5, \"tax\": 7, \"company_name\": \"LOGO Consulting Pte Ltd\", \"email\": \"[email protected]\", \"client\": \"Orsis Pte Ltd\", \"client_address\": \"2769 Nutter Street,\", \"client_address2\": \"Kansas City, Missouri\", \"client_address3\": \"64105\", \"items\": [ { \"description\": \"AWS Webservices\", \"quantity\": 10, \"unit_price\": 50, \"total\": 500 }, { \"description\": \"Web Design & Elementor Theme\", \"quantity\": 5, \"unit_price\": 40, \"total\": 200 }, { \"description\": \"Software Development\", \"quantity\": 2, \"unit_price\": 60, \"total\": 120 }, { \"description\": \"IT Consulting\", \"quantity\": 20, \"unit_price\": 50, \"total\": 1000 }, { \"description\": \"Social Media Page\", \"quantity\": 8, \"unit_price\": 40, \"total\": 320 } ], \"gross_total\": 25055 }' \
  "https://api.craftmypdf.com/v1/create"
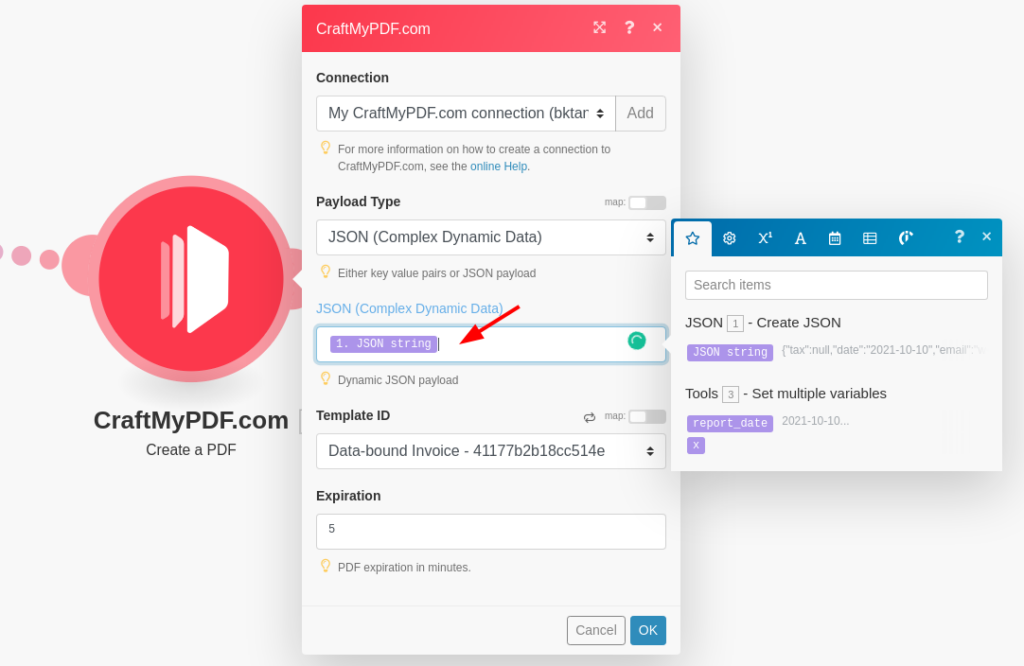
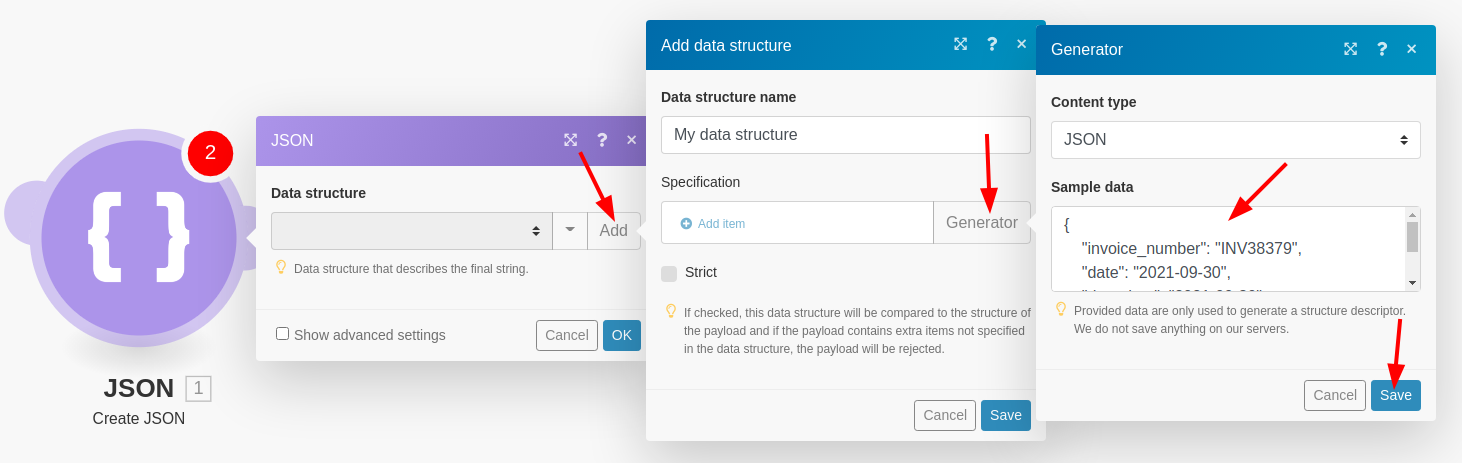
3.1 Integromat: How to handle array
Use Create JSON module in JSON app to create a JSON. You may use the Generator to generate a JSON schema for you.
Then with CraftMyPDF app create a PDF module, select JSON payload type and assign the JSON string to the JSON field.