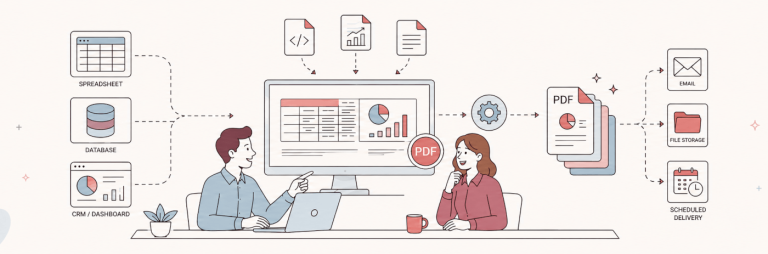
Have you ever needed to generate a PDF from HTML? Perhaps you had a web form that needed to be printable, or you wanted to export some data from your web app in PDF format. In any case, there’s a tool that can help you with that, and it’s called Puppeteer.

Puppeteer is a Node.js library that provides a high-level API to control Chrome or Chromium over the DevTools Protocol. It can be used for a variety of purposes, including web scraping, test automation, and converting HTML to PDF.
In this article, we’ll show you how to use Puppeteer and Node.js for pdf generation from HTML.
1. What is Puppeteer?
Puppeteer is a Node library that provides a high-level API to control Chrome or Chromium over the DevTools Protocol. Puppeteer runs headless by default, but can be configured to run full (non-headless) Chrome or Chromium.
Puppeteer is useful because it can be used for:
- Pdf generation from HTML: We can use Puppeteer to open up a web page and save it as a PDF.
- Web Scraping: We can use Puppeteer to visit a web page and extract data from it. For example, we can use Puppeteer to get the text content of a web page, or to get the value of a form field.
- Test Automation: We can use Puppeteer to automate tests for a web application. For example, we can use Puppeteer to fill out a form and submit it, or to click a button.
- Debugging: We can use Puppeteer to debug a web application. For example, we can use Puppeteer to take a screenshot of a web page, or to inspect the HTML source code.
1.1 Getting Started
If you don’t already have a Node project set up, create a new directory for your project and initialize it with npm.
mkdir Puppeteer
cd Puppeteer
npm init -y
This will create a package.json file with default values
Next, install Puppeteer. We’ll be using the latest version from npm.
npm install puppeteerThis will download and install Puppeteer, as well as its dependencies.
1.2 Code to generate PDF with Puppeteer
Now that we have Puppeteer installed, let’s write some code to generate a PDF from an HTML file. We’ll start by creating an HTML file with some basic content.
1.2.1 Prepare the HTML file
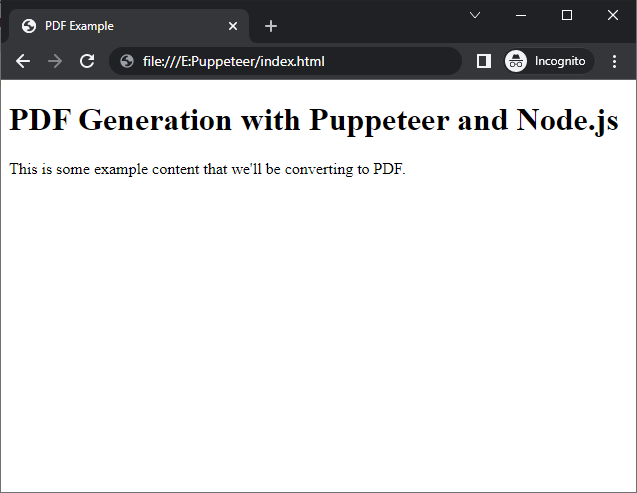
Create a new file named index.html and add the following contents to it:
<!DOCTYPE html>
<html>
   <head>
      <meta charset="UTF-8">
      <title>PDF Example</title>
   </head>
   <body>
      <h1>PDF Generation with Puppeteer and Node.js</h1>
      <p>This is some example content that we'll be converting to PDF.</p>
   </body>
</html>
The following is the HTML page
1.2.2 Write the Node.js code
Next, create a new file named generate-pdf.js and add the following code to it:
const puppeteer = require('puppeteer');

(async () => {
    const browser = await puppeteer.launch();
    const page = await browser.newPage();
    await page.goto('file:///path/to/index.html', {waitUntil: 'networkidle2'});
    await page.pdf({path: 'output.pdf', format: 'A4'});
    await browser.close();
})();
Let’s break down what this code is doing:
First, we’re requiring the puppeteer module. This gives us access to all of the methods we need to control headless Chrome.
const puppeteer = require('puppeteer');Next, we wrap everything in an async function. This is necessary because Puppeteer uses promises, and we want to wait for everything to finish before closing the browser.
(async () => { ... })();Inside the async function, we launch a new instance of Chrome.
const browser = await puppeteer.launch();We create a new Page instance, which represents a tab in Chrome.
const page = await browser.newPage();We navigate to our HTML file using the page’s goto() method. The {waitUntil: ‘networkidle2’} option
tells Puppeteer to wait until the network is idle before taking a screenshot.
await page.goto('file:///path/to/index.html', {waitUntil: 'networkidle2'});Finally, we use the page’s pdf() method to generate a PDF. We save it to a file named output.pdf.
await page.pdf({path: 'output.pdf', format: 'A4'});1.2.3 Parameters to generate PDF
You can see that the options passed to the pdf() method are quite flexible. For example, you can
control the page size and margins with the width, height, and margin options. Now let’s look at
some of the optional parameters in detail:
- path: The path (relative to the current working directory) where the PDF will be written. If a relative path is specified, it will be resolved relative to the current working directory.
- format: We can set the page format with this parameter. The default format is Letter. The other options are A3, A4, A5, Legal, Tabloid and an array of [width, height].
- margin: It’s an object that lets us customize the PDF’s margin. The default margin is 0 for all sides.
- printBackground: By default, the background graphics is not printed. If we want to print the background, we need to set printBackground to true.
- pageRanges: The pages to print, e.g., ‘1-5, 8, 11-13’. Defaults to the empty string, which means print all pages.
- preferCSSPageSize: Give any CSS @page size declared in the page priority over what is declared in width and height or format. Defaults to false, which will scale the content to fit the paper size.
- displayHeaderFooter: This parameter adds header and footer to the PDF. The header and footer are HTML templates and the values of the template can be accessed with the following expressions:
- scale: We can scale the pages with this parameter. The default value is 1. To increase or decrease the scale, we can set a number between 0 and 2.
After the PDF is generated, we close the browser.
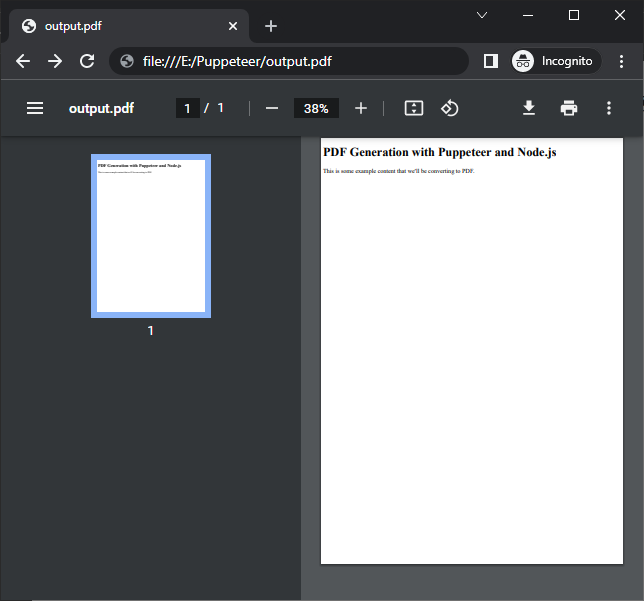
await browser.close();And that’s it! Now if we run our script with Node, it will generate a PDF for us.
node generate-pdf.jsYou should now have a file named output.pdf in your current working directory. Open it up and take a look!
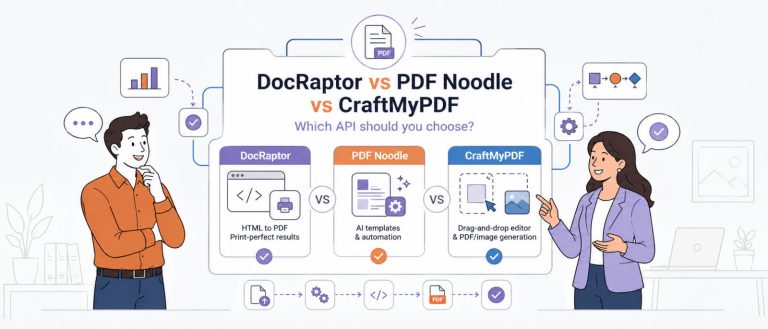
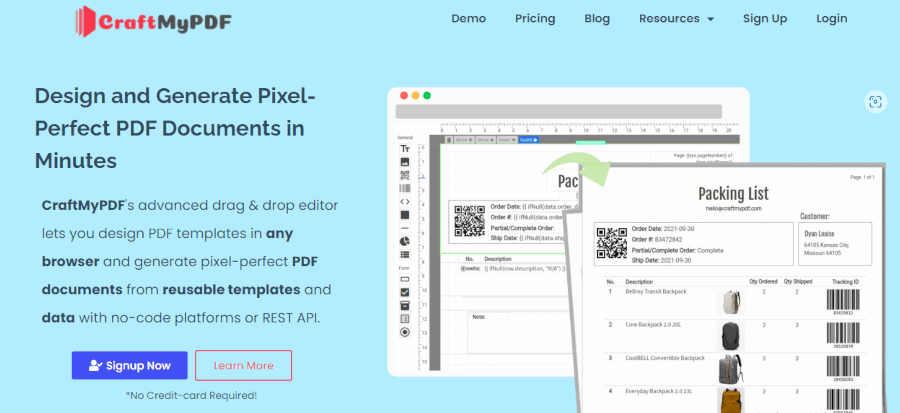
2. Generate PDFs with CraftMyPDF
CraftMyPDF offers PDF generation API and an advanced drag-and-drop editor for you to create PDF templates.
If you prefer a visual no-code approach instead of building PDF layouts directly in HTML, the CraftMyPDF template editor lets you design reusable PDF templates with a drag-and-drop interface, making it easy to separate document design from your Node.js application.
The following are the core features of CraftMyPDF.
- Drag and Drop Editor: The CraftMyPDF’s drag & drop editor is a powerful tool that lets users easily create PDF templates. With this tool, users can simply drag & drop elements into place to create their own custom PDF templates. This is an extremely useful feature for those who need to create PDFs on a regular basis, as it saves a lot of time and effort.
- Fillable PDF Components: The CraftMyPDF’s fillable components are a great way to create fillable PDF forms. With the drag-and-drop editor, you can easily add and remove fields, and rearrange them as you see fit. This makes it easy to create custom forms that users can use for any purpose.
- Support multipage PDFs: CraftMyPDF supports the creation of multipage PDFs, which is a very useful feature for users. This allows them to easily create PDFs with multiple pages, which can be very helpful for organizing and sharing information.
- PDF & Image Generation API: With the help of this feature, users can generate PDF documents or images (JPEG/PNG) synchronously/asynchronously at scale without the costs of maintenance. This is a useful solution for users who need to generate large quantities of PDFs or images on-demand, without having to worry about the costs associated with maintaining their own servers.
- Integration with Low-code Platforms: The CraftMyPDF integration with low-code platforms like Zapier, Make.com, Bubble.io and REST API, makes it easy to generate PDF documents. This is a great feature for users who need to create PDFs on a regular basis, as it makes the process quick and easy.CraftMyPDF’s API and template editor work across multiple tech stacks, so if Node.js isn’t your primary language, you can also generate PDFs with C# using the same template-based approach described below.
- Support Expressions: With the CraftMyPDF editor, users can take advantage of expressions and formatting options for datetime, currency, and custom formats. This feature extends the support for headers and footers, providing users with more flexibility and control over their PDF documents.
- Quality Fonts: The CraftMyPDF provides support for over 25 languages, allowing users to create high quality PDFs in a variety of languages. This is particularly useful for users who need to create PDFs in languages other than English.
- Whitelabel PDF Template Editor: The CraftMyPDF whitelabel PDF template editor is a cost-effective and seamless way to generate PDF documents. It gives users more liberty to manage their documents while also reducing your development costs.
If you need to generate documents directly from your own application instead of relying on browser automation, the PDF generation API provides a template-based approach for creating PDFs at scale while also supporting no-code platforms such as Make.com and Zapier.
2.1 Generate Packaging list PDF
Now we are going to see how we can generate a packaging list with Node.js and CraftMyPDF. It’s very easy to do it with CraftMyPDF. You just need to follow these steps:
2.1.1 Sign up at CraftMyPDF
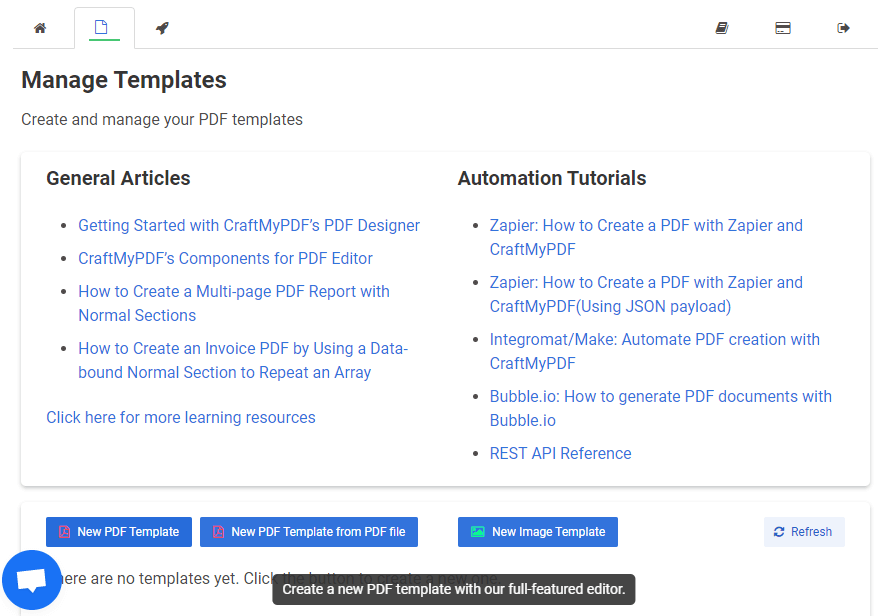
Go to the CraftMyPDF website and sign up for a free account.
After signing up, click on “Manage Templates” at the top and then “New PDF Template” at the bottom to create a new PDF template.
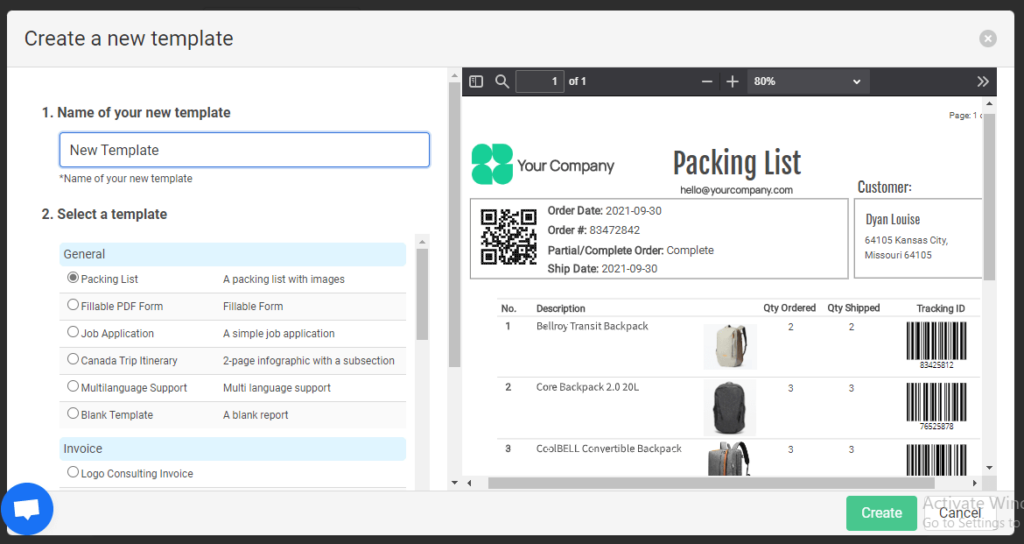
2.1.2 Create a new PDF template
After that, give a name to your new template and select a predefined template to start with. For this example, we are going to use the “Packaging List Template.” Then click on “Create.”
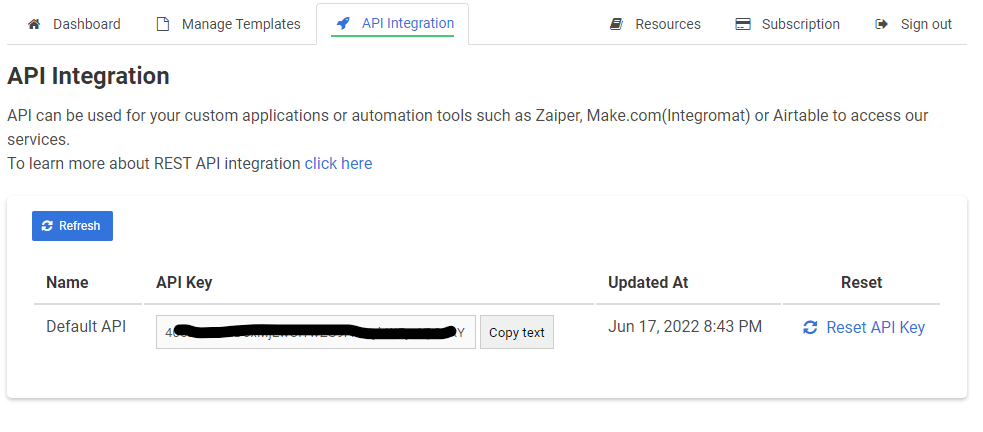
Now you can see the template in your dashboard with a template ID. Copy the template ID and go to the API Integration tab.

2.1.3 Create an API Key
Now copy the API Key. We will need that when we make the API call.
2.1.4 Writing the code to generate PDF
Now everything is ready and we can start making the API calls. For this, create a new Node.js project and install the request module using the below command:
npm i request Next, create a new JavaScript file with the name ‘generate-package.js’ and add the below content to that file:
var request = require('request');
var options = {
  'method': 'POST',
  'url': 'https://api.craftmypdf.com/v1/create',
  'headers': {
    'Content-Type': 'application/json',
    'X-API-KEY': 'YOUR_API_KEY'
  },
  body: JSON.stringify({
    "data": {
      "order_number": "232467",
      "order_date": "2022-09-30",
      "ship_date": "2022-09-30",
      "currency": "USD",
      "company_name": "ProCase Owl",
      "email": "hello@procase.io",
      "customer_name": "Jockel Nora",
      "ship_to": "Orsis Pte Ltd",
      "ship_to_address": "7588 Tanglewood St,",
      "ship_to_address2": "La Puente, CA 91744",
      "ship_to_address3": "64105",
      "is_partial_order": false,
      "items": [
        {
          "tracking_id": "567246",
          "description": "City Pouch",
          "qty_ordered": 2,
          "qty_shipped": 2,
          "image_url": "https://craftmypdf-upload.s3-ap-southeast-1.amazonaws.com/3e9/94501718-6376-4f6e-aec1-ba37a121a255.png"
        },
        {
          "tracking_id": "34572",
          "description": "Leather briefcase 18 Inch Laptop",
          "qty_ordered": 3,
          "qty_shipped": 1,
          "image_url": "https://craftmypdf-upload.s3-ap-southeast-1.amazonaws.com/3e9/aa6ee876-7785-472c-a679-aa31af73faa6.png"
        },
        {
          "tracking_id": "68367",
          "description": "CoolBELL Sling Mini",
          "qty_ordered": 3,
          "qty_shipped": 3,
          "image_url": "https://craftmypdf-upload.s3-ap-southeast-1.amazonaws.com/3e9/b8a15c92-8d9e-4263-81dd-a4edb6ee029a.png"
        }
      ]
    },
    "template_id": "YOUR_TEMPLATE_ID",
    "export_type": "json",
    "expiration": 60,
    "output_file": "output.pdf",
    "is_cmyk": false,
    "image_resample_res": 600
  })

};
request(options, function (error, response) {
  if (error) throw new Error(error);
  console.log(response.body);
});
Add your API key and Template ID and run the application using the below code:
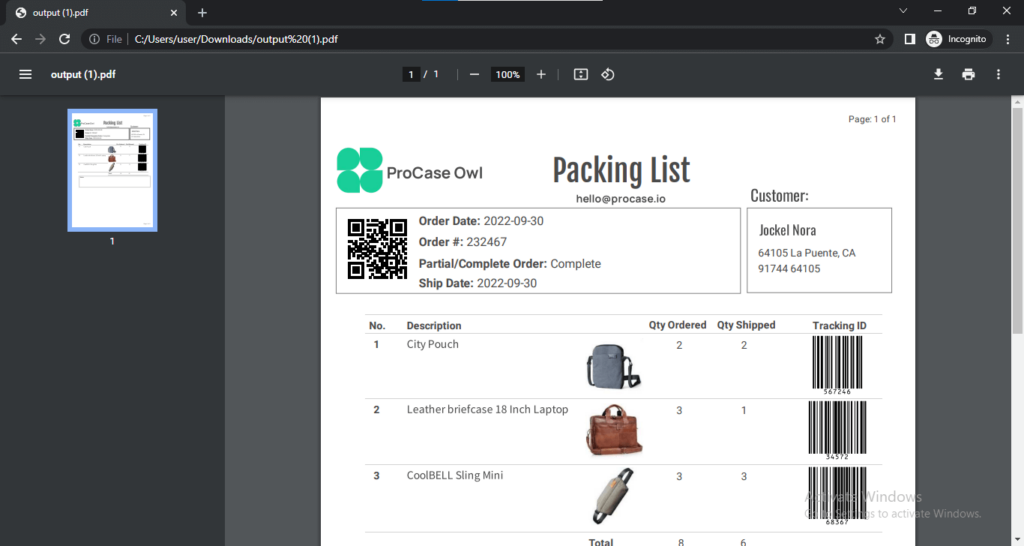
node generate-package.jsAfter running the code, you will get the link of the generated PDF as an output.
3. Conclusion
In this article, we learned how to create PDF from HTML with Puppeteer and Node.js. We first installed Puppeteer and then ran a script to convert a HTML file to PDF. We saw that Puppeteer is a powerful tool that can make our lives much easier when it comes to creating PDFs from HTML.