Bubble is a popular no-code platform that makes it easy to create web applications without having to write any code.
However, manipulating JSON in Bubble can be a daunting task, that’s why we created a Bubble plugin for you to generate PDFs as well as manipulate JSON.

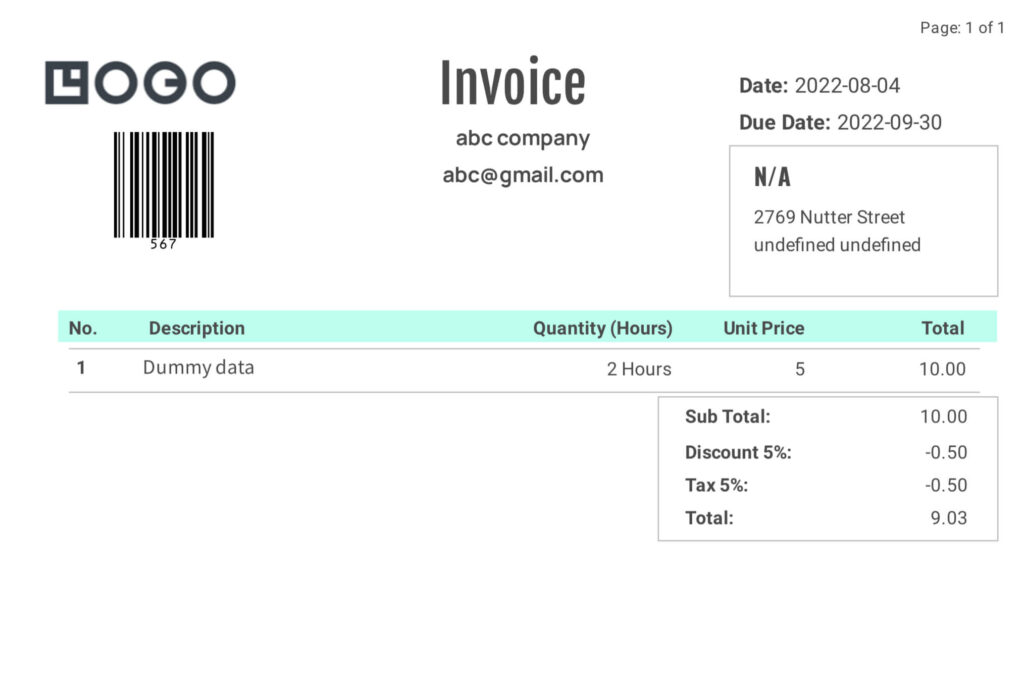
In this tutorial, we will create line items for an invoice template.
An invoice is a document that itemizes and records a customer’s purchase and typically includes shipping and billing information. The individual billable items are line items that normally represent in an array.
The takeaway of the tutorial is to build JSON with our Bubble plugin actions Thing(s) to JSON and Build JSON for complex JSON that consists of line items(an array). Then, the JSON will be used for generating the dynamic PDF documents.
Let’s get started!
Note: If you are looking for something simple such as
– Creating PDFs,
– Save the PDFs into your database or ,
– Attach the PDF in your email action
click here for a simple tutorial
If you simply need to create professional invoice PDFs without building a Bubble application, you can start with our invoice maker. It’s a quick no-code option for generating invoice PDFs, while the rest of this guide focuses on automating invoice creation within Bubble.io.
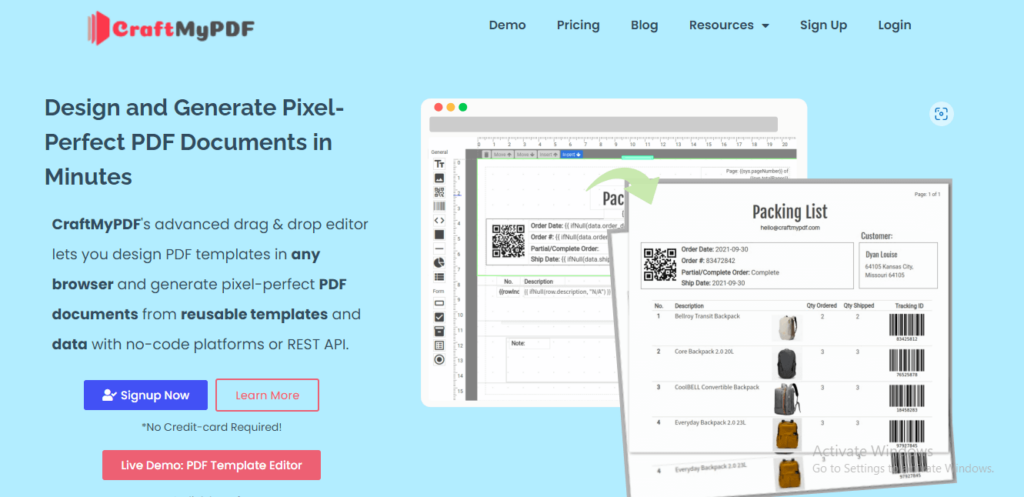
1. Setting up CraftMyPDF
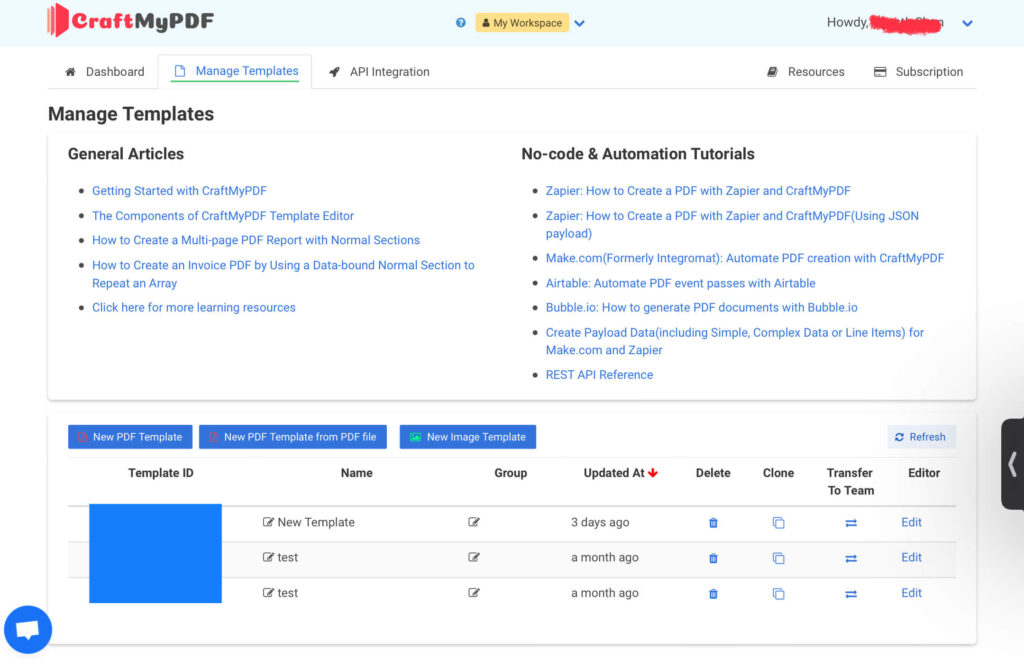
First, we need to create a PDF template. To do this, go to the CraftMyPDF website and create a free account. After creating the account and signing up, you’ll be redirected to the dashboard.
Navigate to the Manage Template page, and click on the “New PDF Template” button to create a new PDF template.
Now you have to select a template from the list of pre-built templates. For this example, we are going to use the Simple Invoice Template, but you can choose any template you want.

After selecting the template, give it a name and click on the “Create” button.
If you’d like to build your own document layout instead of starting with a pre-built template, the template maker provides a drag-and-drop editor for creating reusable PDF templates that can be customized for invoices, reports, certificates, and other business documents.
Once the template is created, navigate to the Manage Template page and copy the Template ID. That’s it! Now we can start working on our app.
2. Getting Started with Bubble.io
If you’re not familiar with Bubble.io, it’s a low-code platform that lets you build web applications without having to write any code. And best of all, it’s free to use!
There are many benefits of using Bubble.io to create invoices in PDF format with line items.
First, it’s a very user-friendly platform, so you don’t need any coding skills to use it. Second, it’s very quick and easy to create apps using Bubble.io.
And lastly, it’s a very cost-effective solution since you don’t need to hire a programmer to create the apps for you.
2.1 Create a Bubble account
If you don’t have a Bubble.io account yet, you can create one for free by going to their website and clicking on the “Get started” button.
Once you’ve logged in, you’ll be redirected to the dashboard. To create a new app, click on the “Create new app” button.
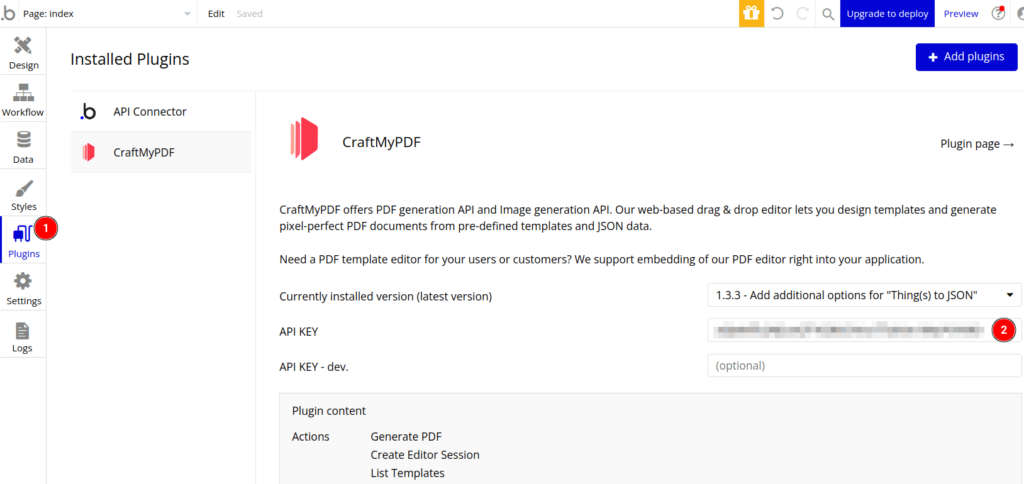
Now that you have a new app, you need to install the CraftMyPDF plugin. To do that, go to the “Plugins” tab and search for “CraftMyPDF“. Once you’ve found it, click on the “Install” button.
2.2 Setting up API Key for CraftMyPDF plugin
In your app, navigate to the CraftMyPDF plugin and paste the API key.
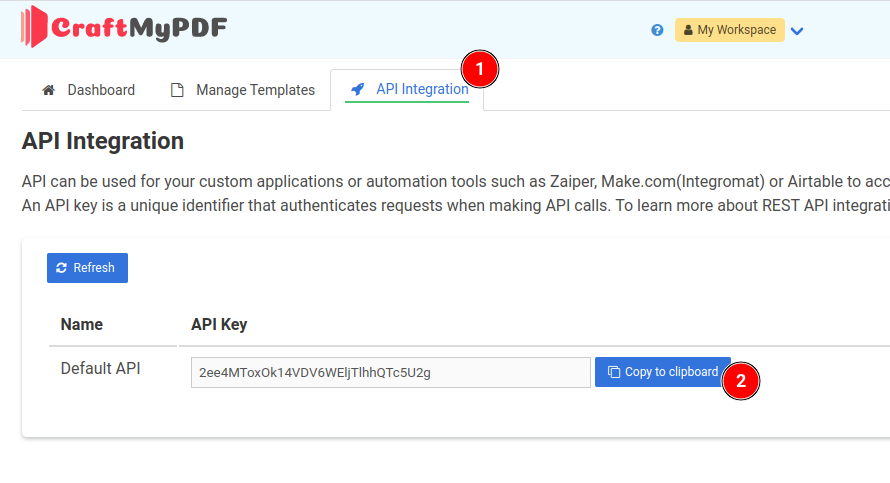
To obtain the CraftMyPDF API, log in to CraftMyPDF and click on API Integration Tab and click on Copy API Key button.
Now that we have everything set up, we can start creating our app.
2.3 The design of the Bubble app
In our app, we are going to use 8 elements: 6 multiline text fields and 2 buttons.
Multiline Textfield 1: This text field is used to take the number of units as input from the user.
Multiline Textfield 2: This text field is used to take total cost as input from the user.
Multiline Textfield 3: This text field is used to take the description text as input from the user.
Multiline Textfield 4: This text field is used to take the quantity number as input from the user.
Multiline Textfield 5: This text field is used to take the Invoice number as input from the user.
Multiline Textfield 6: This text field is used to take the due date as input from the user.
Button Add Data: This button is used to add the user-entered data to the line items database.
Button – Generate PDF: This button is used to create a PDF from the database data.
Click on the Design tab in your Bubble app and create all the above elements as the following screenshot:

Here each input field will be a separate line item on the PDF invoice. You can add as many fields as required in your PDF.
2.4 Add line items to the database
This step is to save the line item data into the database entered when clicking the Add Data button.
Click on the Button Add Data and click on the “Start/Edit Workflow” option to start creating a new workflow.
Since we want the data of the Textfield 1, 2, 3 & 4(Units, Total, Description & Quantity) to be stored in the database whenever the user clicks on the button, we’ll need to add a “Line Items” element.
To do this, click on the “Click here to add an action…” button and select “Data (Things)” and then click on the “Create a new thing” button.
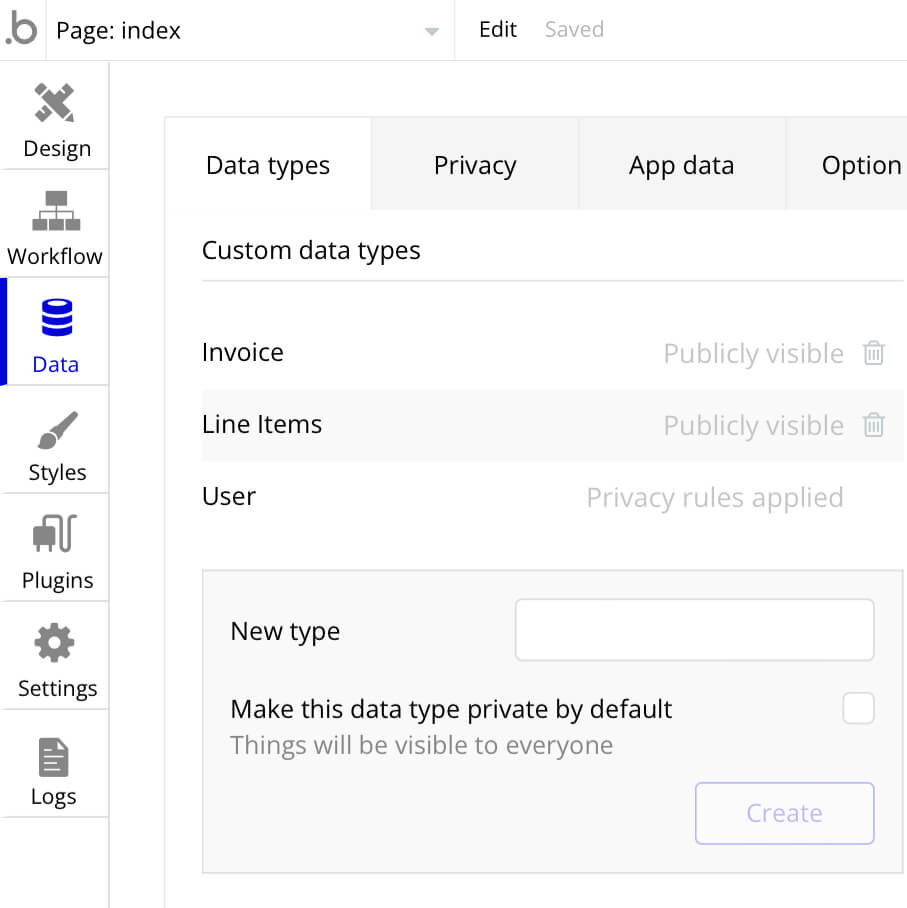
It will open a new pop-up. In that pop-up, in the “Type” section, create a new type named “Line Items”.
It will create a new table in your database with the name “Line Items”.
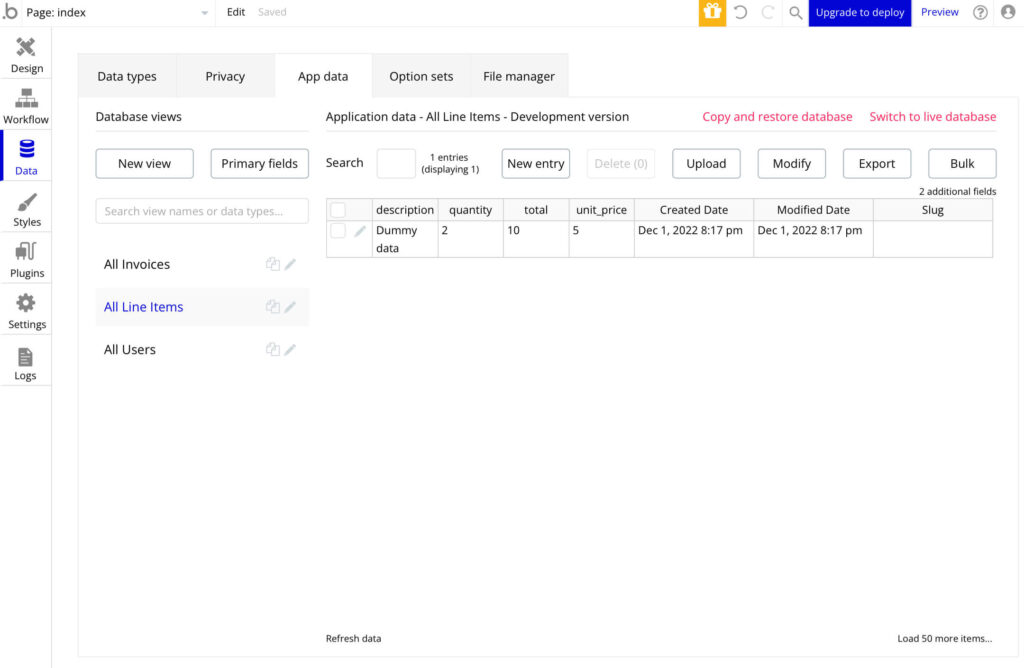
After that, start adding fields that are required in your PDF. You can add as many fields as required in your PDF. For this example, we are using only four fields for our “items” JSON.
To add the fields, click on the “Set another field” button. On the field name text field click on the “Create a new field” button.
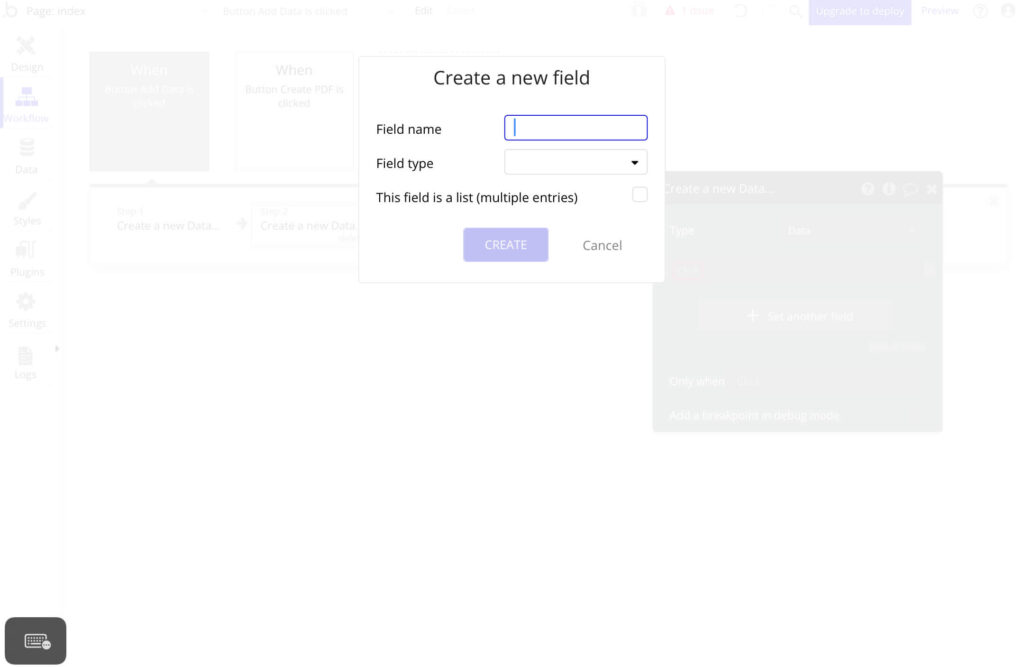
Then give a name to your field and select a data type. This will create a new field in your “Line Items” table.
Now, set the value of the Multiline Textfields on those fields.

2.5 Build JSON and Generate PDFs with CraftMyPDF
This step is to build JSON and generate PDFs with the CraftMyPDF plugin when the Generate PDF button is clicked.
First, click on the Button Generate PDF and click on the “Start/Edit Workflow” option to start creating a new workflow.
i. Thing(s) to JSON action for line items JSON
Before building the complete JSON, we’ll first need to convert the line items from the database to JSON.
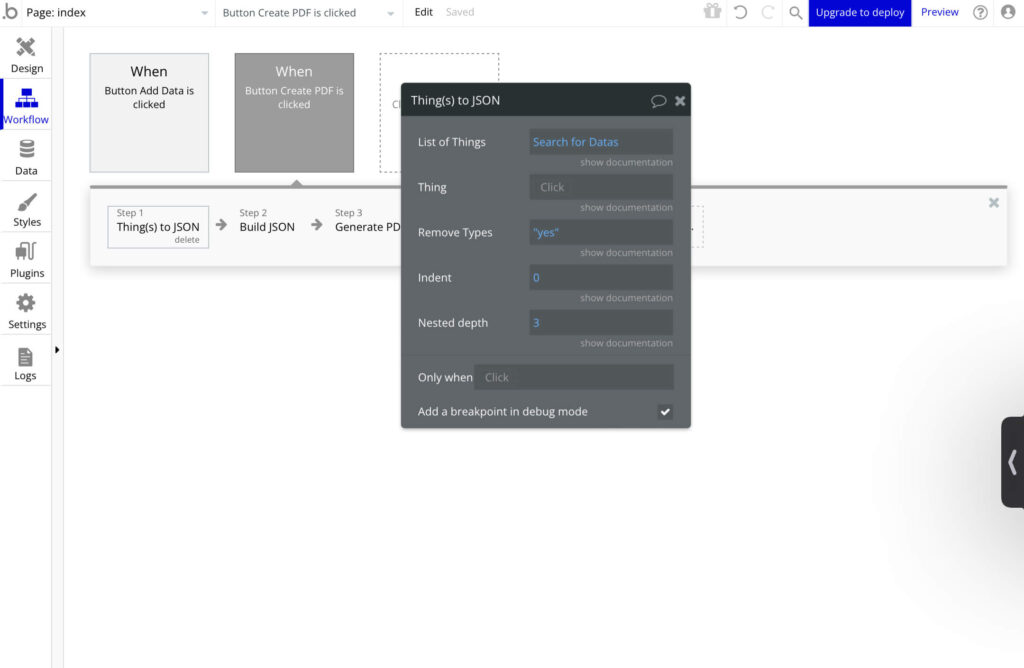
To do this, click on the “Click here to add an action…” button to add a new action. Go to “Plugins” and select the “Thing(s) to JSON” option.
The action Thing(s) to JSON action is used for converting things(list of object) or thing into JSON.
A new pop-up will appear. Here you can pass your “Thing” or “List of Things”.
The property “List of Things” and “Thing” are mutually exclusive; either use “List of Things” for an array or “Thing” for an object. If both fields are given, it’ll use “List of Things”.
For this example, we will use “List of Things”. In the “List of Things” section, select “Do a search for” and select your “Line Items” database.
Optional: On the “Remove Types” field, select “Yes”. This will remove the data type from the field name.
That’s it! It’ll create a JSON for our “items” field.
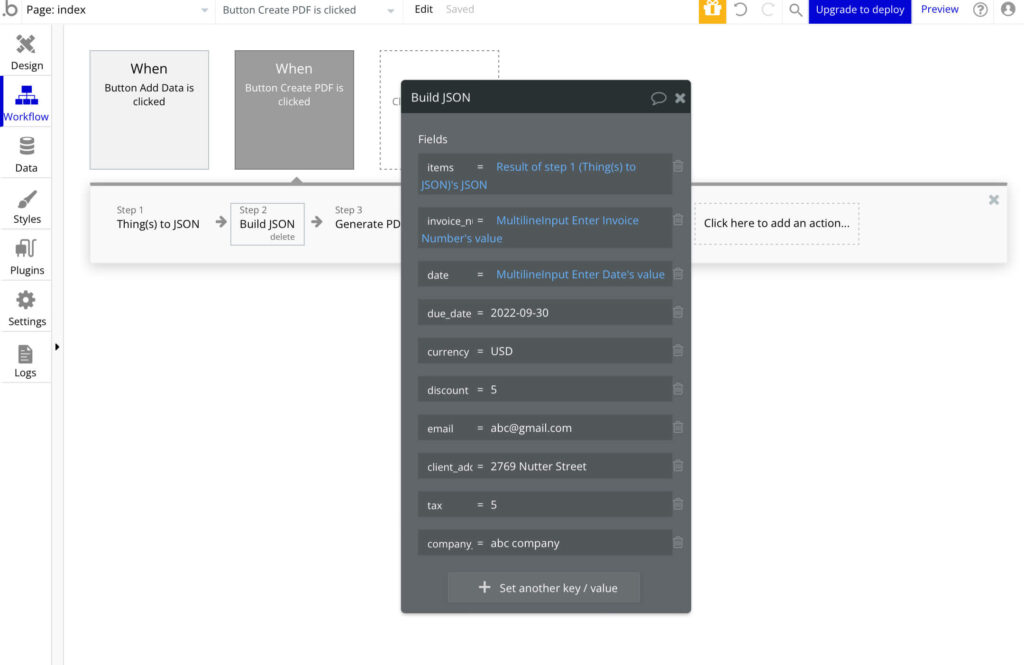
ii. Build JSON action for the final JSON
This step is to build the final JSON and include properties like invoice numbers, due date, currency and etc, and most importantly the line items JSON that were built in the previous step.
Now create a new action and select “Build JSON” action from the “Plugins” section.
The action Build JSON is to build JSON from the provided keys, values, and sample JSON.
In the Build JSON action dialog, you can add fields that your PDF requires like invoice_number and date. After that, add the values from the Multiline text fields to those fields.
Also, create a new field with the name “items” and with the value of the data returned from the “Things to JSON” action.
In the “Sample JSON” section, paste the sample JSON data.
Why sample data is important?
The sample JSON will be used to identify the data types of the new JSON fields. If no data type is provided, the “String” datatype will be used.
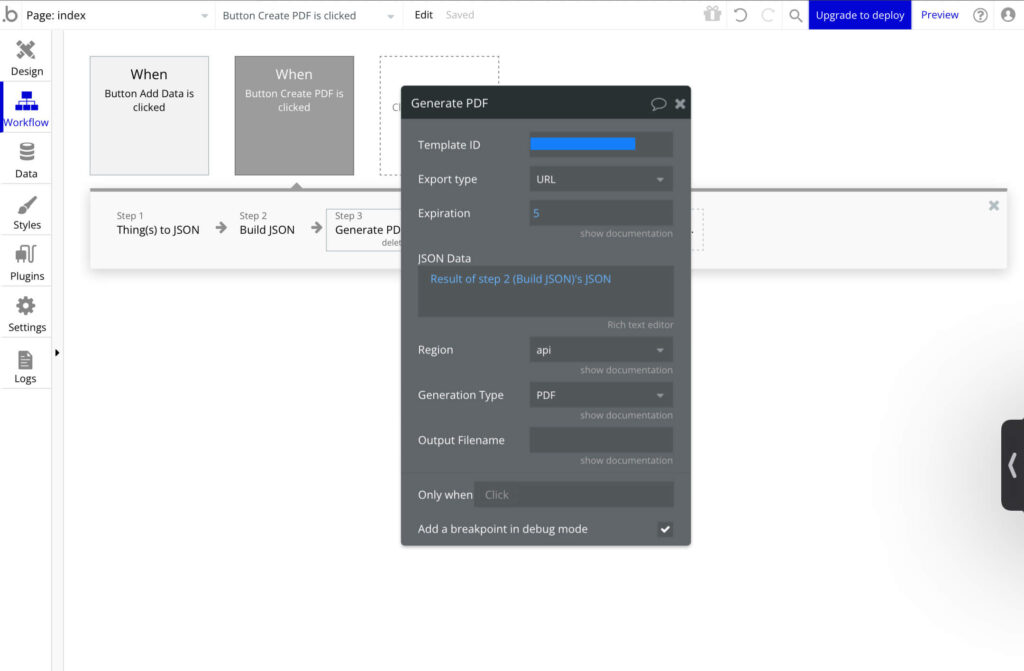
iii. Create PDFs with Generate PDF action
After the JSON has been built, we create a new action and select the “Generate PDF” action from the “Plugins”.
If you’re encountering issues with generating PDFs, please check both the Status and Message properties of the Generate PDF action for more information.
Enter the Template ID and, in the “JSON Data” section, enter the data received from the “Build JSON” action.
2.6 Setting up send email action(Optional)
Now our PDF is ready, so let’s send this PDF through mail.
For that, create a new action and select the “Send Email” from the “Email” section.
Enter the email ID and the subject and, in the “Body”, enter the PDF URL received from the previous output.
That’s it! Our app is created. We just added the description and quantity field but you can add the other fields similarly.
While this tutorial focuses on automating invoice generation with Bubble.io, you may also find our receipt maker tool useful for creating professional receipts without building a workflow. It’s a handy option for businesses that need both invoices and receipts as part of their document process.
3. Conclusion
In this article, we have shown you how to create invoices in PDF format with line items using Bubble.io.
We hope you found this article helpful and that you will be able to use Bubble.io to create invoices in PDF format with line items.