In one way or another, in any business, there is a need to generate an invoice. This is why it’s important to resort to a method that can make your business more efficient and convenient.
With PDF invoices, it’s easier to send invoices directly to clients without needing paper copies, or the fear of your invoices being altered by an unauthorized person. It’s also easy to track invoices, follow up with clients, and organize and streamline your company’s processes.
If you also need to issue proof of payment after an invoice has been settled, you can use our free receipt maker to create professional receipts online in just a few clicks.

In this article, I would be showing you how to generate PDF invoices with Zapier and also help you understand the benefits of doing this. Let’s get to it!
If you need to quickly create an invoice before automating your workflow, you can use our online invoice generator to generate professional invoices without any setup.
1. What is an Invoice?
An invoice is a business document that is issued to a customer after a service has been rendered. It’s sort of similar to a receipt but the only catch is it asks for payment after service. When running a business, issuing invoices is very important as it helps you organize and keep track of outstanding payments.
2. Benefits of generating invoices with Zapier
Zapier is a no-code tool that helps you automate your workflow easily. Here are some of the benefits of generating invoices with Zapier.
- Automation of Invoicing Process: Zapier allows for easy automation by using a set of triggers for triggering events. For example, let’s say you just completed a service for a client and there’s a need to generate an invoice, instead of manually creating the invoice, you can set up a trigger based on the client’s details.
- Integration with third-party tools: Zapier allows for easy integration with third-party tools like CraftMyPDF. This allows for the easy transfer of data from one application to another making the automation of invoicing process faster.
- Customization of Invoices: By creating a customized workflow with Zapier, businesses can customize their invoices using triggers. Let’s say you want to automatically send payment reminders to your client’s email. You can set up a “zap” that will automatically send out reminders to your clients. This way, you don’t have to manually send out payment reminders one by one.
3. Overview of the automation
We would be using CraftMyPDF and PayPal to automate PDF invoices. We will create a customized automated workflow that:
- Uses data generated from PayPal sales.
- Connects the data to CraftMyPDF.
- Creates the PDF invoices.
- Sends out an email as an attachment.
4. Steps to automate PDF invoices
Part 1. Steps on CraftMyPDF
1. Sign in/Register an account: If you have a registered CraftMyPDF account, then you can skip this step, but if you don’t, go to craftmypdf.com and click on Sign Up at the top of the page, follow the necessary details required to create your account.
2. Go to “Manage Templates”: After your registration is complete, you would be automatically directed to your dashboard. Go to Manage Templates which is located at the top of the page, on your “Manage Templates” page, select New PDF Template.
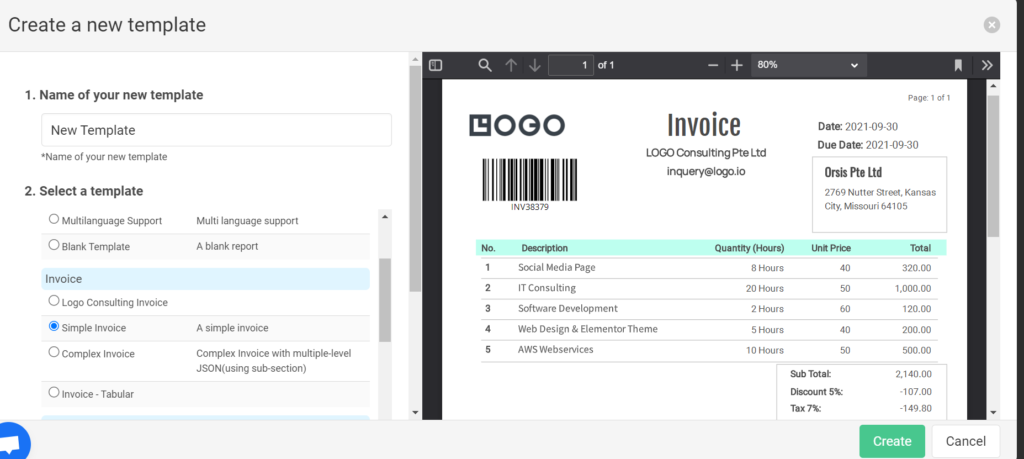
3. Click on “New PDF template”: After selecting “New PDF template”, you would be directed to a “Create a new template” page. To do this, three things are required:
- Name template: You can overwrite the name of your template or use the default.
- Select a template: In the dialog select “Simple Invoice” under the invoice category.
* Note that you can customize the invoice template to match your preferred design, but for this tutorial, we would be using the default template without any modification.
- Create a template: Click on the “Create” button template to generate the PDF invoice template.
4. Go to “API Integration”: You would be directed back to your “Manage Templates” page after creating your invoice template. Now, at the top of the page, click on “API integration”. Copy the API key from the API Integration page to your clipboard. This is required to connect CraftMyPDF to Zapier.
Part 2. Steps on Zapier
1. Signup or create an account on Zapier: If you already have a Zapier account, then skip this step, but if you don’t, go to zapier.com and click on Sign Up at the top of the page, follow the instructions to create your account.
2. Create “Zap”: Click on the create “Zap” button at the top left of the page. You can change the Zap’s name from its default, “Untitled Zap,” to anything you choose. I renamed mine to “PDF invoices with PayPal”
3. Create a trigger: You need to proceed with a little caution at this stage. I’d be breaking down this step into phases, it’s really easy so don’t fret.
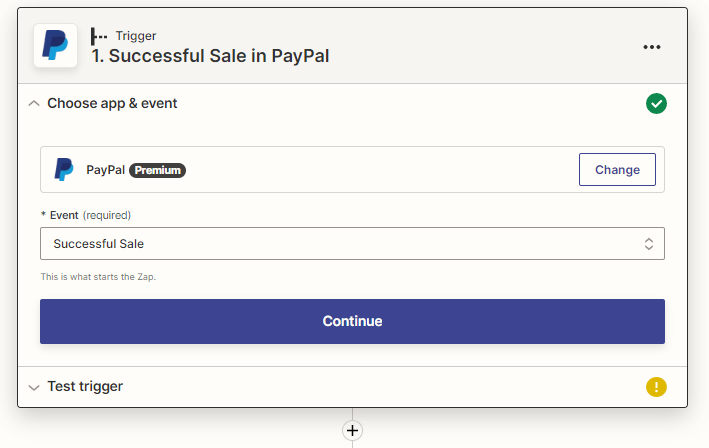
i. Choose an app: Type and choose PayPal as your app.
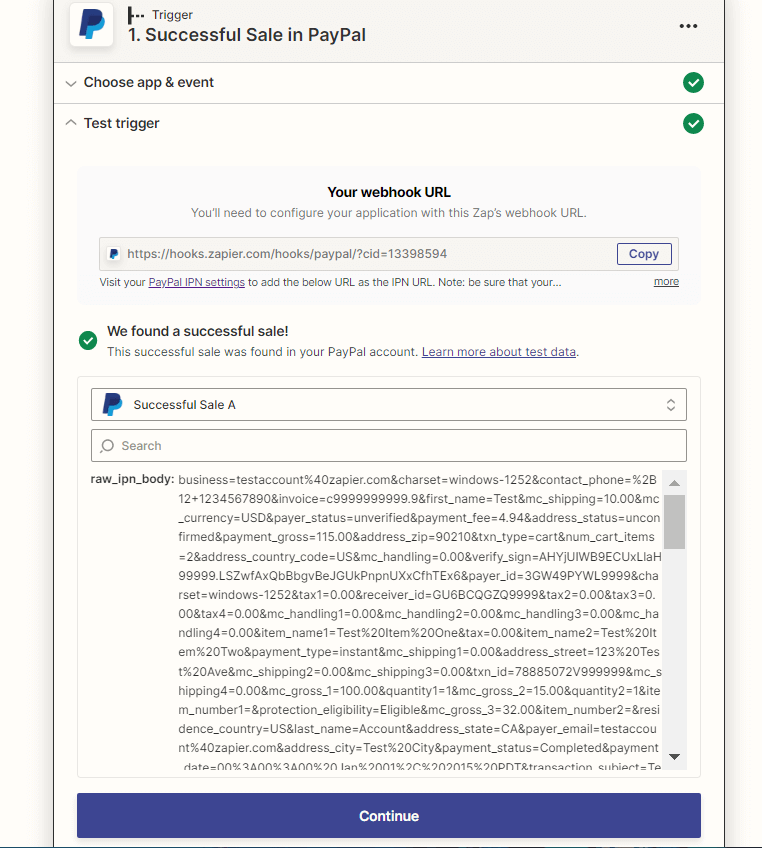
ii. Choose an event: Type “Successful Sale in PayPal” and select it, you might get two options, go with the first option and click on continue. You should get something similar to the screenshot below.
iii. Test trigger: We need to connect our PayPal account to Zapier so that we can test the trigger. You can do this using the following steps:
- Copy the webhook URL
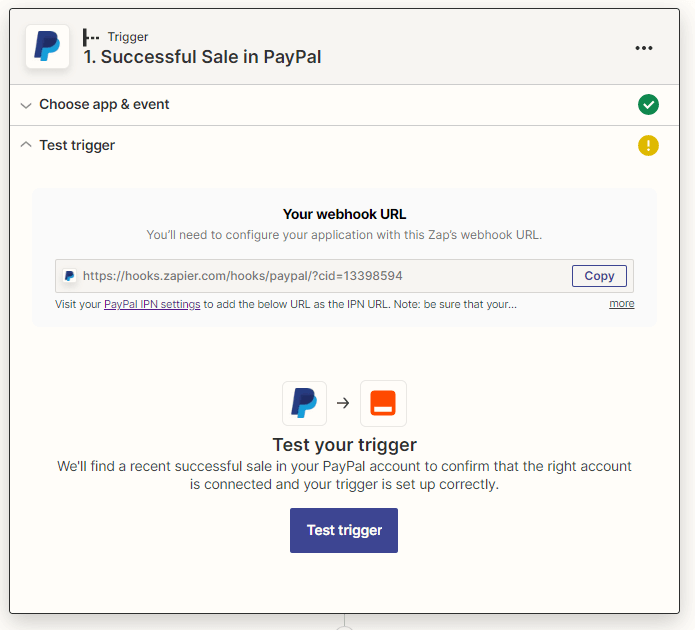
- Go to your PayPal IPN settings, paste your webhook URL in the Notification URL and enable Receive IPN messages. Click on “Save”, and you should get something similar to the screenshot below.

- Go back to Zapier and click on “Test Trigger”. You should get a successful sale
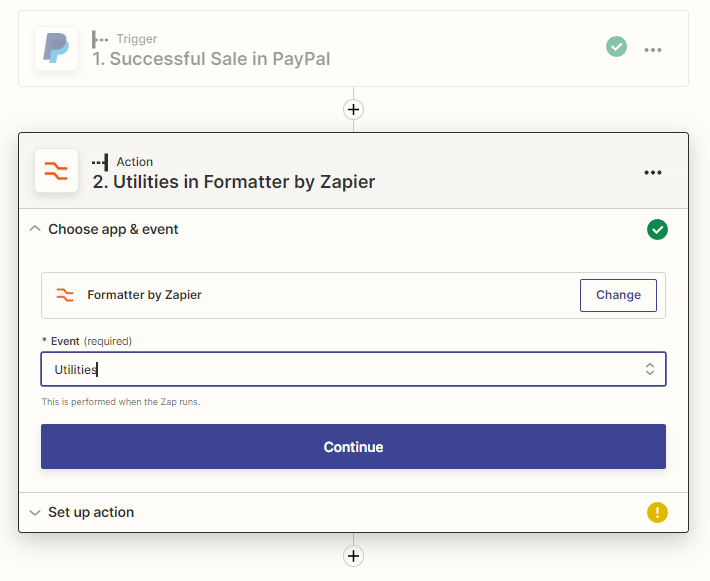
4. Format data: We would need to “Add a new action” to format our data so each field in the invoice can stand as a separate field. Here’s what you need to do:
i. Choose an app: Type and choose “Formatter by Zapier” as your app.
ii. Choose an action event: Type and choose “Utilities” as your action event.
iii. Transform: Under Transform, select Line Itemizer (Create/Append/Prepend)
iv. Line-item(s) Group Name: Click on Line-item(s) Group Name and name your set of lines to what you prefer
v. Line-item Properties: On the left-hand side, add the name of the property and on the right-hand side, add the data that was generated from the trigger. You can add as much data as you like but make sure the names of the data on the left and right are similar for clarity’s sake.
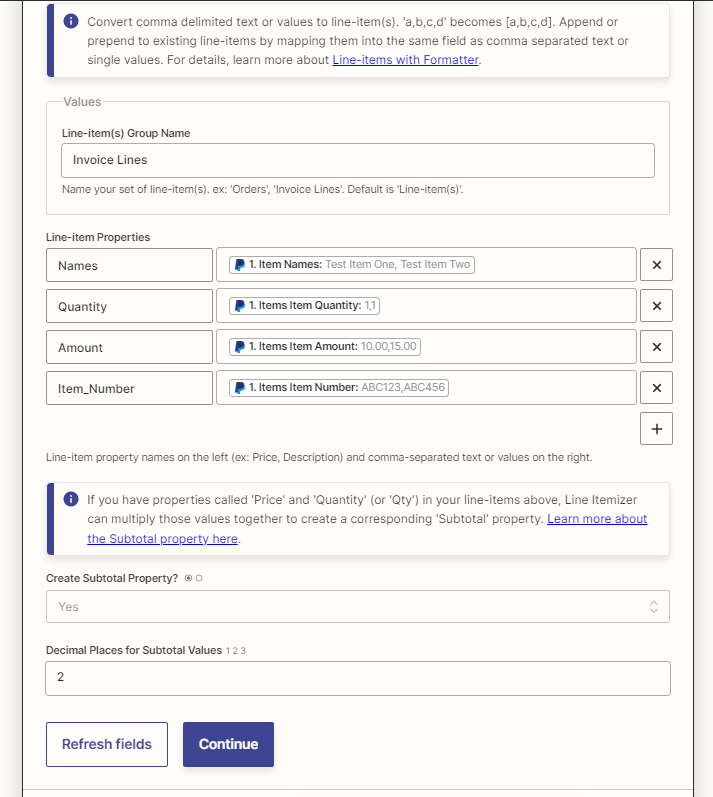
vi. Create Subtotal Property: Change the “Subtotal Property” to “Yes” because our invoice has values we can add or subtract. Click on “Continue”.
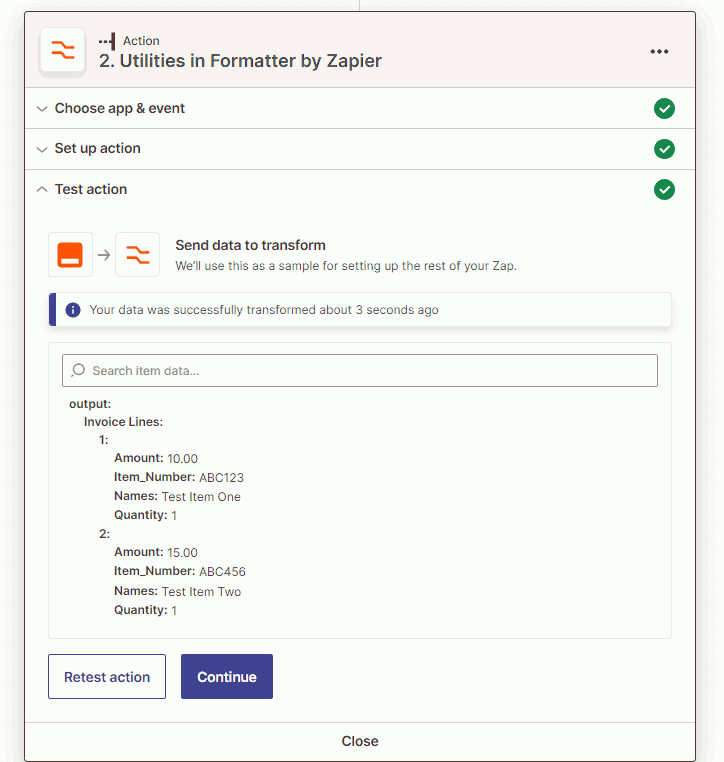
vii. Test Action: Click on the “Test Action” button. You should get a successful test.
5. Format date: We would need to format the date from PayPal and choose a format that would work best for our CraftMyPDF invoice. Here are the things you need to do:
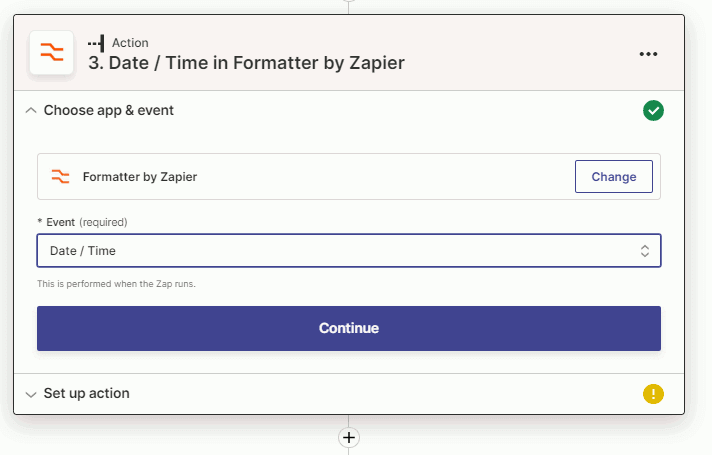
i. Choose an app: Type and choose “Formatter by Zapier” as your app.
ii. Choose an event: Choose “Date/Time” as your action event. Click on Continue
iii. Transform: Under Transform, select “Format”
iv. Input: Add the date input from your PayPal data
v. Format: Choose the MMMM DD YYYY format or any of your choice.
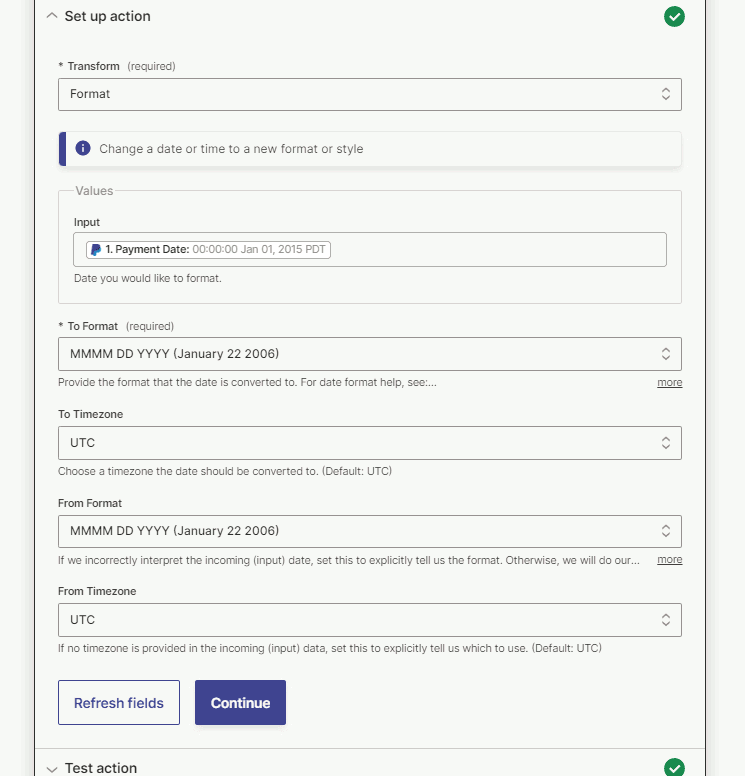
vi. Timezone: Choose your preferred time zone, I used the default timezone which is UTC. Click on Continue
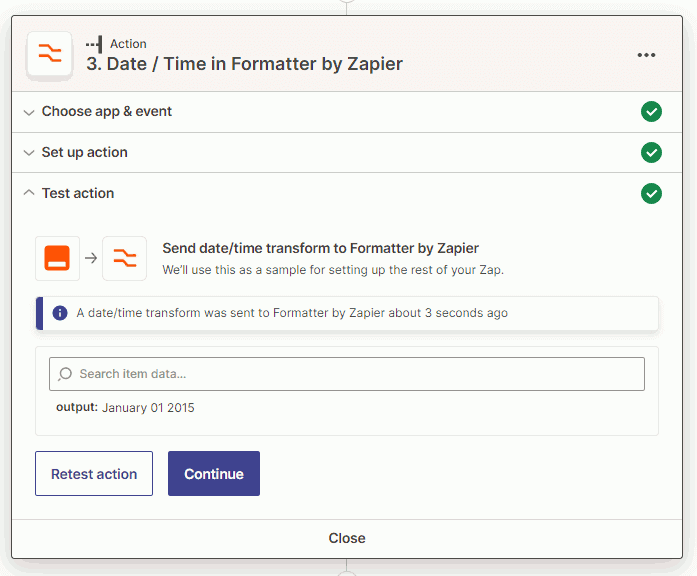
vii. Test Action: You should get a successful test.
6. Create an action “Create PDF”: We need to create an action to print out our PDF invoice with CraftMyPDF. Here are a few steps to take:
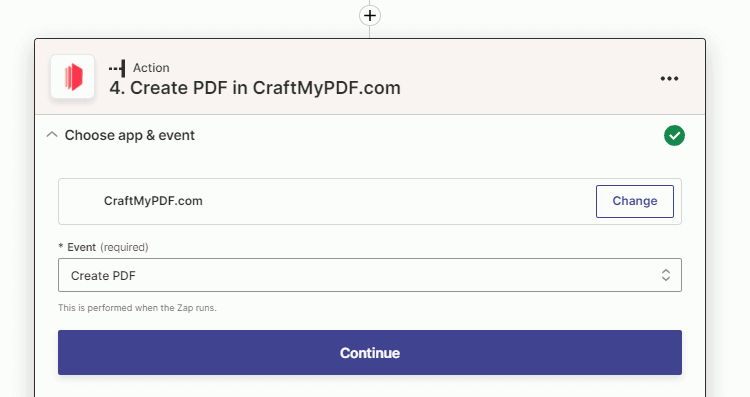
i. Choose an app: Type and choose “CraftMyPDF” as the app
ii. Choose an event: Choose “Create PDF” as the event.
iii. Choose an account: Link your CraftMyPDF account by following the steps.
You must link your account using the CraftMyPDF API key located in the “API Integration” section at the top of your CraftMyPDF page (this was copied earlier to your clipboard)
iv. Set up action: We would need to connect a few things:
- Region: Choose your preferred region, I used the default region.
- Template: Select the template (Invoice) we created earlier on CraftMyPDF
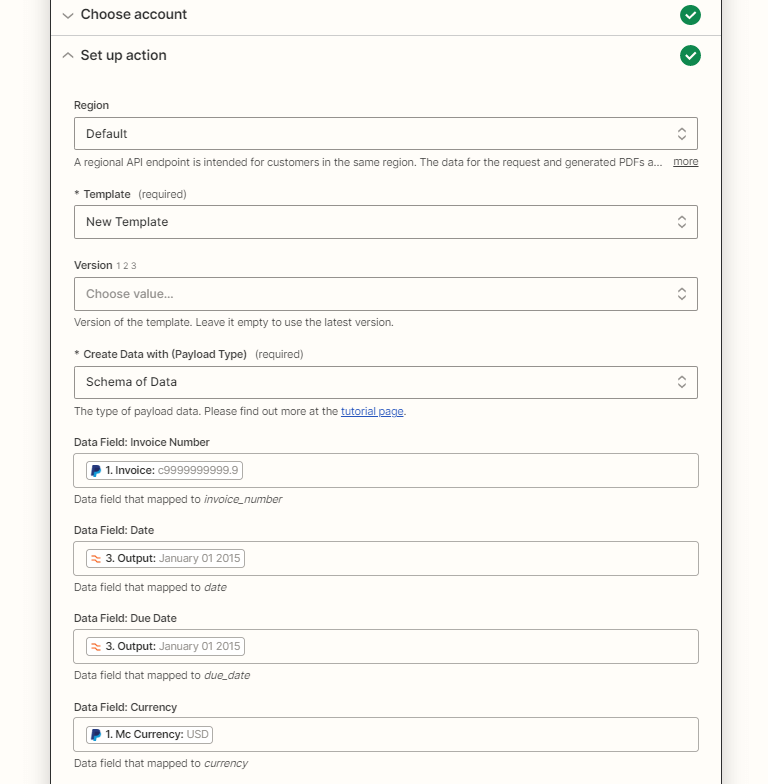
- Create Data with (Payload type): Select “Schema of data” as your payload type. This is because this payload type handles nested objects and arrays.
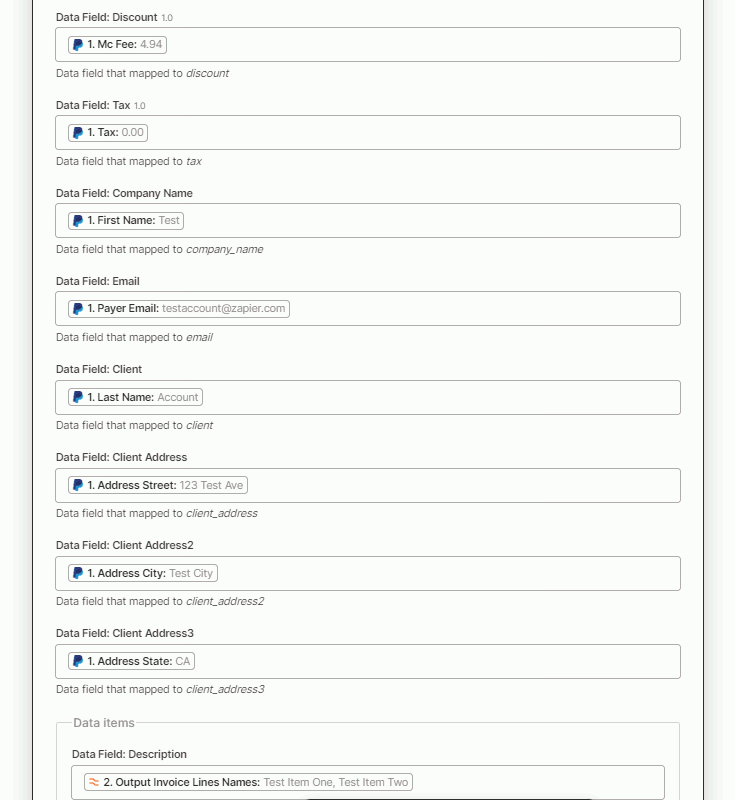
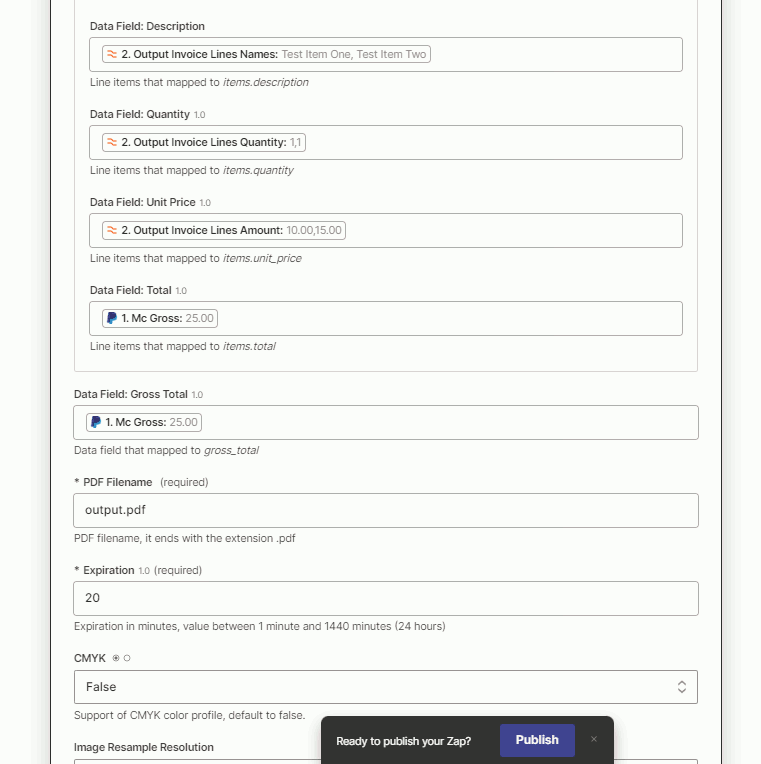
- Data Field: We’d be selecting our PayPal data for some of our data fields and formatted data for the dates and data items.
- Expiration: The default expiration time is 5 minutes, however, we can increase the expiration time. I increased mine to 20 minutes. Click on “Continue”
- Test Action: Click on “Test Action”. You should get similar results to the screenshot below.
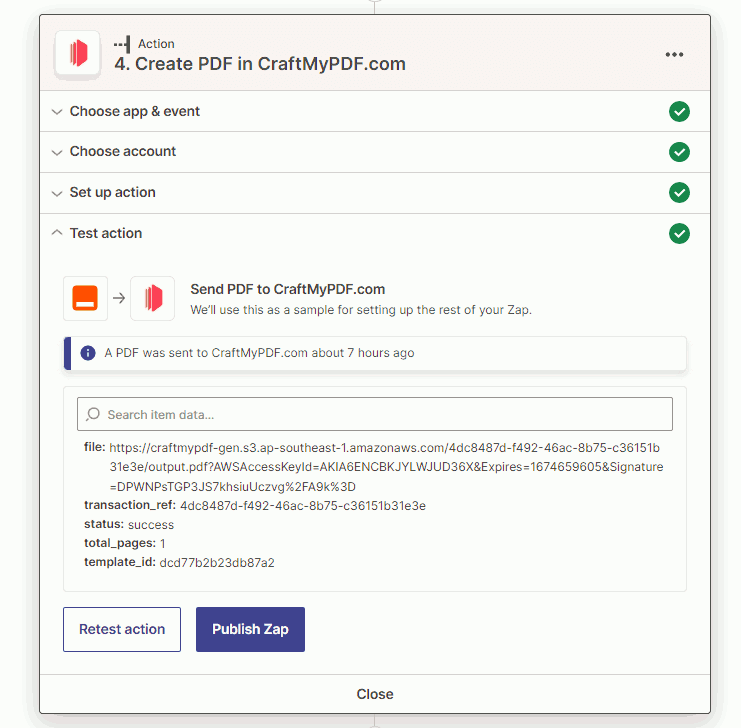
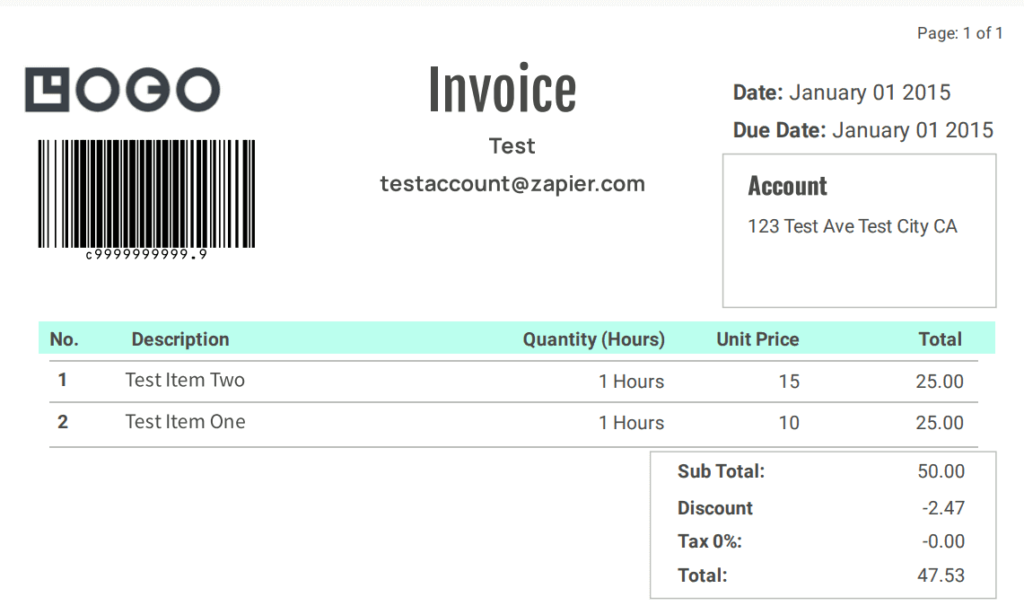
Copy the file link and paste it in your browser to download your PDF invoice. This is an example of the kind of PDF invoice you might get.
7. Send out an email as an attachment: With Zapier, it’s possible for you to automate the emailing process. You have the power to forward the PDF invoice directly to your mail as an attachment. Here are the steps you need to take:
i. Choose an app: Zapier supports thousands of products and services, so you have the privilege of choosing your preferred mailing app. I would be using “Gmail” in this example.
ii. Choose an event: Choose “Send Email” as your event cause the goal here is to send out an email.
iii. Choose an account: Connect your Gmail account by following the provided steps
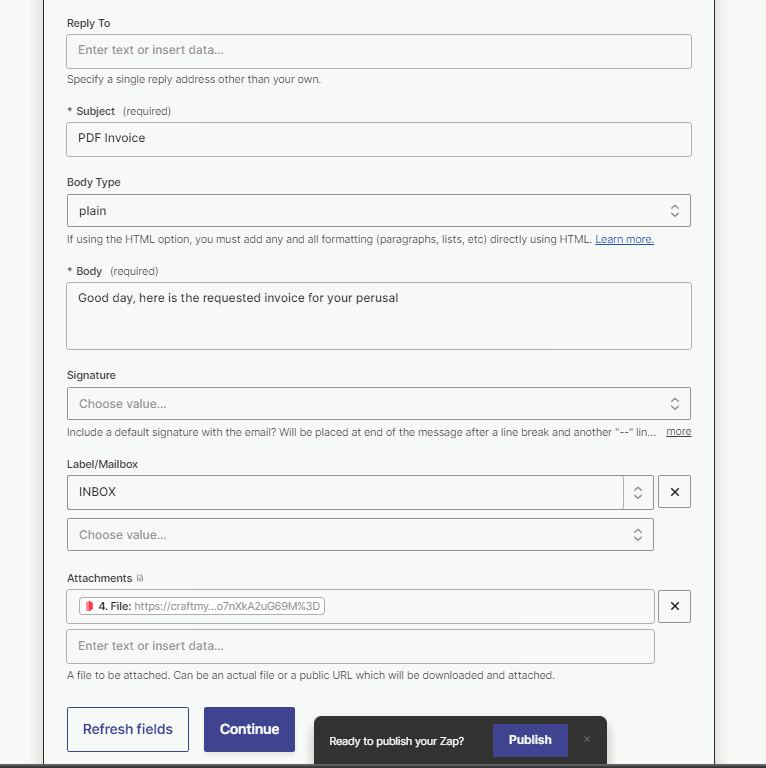
iv. Setup action: Input the required fields necessary to send out the email attachment.
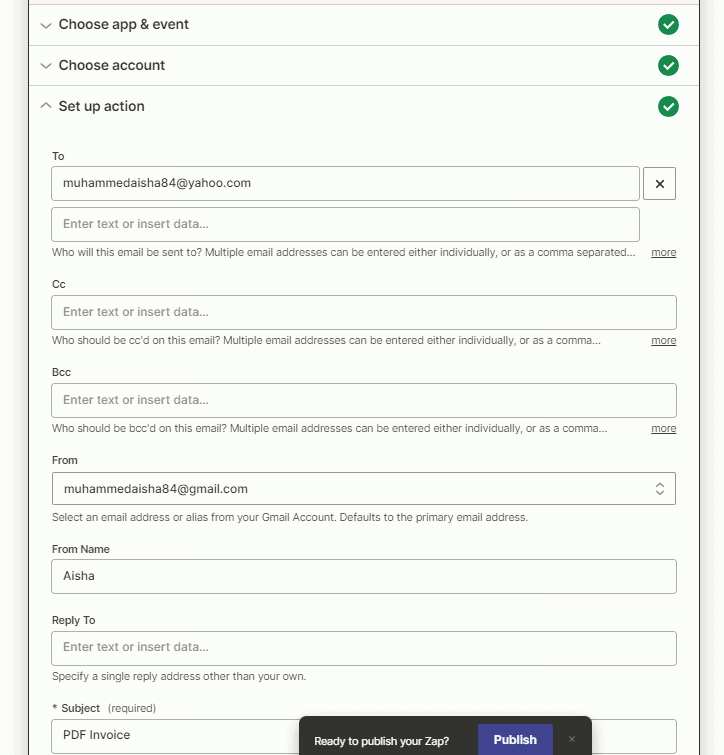
You may enter the fields such as,
- Who would the email be sent to, who do you want to copy?
- The subject of the email
- The body of the email
- What attachment do you want to send
And the list goes on. After you are done, click on “Continue”
v. Test Action: Click on “Test Action”, and you should get a message similar to the screenshot below.
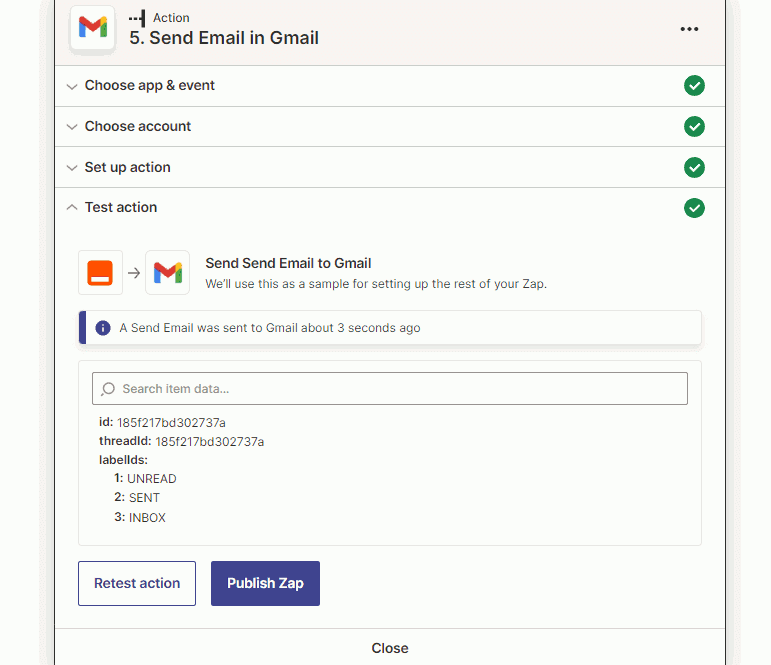
You can choose to Publish your Zap to kick off your automation!
5. Conclusion
To boost your company’s reputation in the business sector, it’s crucial to have efficient work processes. We all know that manually creating invoices can be hectic and sometimes take a chunk of our time, taking advantage of the automation process for generating invoices could help your business improve its workflow.
Zapier allows for easy automation and integration with third-party tools such as CraftMyPDf which makes it easy for users to connect their preferred applications and streamline the invoicing process as well as other processes like autogenerating shipping labels, banners, receipts, social media images, and so on.
This allows you to spend more time focusing on other business aspects. So why not give it a shot and avoid wasting time on repetitive tasks.?