1. Introduction
Ever scrolled through social media or browsed a website and noticed how some images just pop and grab your attention? Chances are, those images had text overlays. Adding text to an image isn’t just about making things look pretty—it’s a powerful way to communicate information quickly and effectively.

Think about it: a striking photo with a bold quote, a product image with key details, or even a simple background with an announcement. These overlays can transform a regular image into a compelling piece of content that stands out. Whether you’re creating promotional graphics, social media posts, or web banners, mastering this technique can seriously up your design game.
In this guide, we’re diving into two methods to overlay text on images:
- HTML and CSS with Puppeteer (Node.js): This method is a bit more hands-on and involves using good old HTML and CSS to position text over images. Then, we bring in Puppeteer, a super handy Node.js library, to automate the whole process. This way, you can generate and capture your designs like a pro. If you’re comfortable with coding, this method offers a lot of flexibility and customization.
- CraftMyPDF’s Image Generation API: Now, if coding isn’t really your thing or you just want a quicker solution, CraftMyPDF has got you covered. Their API is designed to make the process of generating images with text overlays a breeze. You can create templates and produce customized images without breaking a sweat. It’s perfect for no-code enthusiasts looking for an efficient and user-friendly tool.
We’ll walk you through both methods step by step, giving you all the details you need to get started. Plus, we’ll compare the pros and cons of using Puppeteer with HTML/CSS versus CraftMyPDF, so you can decide which approach suits you best.
By the end of this guide, you’ll have the skills to create stunning visuals that not only catch the eye but also convey your message loud and clear.
2. Using HTML and CSS with Puppeteer
Let’s dive into the nitty-gritty of using HTML, CSS, and Puppeteer to overlay text on images. We’ll walk through each step, from setting up your HTML structure to generating a polished image using Puppeteer. Ready? Let’s get started!
2.1 Introduction to HTML and CSS for Image Overlay
First, let’s cover the basics of using HTML and CSS to overlay text on an image. This technique involves using CSS properties to position text elements over image elements.
Here’s a simple example:
<!DOCTYPE html>
<html lang="en">
<head>
    <meta charset="UTF-8">
    <meta name="viewport" content="width=device-width, initial-scale=1.0">
    <style>
        .container {
            position: relative;
            width: 50%;
        }
        .image {
            display: block;
            width: 100%;
        }
        .overlay-text {
            position: absolute;
            top: 50%;
            left: 50%;
            transform: translate(-50%, -50%);
            color: white;
            font-size: 24px;
            font-family: Arial, sans-serif;
            text-shadow: 2px 2px 4px #000000;
        }
    </style>
</head>
<body>
    <div class="container">
        <img src="<https://images.unsplash.com/photo-1454496522488-7a8e488e8606?ixlib=rb-4.0.3&q=85&fm=jpg&crop=entropy&cs=srgb&dl=rohit-tandon-9wg5jCEPBsw-unsplash.jpg&w=1920>" alt="Background Image" class="image">
        <div class="overlay-text">Learn as if you were going to live forever. –Gandhi</div>
    </div>
</body>
</html>
In this example:
- The
containerclass is used to hold the image and the overlay text. - The
imageclass ensures the image takes up the full width of the container. - The
overlay-textclass positions the text in the center of the image usingposition: absolute,top: 50%, andleft: 50%. Thetransformproperty centers the text perfectly.
2.2 Setting Up Puppeteer
Puppeteer is a Node.js library that provides a high-level API to control headless Chrome or Chromium over the DevTools Protocol. It’s perfect for generating screenshots of your HTML/CSS creations.
Here’s how to get Puppeteer up and running:
Step 1. Install Node.js and npm
If you haven’t already, download and install Node.js from nodejs.org.
Step 2. Initialize a new Node.js project
mkdir puppeteer-project
cd puppeteer-project
npm init -y
Step 3. Install Puppeteer
npm install puppeteer2.3 Integrating HTML/CSS with Puppeteer (Node.js)
Now that we have Puppeteer installed, let’s write some code to load our HTML/CSS and take a screenshot.
Step 1. Create an HTML file (index.html)
<!DOCTYPE html>
<html lang="en">
<head>
    <meta charset="UTF-8">
    <meta name="viewport" content="width=device-width, initial-scale=1.0">
    <style>
        body, html {
            margin: 0;
            padding: 0;
            height: 100%;
            display: flex;
            justify-content: center;
            align-items: center;
        }
        .container {
            position: relative;
            width: 100%;
            height: 100%;
            display: flex;
            justify-content: center;
            align-items: center;
        }
        .image {
            width: 100%;
            height: 100%;
            object-fit: cover;
        }
        .overlay-text {
            position: absolute;
            top: 50%;
            left: 50%;
            transform: translate(-50%, -50%);
            color: white;
            font-size: 64px;
            font-family: Arial, sans-serif;
            text-shadow: 2px 2px 4px #000000;
        }
    </style>
</head>
<body>
    <div class="container">
        <img src="https://images.unsplash.com/photo-1454496522488-7a8e488e8606?ixlib=rb-4.0.3&q=85&fm=jpg&crop=entropy&cs=srgb&dl=rohit-tandon-9wg5jCEPBsw-unsplash.jpg&w=1920" alt="Background Image" class="image">
        <div class="overlay-text">Learn as if you were going to live forever. –Gandhi</div>
    </div>
</body>
</html>
Step 2. Create a Puppeteer script (index.js):
const puppeteer = require('puppeteer');
const fs = require('fs');
const path = require('path');

(async () => {
    const browser = await puppeteer.launch();
    const page = await browser.newPage();

    // Set the viewport to match the dimensions of the HTML content
    await page.setViewport({ width: 1620, height: 1080 });

    const htmlContent = fs.readFileSync(path.join(__dirname, 'index.html'), 'utf8');
    await page.setContent(htmlContent);

    // Wait for the image to load
    await page.waitForSelector('.image');

    await page.screenshot({ path: 'overlayed_image.png' });

    await browser.close();
    console.log('Screenshot taken and saved as overlayed_image.png');
})();
In this script:
- We use
fsto read the HTML content fromindex.html. page.setContent(htmlContent)loads the HTML into a new Puppeteer page.page.waitForSelector('.image')ensures the image loads before taking the screenshot.page.screenshotcaptures the page and saves it asoverlayed_image.png.
Step 3. Run the Puppeteer script:
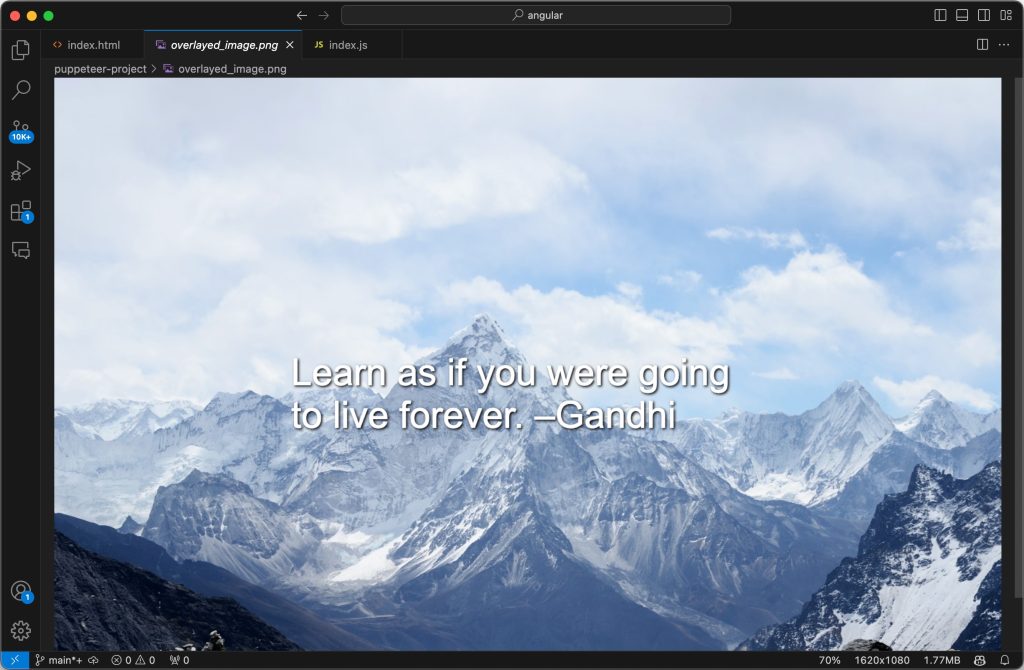
node index.jsThis command will run the script, and you should see a new image file, overlayed_image.png, in your project directory.
2.4 Generating and Saving the Image
Once you have your image generated, there are a few tips to ensure it looks great:
- Optimize image quality: Puppeteer allows you to set the quality of the screenshot (for JPEG format) and the resolution. You can tweak these settings to balance quality and file size.
await page.screenshot({ path: 'overlayed_image.jpg', quality: 80, fullPage: true });- File format considerations: Choose the right file format (PNG for higher quality and transparency, JPEG for smaller file size).
- Automate the process: You can set up a cron job or a server endpoint to automate image generation based on specific triggers or schedules.
By following these steps, you can easily create beautiful images with text overlays using HTML, CSS, and Puppeteer. This method provides a lot of flexibility and control, allowing you to tailor your designs to meet specific needs.
3. Using CraftMyPDF’s Image Generation API
In this section, we’ll explore how to use CraftMyPDF’s image generation API to overlay text on images.
CraftMyPDF is a versatile platform that supports both image and PDF generation through an API. It allows users to create high-quality graphics and documents with ease, making it an excellent choice for no-code developers and those who want to automate their design workflows.
Let’s go through each step in detail.
3.1 Setting Up Your CraftMyPDF Account
To get started with CraftMyPDF, you’ll need to create an account. Here’s how:
Step 1. Visit the CraftMyPDF website: Go to craftmypdf.com and click on the “Sign Up” button.
Step 2. Fill in your details: Enter your email address, create a password, and complete any other required fields.
Step 3. Verify your email: Check your inbox for a verification email from CraftMyPDF and follow the instructions to verify your account.
Step 4. Log in: Once your account is verified, log in to access the dashboard.
3.2 Creating an Image Template
Now that you have an account, let’s create an image template. This template will serve as the base for your image with the text overlay.
Step 1. After logging in, go to the “Manage Templates” tab in the dashboard.
Step 2. Click on “New Image Template”. 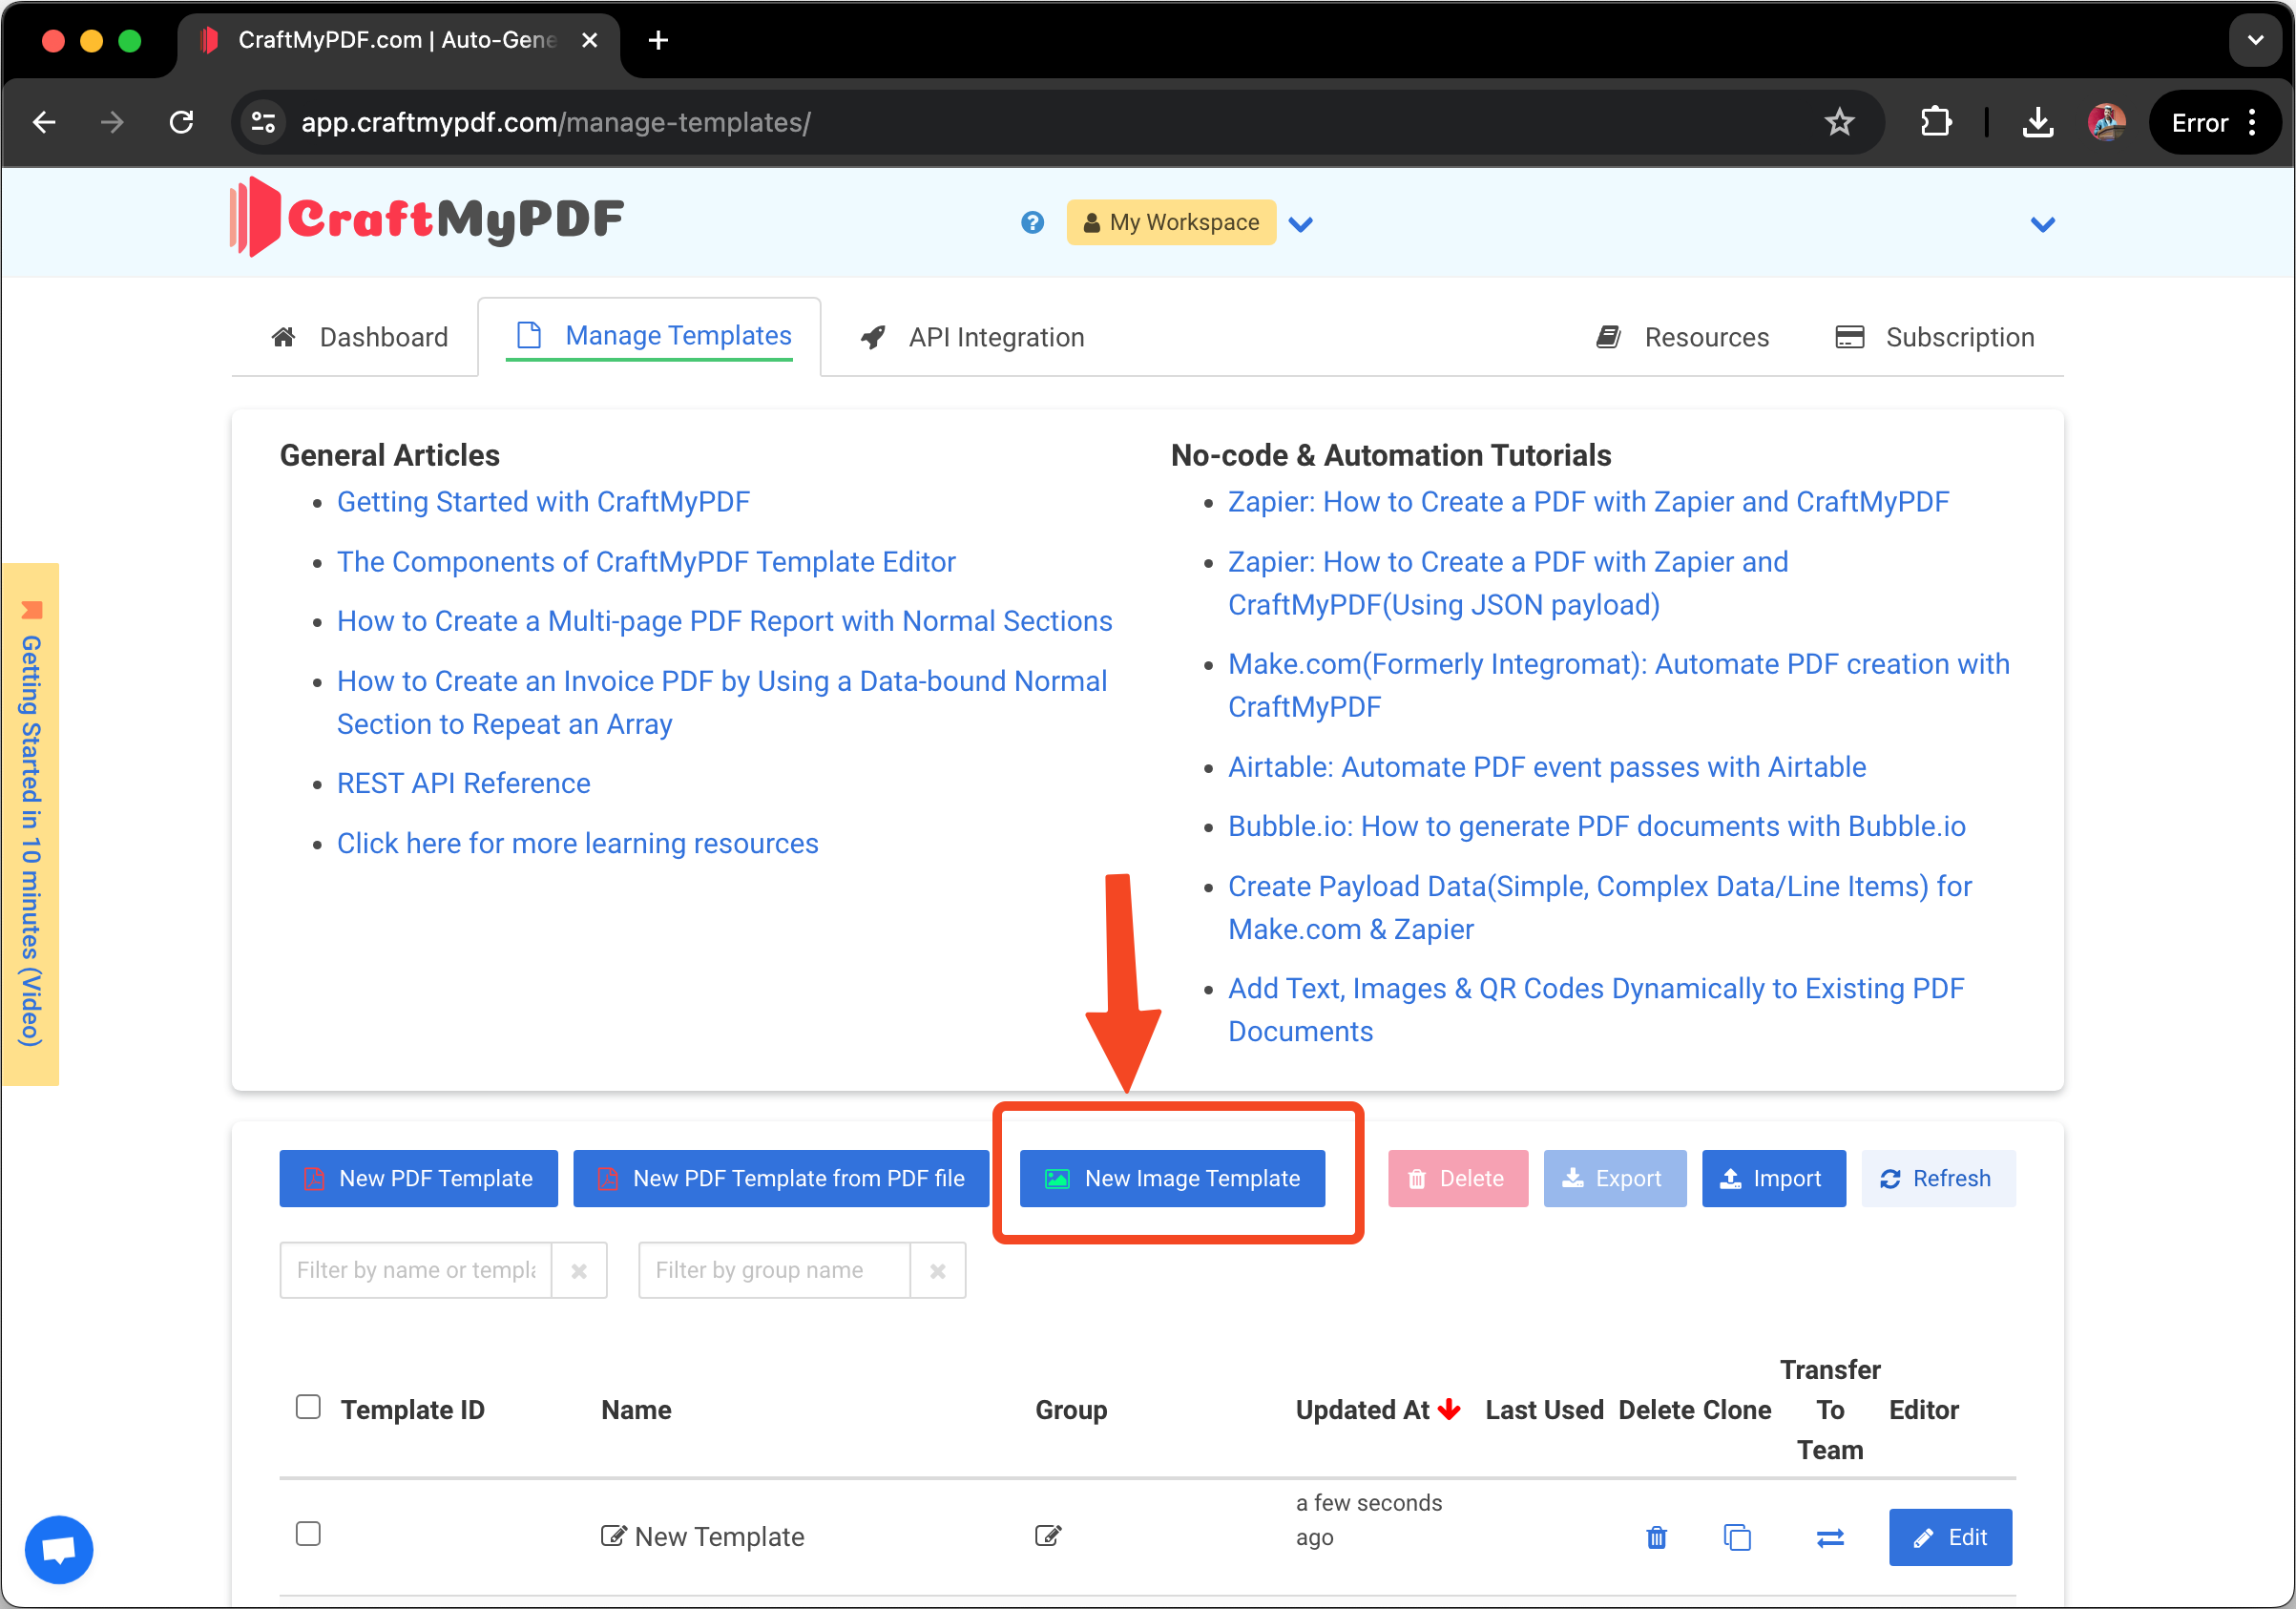
Step 3. In the sample library, select the “Sample – Instagram” template. This template is designed for creating Instagram-style images.
Step 4. Replace the background image with the one you want to use. For this, click on the background image and change the Src property url with this image from Unsplash. 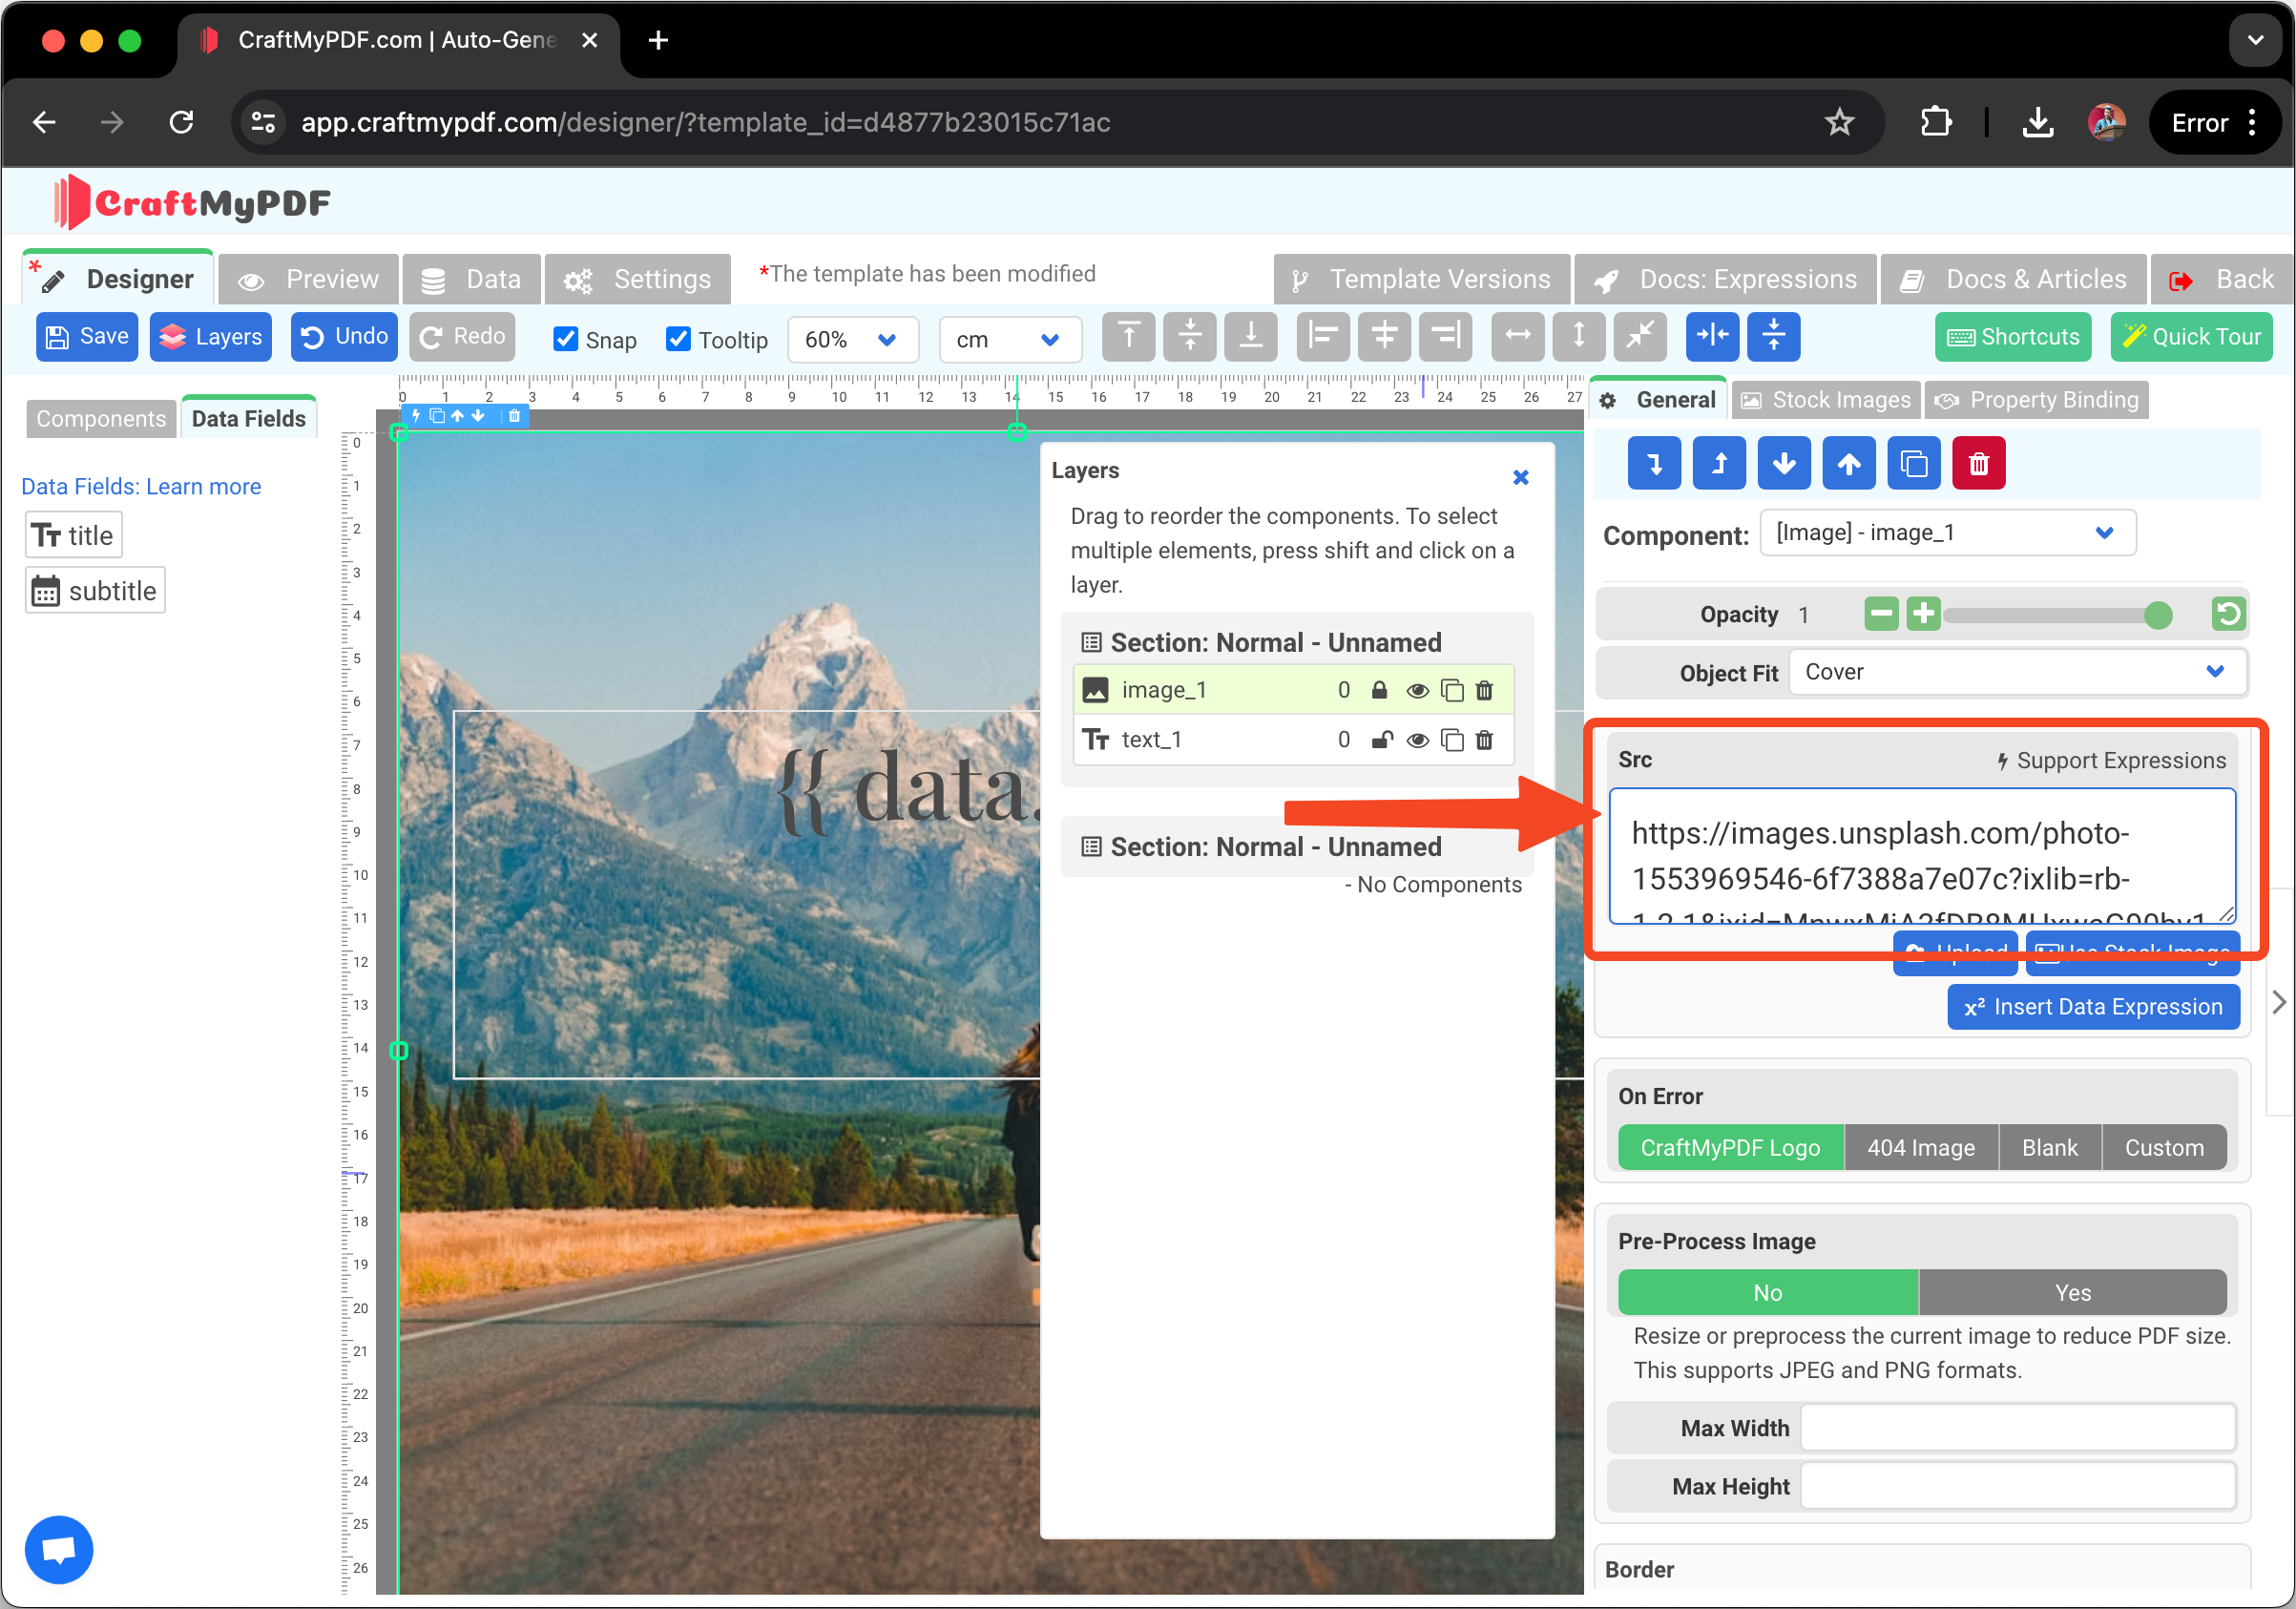
Step 5. Click on the background image in the template and upload the new image.
Step 6. Customize the text properties such as font size, color, and alignment to ensure it stands out against the background.
3.3 Using the CraftMyPDF API to Overlay Text
With your template ready, it’s time to use the CraftMyPDF API to generate an image. Here are the steps:
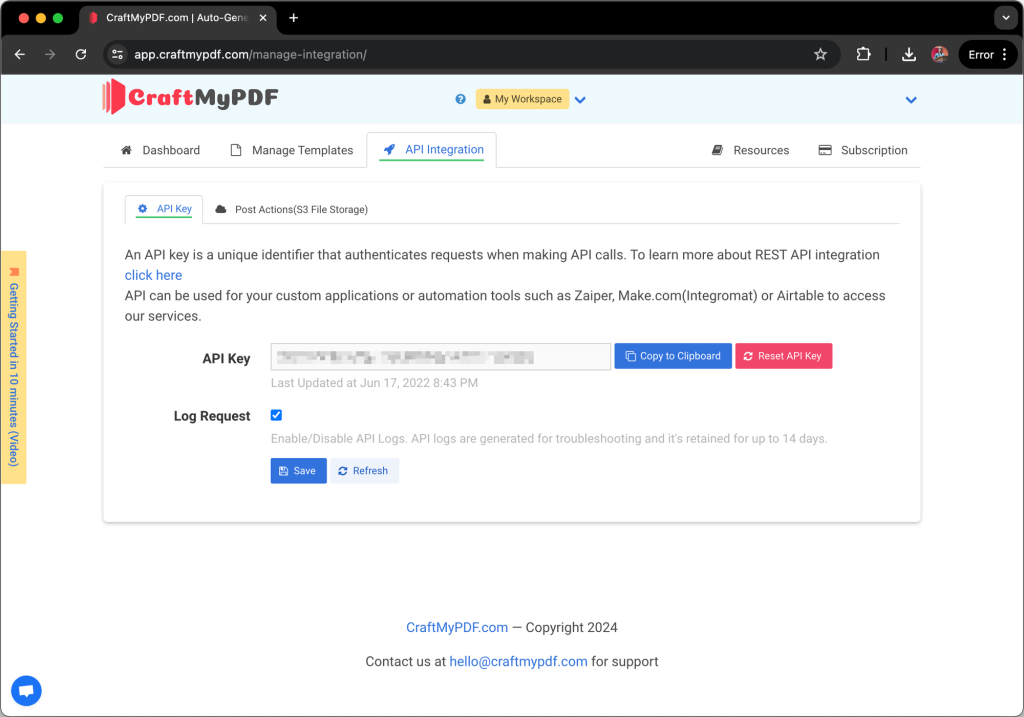
Step 1. Obtain Your API Key:
Go to the “API Integration” section in your dashboard and copy the API key. This key will be used to authenticate your API requests.
Step 2. Set Up Your Node.js Environment:
If you haven’t already, set up a Node.js environment and install the axios package for making HTTP requests: npm init -y npm install axios
Step 3. Create a Script to Generate the Image:
Create a new file generateImage.js and add the following code:
const axios = require('axios');

const apiKey = 'YOUR_CRAFTMYPDF_API_KEY';
const templateId = 'YOUR_TEMPLATE_ID';

const generateImage = async () => {
    try {
        const response = await axios.post('https://api.craftmypdf.com/v1/create-image', {
            template_id: templateId,
            export_type: 'json',
            expiration: 10,
            output_file: 'output.jpg',
            output_type: 'jpeg',
            data: JSON.stringify({
                title: "Learn as if you were going to live forever. –Gandhi"
            })
        }, {
            headers: {
                'Content-Type': 'application/json',
                'X-API-KEY': apiKey
            }
        });

        console.log('Status:', response.data.status);
        console.log('Generated Image URL:', response.data.file);
        console.log('Transaction Reference:', response.data.transaction_ref);
    } catch (error) {
        console.error('Error generating image:', error);
    }
};

generateImage();
Replace YOUR_CRAFTMYPDF_API_KEY with your actual API key and YOUR_TEMPLATE_ID with the ID of the template you created.
Step 4. Run the Script:
Execute the script using Node.js:
node generateImage.jsThe script sends a request to the CraftMyPDF API to generate an image with the specified text overlay. Upon success, it will print the URL of the generated image.
The generated image should look like this:
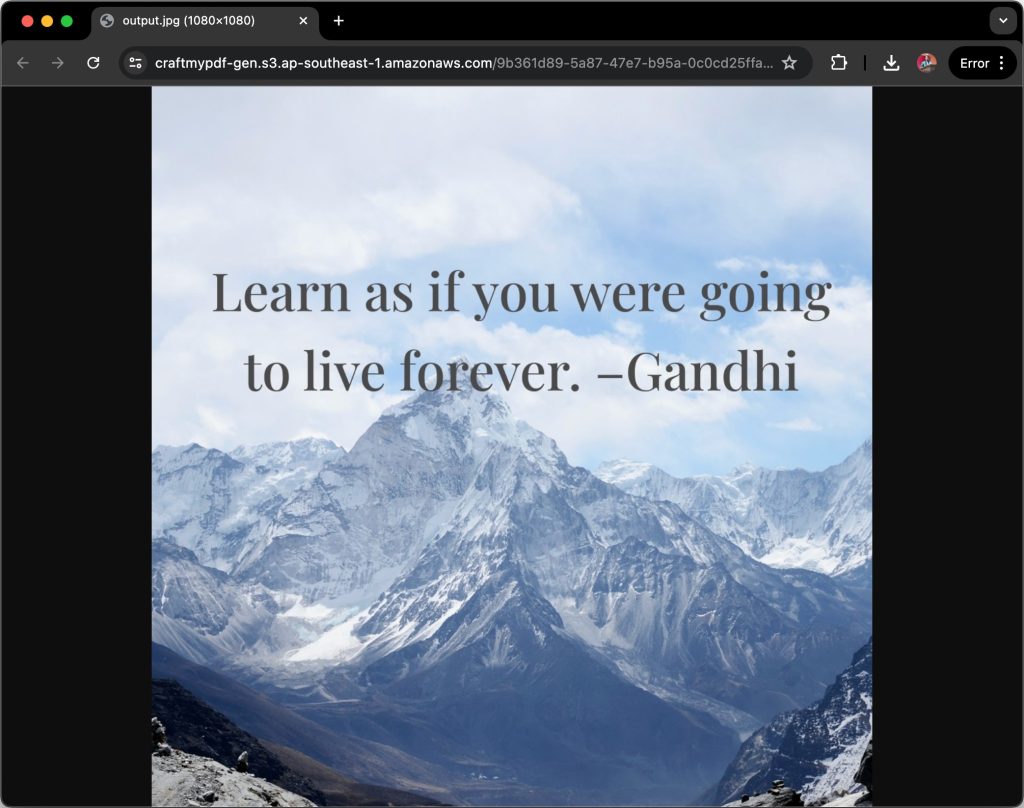
By following these steps, you can easily create and customize images with text overlays using CraftMyPDF’s powerful API. This method is particularly useful for no-code developers and those looking to automate their image generation workflows without extensive coding.
4. Tips on Using Layers and Text in Your Designs
Using layers and text effectively can dramatically improve the visual appeal and readability of your designs. Here are four essential tips to help you make the most out of these elements:
i. Contrasting Backgrounds for Text : Ensuring your text stands out against its background is crucial for readability. Use contrasting colors, such as light text on a dark background or vice versa, to make your content pop.
Additionally, consider using semi-transparent panels or applying blur effects to the background layer. This approach keeps the focus on the text while maintaining the overall aesthetic of the design.
ii. Layer Hierarchy: Organize your design elements in a logical layer hierarchy. Place background elements on lower layers and key graphics or text on upper layers. This organization simplifies the editing process and helps maintain a clear visual structure.
It ensures that the most important elements are prominently displayed, enhancing the overall effectiveness of your design.
iii. Text Padding: Adequate padding around text significantly improves its legibility. Padding is the space between the text and its container or the nearest design element.
Ensuring sufficient padding prevents the text from appearing cramped and makes it easier to read. This small adjustment can make a big difference in the clarity and impact of your message.
iv. Typography Choices: Selecting the right fonts and typefaces is critical to your design’s success. Choose fonts that match the mood and tone of your message.
While combining fonts can be effective, limit yourself to no more than three different fonts in a single layout to maintain cohesion. Consistent typography choices help create a unified and professional look, making your design more engaging and easier to read.
By applying these principles, you can create designs that are not only visually appealing but also functional and user-friendly.
5. Uses of Image Generation API
Image generation APIs offer a wide range of applications in web development and digital content creation. Here are four key uses that can significantly enhance your projects:
i. Social Media Automation : Automatically generating social media posts is one of the most impactful uses of image generation APIs. Brands and influencers can quickly create visually appealing posts with customized text and images, ensuring consistent branding and messaging across platforms.
For instance, you can set up a system to generate daily quotes, promotional graphics, or event announcements without manual intervention, saving time and maintaining an active online presence.
ii. E-commerce Enhancement : In the e-commerce industry, product presentation is crucial. Image generation APIs can help online stores create product images in various settings or display products in different colors and styles without needing actual photographs.
This capability allows for a dynamic and personalized shopping experience. For example, customers can see how a piece of furniture looks in different room settings or visualize clothing in various colors, enhancing their decision-making process and potentially increasing sales.
iii. Marketing and Advertising Personalization : Customized images play a pivotal role in targeted advertising campaigns and personalized marketing emails. Image generation APIs enable marketers to create tailored graphics that resonate with specific audience segments.
For instance, an API can generate personalized discount coupons with customer names or dynamically create banner ads that adapt to user preferences and behavior. This level of personalization can lead to higher engagement rates and more effective marketing efforts.
iv. Automation of Graphic Design Tasks : Automating routine graphic design tasks is another significant benefit of using image generation APIs. Tasks such as creating charts, graphs, or entire layouts can be automated, freeing up valuable time for designers to focus on more creative aspects of their work.
For example, a financial company could use an API to automatically generate weekly or monthly performance reports with up-to-date data visualizations, ensuring consistency and accuracy while reducing manual effort.
6. Comparison of Using Puppeteer/CSS and CraftMyPDF
When it comes to overlaying text on images, both Puppeteer with HTML+CSS and CraftMyPDF offer unique advantages. Here’s a detailed comparison to help you decide which tool is best suited for your needs:
| Feature | Puppeteer (HTML+CSS) | CraftMyPDF |
|---|---|---|
| Ease of Use | Requires a solid understanding of HTML, CSS, and JavaScript, making it more suitable for developers. | Features a user-friendly drag-and-drop editor, ideal for non-developers and those without coding knowledge. |
| Integration | Primarily involves scripting for integrations, which can be complex and time-consuming. | Easily integrates with no-code tools like Zapier and http://make.com/, streamlining workflow automation. |
| Customization | Offers a high level of customization through direct coding, allowing for detailed and specific design adjustments. | Customization is more limited to the options available in the drag-and-drop editor, which may not cover all specific needs. |
| Development Time | Development can be time-consuming due to the need for coding, testing, and debugging. | Quick setup and deployment thanks to pre-built templates and an intuitive editor, reducing overall development time. |
| Scalability | Scalability is possible but requires additional development and technical oversight, which can be complex. | Easily scalable within the platform’s service limits, with minimal technical complexity involved. |
| Cost | Costs can vary widely depending on the infrastructure and development resources required. | Subscription-based pricing, with costs depending on usage and the features included in the chosen plan. |
| Maintenance | Requires ongoing maintenance, including updates to scripts and browser environments, which can be resource-intensive. | Low maintenance, as updates and platform maintenance are handled by CraftMyPDF, freeing up your resources. |
| Documentation & Support | Good documentation is available, but support often relies on community forums and resources, which may vary in responsiveness. | Typically offers dedicated support and comprehensive documentation, providing faster and more reliable troubleshooting. |
7. Conclusion
Choosing between Puppeteer with HTML+CSS and CraftMyPDF largely depends on your specific needs and technical expertise.
Puppeteer with HTML+CSS is ideal for developers looking for high customization and control over their design process. It’s a powerful tool for those who need detailed, script-based integrations and are comfortable with ongoing maintenance and coding.
CraftMyPDF is perfect for non-developers or those seeking a quicker, more user-friendly solution. Its easy integration with no-code tools and low maintenance requirements make it a practical choice for rapid deployment and efficient workflow automation.
By understanding the strengths and limitations of each option, you can make an informed decision that best fits your project requirements and resources.
Discover more features on CraftMyPDF and try them out by signing up for a free account today!


