Collecting data through Google Forms surveys is a popular method for gathering valuable insights. However, the process of converting survey responses into presentable and shareable PDF reports can be time-consuming and tedious. In this article, we will explore how to automate the generation of PDF reports from Google Forms surveys using the powerful combination of CraftMyPDF and Zapier.

By leveraging the data collection capabilities of Google Forms, the dynamic PDF generation features of CraftMyPDF, and the automation capabilities of Zapier, you can streamline the process and effortlessly generate polished PDF reports for analysis and sharing.
What are Google Forms?
Google Forms is a free web-based tool provided by Google that allows users to create and share surveys and forms. With Google Forms, you can easily collect responses from participants and gather data on various topics. The responses are stored in a Google Sheets spreadsheet, which provides a convenient way to view, analyze, and manipulate the collected data.
Set up a Google Form
To get started with Google Forms, follow these detailed steps:
1. Sign up for a Google account if you don’t already have one. You can create an account by visiting the Google account creation page.
2. Once you have a Google account, go to the Google Forms website.

3. Click on the Blank template to create a new form.
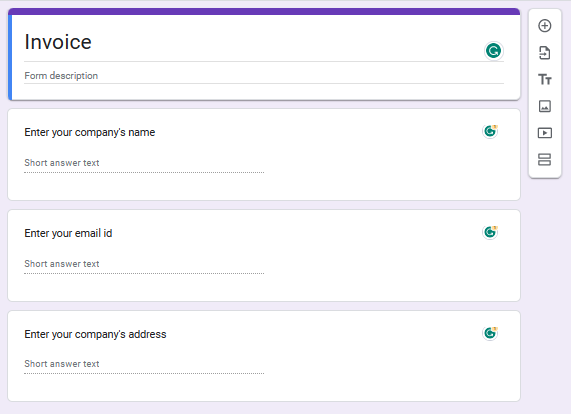
4. Give the form a descriptive name that reflects the purpose of your survey. For example, if you are conducting a customer satisfaction survey, you can name it Customer Satisfaction Survey
5. Optionally, provide a brief description of the survey in the “Form description” field to provide context for respondents.
6. Start adding questions to your form by clicking on the “+” button or the “Add question” button.
7. Choose the appropriate question type for each question. Google Forms offers a variety of question types, including multiple-choice, checkbox, short answer, paragraph, and more. Select the question type that best suits the data you want to collect.
8. Enter the question text in the “Question title” field. Make sure your question is clear and easy to understand for respondents.
9. Depending on the question type, provide answer options or specify any additional details required. For example, if you are using a multiple-choice question, enter the answer options in the “Option 1,” “Option 2,” etc., fields. If you are using a checkbox question, enter the options in the same way.
10. For this example, let’s assume that we are creating a Google Form to collect information from customers for an online order. We will add three fields: Company Name, Email, and Company Address. Here’s an explanation of each field:
- Company Name (Short Answer): This field allows respondents to enter the name of their company or organization. It is a short answer field.
- Email (Short Answer): The Email field is another short answer field that collects respondents’ email addresses.
- Company Address (Short Answer): This field captures the company’s address associated with the order.
11. If you want to make a question required, click on the “Required” button next to the question. This ensures that respondents must answer the question before submitting the form.
12. Preview your form by clicking on the “eye” icon in the top right corner. This allows you to see how the form will appear to respondents.
13. Once you are satisfied with your form, click on the “Send” button in the top right corner to distribute it. You can choose to share the form via a link, embed it on a website, or send it directly via email.
14. As respondents submit their responses, the data will be automatically collected in a Google Sheets spreadsheet. You can access the responses by clicking on the “Responses” tab in the form editor or by visiting the “Responses” tab in the linked Google Sheets spreadsheet.
Setting up a Google Form is a straightforward process that allows you to create surveys and collect responses efficiently. With the ability to customize the form’s design, choose question types, and require certain answers, Google Forms provides a versatile platform for gathering data from respondents.
What is CraftMyPDF?
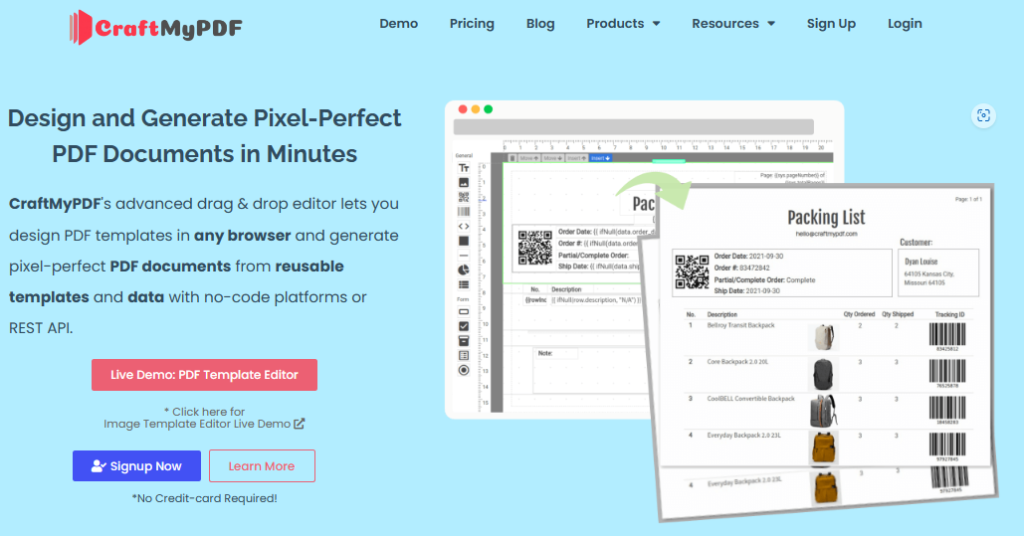
CraftMyPDF is a powerful platform that allows you to create professional PDF documents with ease. With CraftMyPDF, you can easily generate PDFs using pre-built templates or design your custom templates using the intuitive drag-and-drop editor. CraftMyPDF also provides an API that enables you to automate your PDF content creation workflow.
Benefits of Using CraftMyPDF
CraftMyPDF offers several benefits that make it an ideal choice for automated PDF report generation:
- Easy to Use Drag & Drop Editor: CraftMyPDF provides an intuitive interface that allows you to design PDF templates effortlessly. The drag-and-drop editor makes it easy to add text, images, tables, and other elements to your templates.
- PDF & Image Generation API: CraftMyPDF offers a cloud-based API that enables you to generate PDF documents or images (JPEG/PNG) synchronously or asynchronously at scale. This API eliminates the need for maintaining your PDF generation infrastructure, saving you time and resources.
- Automate with No-code or Low-code Platforms: CraftMyPDF integrates with popular no-code or low-code platforms like Zapier, Make.com, Bubble.io, and REST API. This integration allows you to automate the PDF generation process without writing any code.
- Expressions & Formatting Support: CraftMyPDF’s template editor supports expressions and formatting for datetime, currency, and custom formats. You can dynamically populate your PDF templates with data and customize the appearance of your reports.
Set up a CraftMyPDF account and template
To begin using CraftMyPDF for automated PDF report generation, follow these steps:
- Go to the CraftMyPDF website.
- Click on the “Sign Up” button to create a free account.
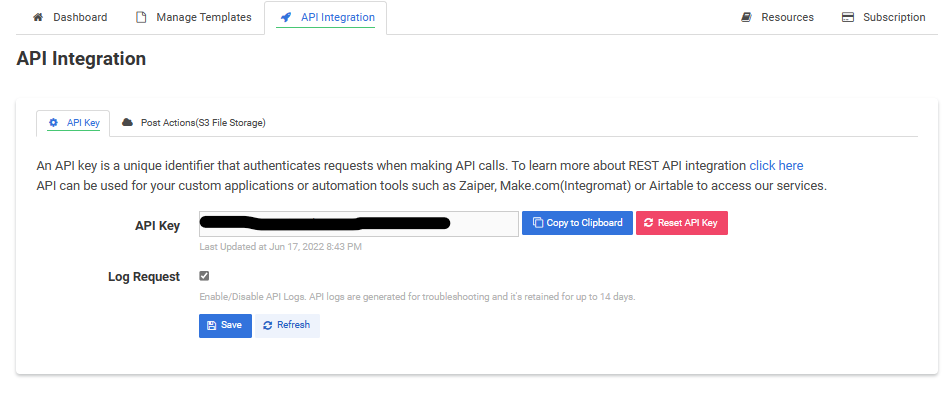
- After signing up, you’ll be redirected to the dashboard. From there, go to the API Integration tab in the navigation bar and copy the API key. We will need this API key later to connect CraftMyPDF with Zapier.
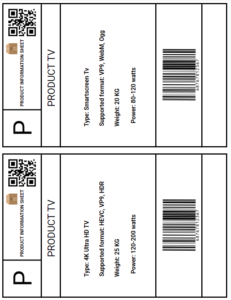
- Next, go to the “Manage Template” section in the navigation bar and click on “New PDF Template” CraftMyPDF offers a range of pre-built templates to choose from, or you can create your custom template from scratch. For this example, we will choose the “Sample Invoice” template.
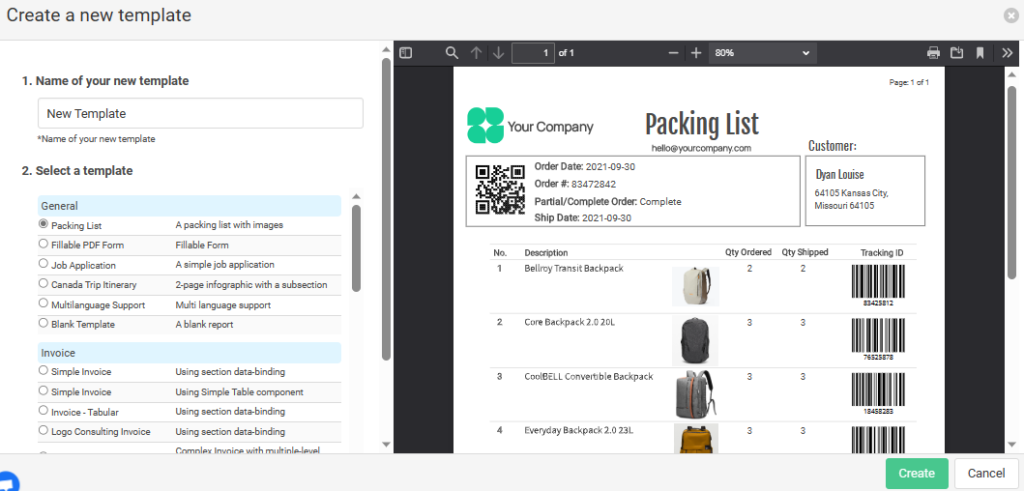
- Once you’ve created the template, copy the template ID from the “Manage Template” page. We will also need this template ID later to map the relevant fields from the Google Form responses to the CraftMyPDF template.
- You can also access the CraftMyPDF template builder and design a template specifically tailored to your PDF report. Include placeholders for dynamic data that will be populated from the Google Form responses. Customize the layout, fonts, colors, and other visual elements to match your desired report format.
What is Zapier?
Zapier is a popular no-code automation platform that allows you to connect different web applications and automate workflows without writing any code. With Zapier, you can create “Zaps,” which are automated workflows that trigger actions in one application based on events in another application.
What is NoCode Automation?
NoCode automation refers to the process of automating tasks and workflows without the need for traditional programming or writing code. It empowers individuals with little to no coding experience to create automated workflows using visual interfaces and pre-built connectors.
NoCode automation platforms, such as Zapier, allow users to connect different web applications and services together to streamline processes, automate repetitive tasks, and transfer data between various systems. Instead of relying on custom code or complex scripts, users can leverage the power of visual builders, drag-and-drop functionality, and predefined integrations to create automated workflows with ease.
NoCode automation has several advantages:
- Accessibility: NoCode automation platforms open up automation capabilities to a broader audience. Users without coding expertise can create sophisticated workflows and automate processes, reducing dependency on technical resources.
- Rapid Development: NoCode automation enables the quick creation and deployment of automated workflows. With a visual interface and pre-built connectors, users can assemble the workflow logic using a modular approach, significantly reducing development time.
- Ease of Use: NoCode automation platforms prioritize user-friendliness. The intuitive interfaces, drag-and-drop functionality, and predefined templates make it easy for users to understand and build automation workflows without needing to learn complex programming languages or concepts.
- Flexibility: NoCode automation allows users to connect a wide range of applications and services, enabling seamless data exchange and integration across systems. This flexibility empowers users to create custom workflows that fit their specific needs and leverage the capabilities of various tools in their tech stack.
- Agility and Iteration: NoCode automation facilitates agile development and iteration. Users can quickly modify and update workflows as business requirements change, allowing for greater adaptability and continuous improvement.
NoCode automation platforms like Zapier have revolutionized the way individuals and businesses automate their processes. These platforms democratize automation by making it accessible to a wider audience, enabling users to optimize their workflows and focus on high-value tasks rather than repetitive manual work.
Step 1: Setting up Zapier
To set up Zapier and automate the PDF report generation process, follow these steps:
- Go to the Zapier website.
- Sign in to your Zapier account or create a new one if you don’t have an account already.
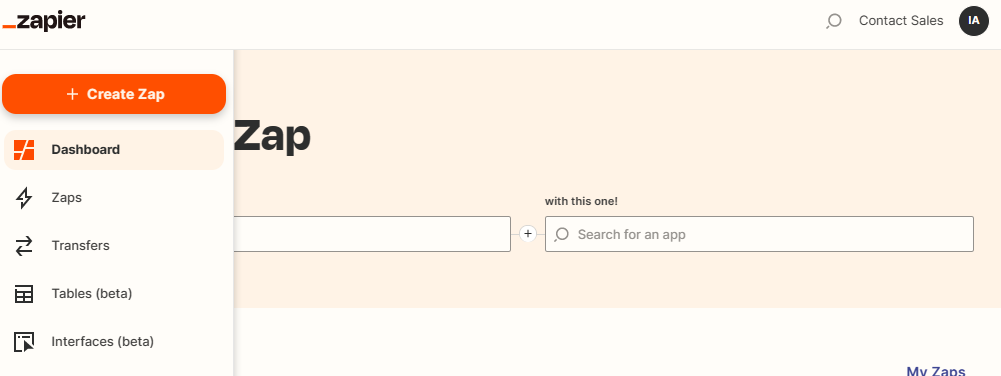
- Create a new Zap by clicking on the “Make a Zap” button.
- Select Google Forms as the trigger app for your Zap. In the “Event” field, choose “New Form Response” as the trigger event. This event will be triggered whenever a new response is submitted through your Google Form.
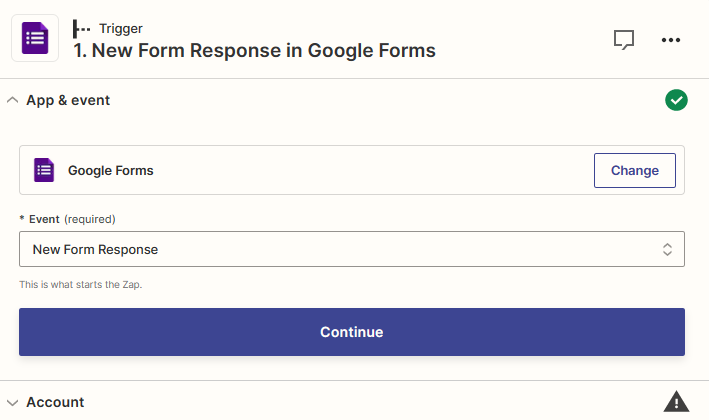
- Authenticate your Google account and select the specific Google Form you created earlier from the dropdown menu.
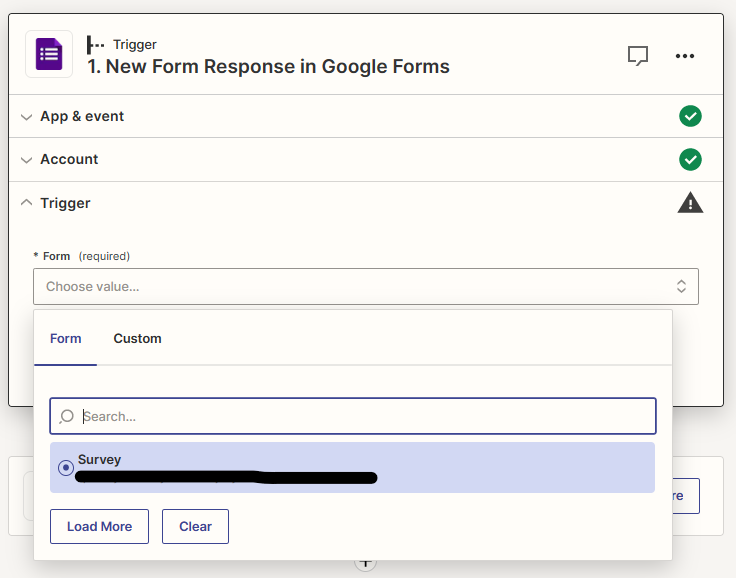
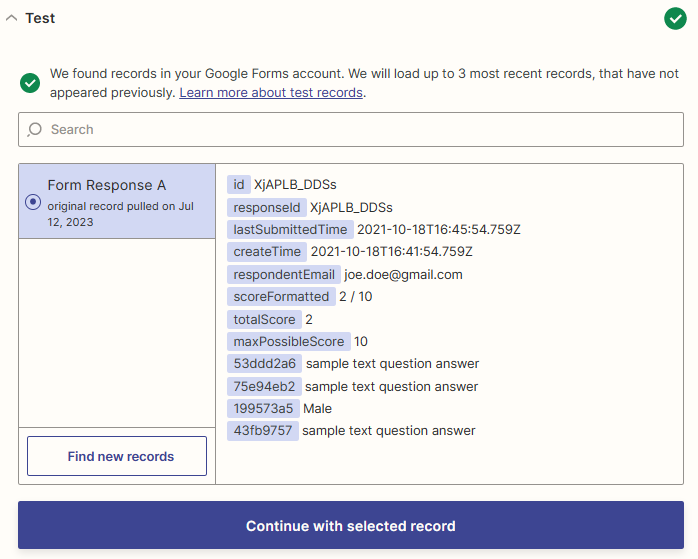
- Test the connection to ensure that Zapier can retrieve the form responses correctly. It will load up to the three most recent records that have not appeared previously. Click on “Continue with selected record” to proceed.
Step 2: Configure the Zapier Action for CraftMyPDF
Now that we have set up the trigger for the Zap using Google Forms, we need to configure the action to generate the PDF reports using CraftMyPDF. Follow these steps to configure the Zapier action:
- Select CraftMyPDF as the action app in Zapier. You can search for “CraftMyPDF” in the app directory and select it as the action app for this step.
- In the “Event” field, choose “Create PDF” as the action event. This event will trigger the generation of the PDF report in CraftMyPDF when a new survey response is submitted.
- Authenticate your CraftMyPDF account using the API key that you copied earlier. This step will connect your CraftMyPDF account to Zapier and allow the integration to function smoothly.
- In the “Action” tab, you will need to specify the CraftMyPDF template you designed earlier for generating the PDF report. Choose the appropriate template from the dropdown menu.
- After selecting the template, you will need to map the relevant fields from the Google Form responses to the corresponding placeholders in the CraftMyPDF template. This step ensures that the data from the survey responses is correctly populated in the generated PDF report.
- In the Zapier action settings, you will see various fields related to the CraftMyPDF template. These fields include “Region“, “Template“, “Version” and “Create Data with (Payload Type)“
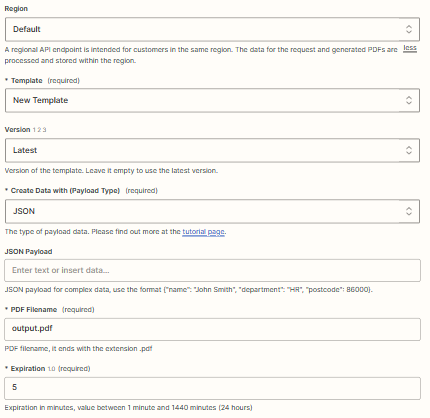
- Region: Select the region where your CraftMyPDF account is hosted from the dropdown menu. Choose the region that is closest to your location for optimal performance.
- Template: Select the template that you created in CraftMyPDF earlier. This is the template that will be used to generate the PDF report.
- Version: Select the latest version of the template to ensure that you are using the most up-to-date design and layout.
- Create Data with (Payload Type): This field allows you to specify the type of payload data you will be providing to CraftMyPDF for generating the PDF report. You have three options to choose from:
- Schema of Data: This option allows you to create payload data using the schema of sample data. The schema is based on the sample data defined in the “Data” tab of the CraftMyPDF template editor. It is a simple way to create payload data, especially when dealing with nested objects and arrays.
- JSON Data: Select this option if you have complex data that follows the JSON format. JSON data can include various data types such as strings, numbers, arrays, booleans, and objects. This option gives you flexibility in structuring and providing the necessary data for the PDF report.
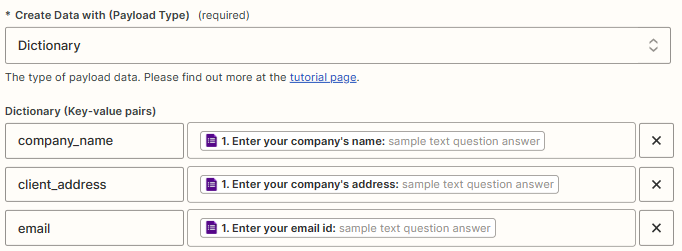
- Dictionary: This option is ideal for simple key-value pair data. If your payload data consists of a list of key-value pairs, the dictionary option provides an efficient way to structure and provide the data.
For this example, we will use the “Dictionary” payload type. In the provided fields, you can enter the key-value pairs for the data you want to populate in the PDF report. The key represents the placeholder in the CraftMyPDF template, and the value will be retrieved from the corresponding Google Form response field.
7. Additionally, you will need to specify the PDF filename. You can enter a static filename or dynamically generate it using a combination of text and form response data. This allows you to uniquely identify each generated PDF report.
Ensure that you review all the settings and fields in the Zapier action configuration to make sure they align with your CraftMyPDF template and the data you want to include in the PDF report. Customization options may vary depending on the specific integration and features available in CraftMyPDF.
Once you have configured the Zapier action for CraftMyPDF, you are ready to proceed to the next step and test the integration to ensure everything is working correctly.
Step 3: Test and Activate the Zap
Before activating the Zap, it’s essential to test it to ensure that the data from the Google Form is correctly mapped to the CraftMyPDF template. Follow these steps:
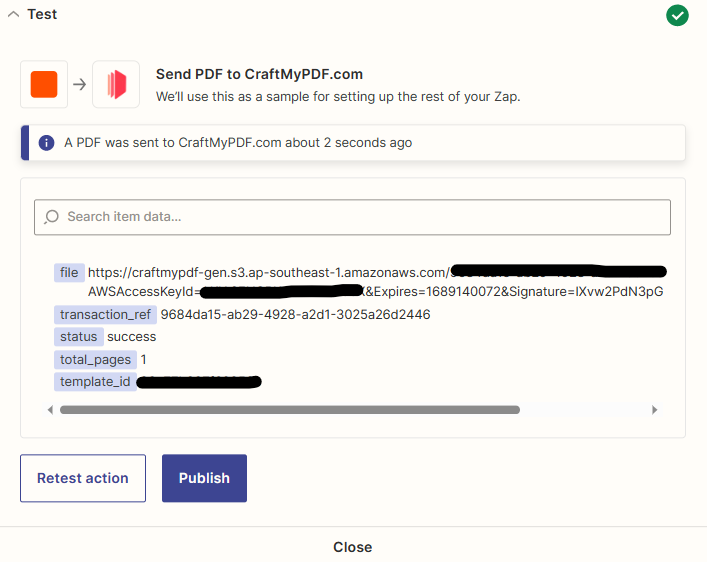
- Test the Zap by triggering it with a sample form response.
- Verify that the data is populated correctly in the CraftMyPDF template and that the PDF report is generated as expected.
- If the test is successful, activate the Zap to start the automation process.
Step 4: Generate and Distribute the PDF reports
Once the Zap is activated, the automated process for generating PDF reports from Google Forms surveys will be in place. Here’s how it works:
- Whenever a new survey response is submitted through the Google Form, Zapier will automatically trigger the CraftMyPDF action to generate a PDF report.
- CraftMyPDF will populate the template with the dynamic data from the survey response and generate a polished PDF report.
- Configure Zapier to save the generated PDF report to your preferred storage location, such as Dropbox, Google Drive, or email. You can use Zapier’s built-in actions or integrations to achieve this.
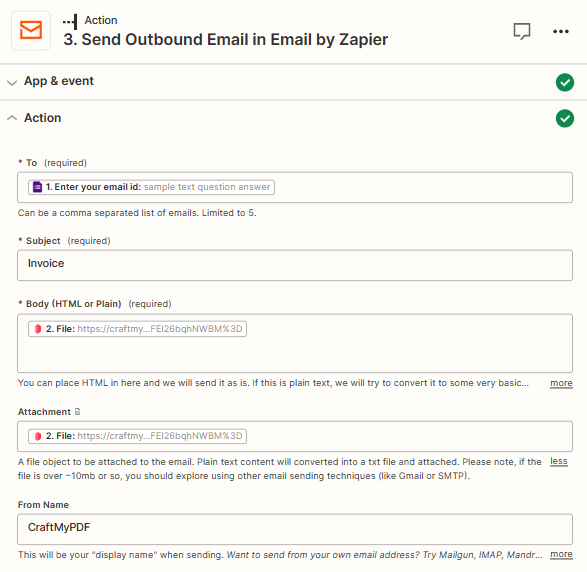
- Optionally, you can set up automated email notifications to send the PDF reports to specific recipients or stakeholders. Zapier provides email integrations that allow you to send emails with the generated PDF attachments.
By automating PDF report generation from Google Forms surveys using CraftMyPDF and Zapier, you can save time, reduce manual effort, and streamline the process of analyzing and sharing valuable survey insights.
The integration between Google Forms, CraftMyPDF, and Zapier empowers you to effortlessly convert survey responses into visually appealing and professional PDF reports. With the automation in place, you can focus more on analyzing the data and making informed decisions rather than spending time on manual report generation.