1. Introduction
Planning an event such as a wedding, baby shower, or even a birthday bash can be magical but also a bit overwhelming. It can be full of decisions and deadlines.
Thankfully, there are amazing tools that make it easier, even if you’re not a designer or a tech expert, you can design a beautiful wedding invitation card, and with just a few clicks, every guest receives their own personalized version.
Automating parts of the planning process can help you save time, avoid mistakes, stay organized, and even wow your guests. With tools such as Canva, CraftMyPDF, and Zapier, you can create customized invitations, and send them automatically to each guests.

Canva is a drag-and-drop design tool that makes it super easy to create beautiful graphics, even if you have never designed anything before. CraftMyPDF helps you turn those beautiful designs into personalized PDFs, perfect for digital or printed invitations, and Zapier acts like a friendly robot that connects your apps together and automates tasks for you without needing to know how to code. Sounds like magic?
In this article, I will be detailing the steps on how to create personalized wedding invitations using these tools. Let’s see how it works.
2. How to Design Your Invitation Template in Canva
There are tons of ready-made wedding invitation templates to choose from in Canva. Here’s a step-by-step guide on how to create your pre-designed template.
Step 1: Sign In or Create a Canva Account
1. Go to Canva: If you don’t have an account, click Sign up and create one using your email, Google, or Facebook account.
2. Once logged in, you will land on the Canva dashboard.
Step 2: Start a New Design with the Right Dimensions
1. Click on the “Create (+)” button which is located at the top left.
2. Choose a custom template size of your choice
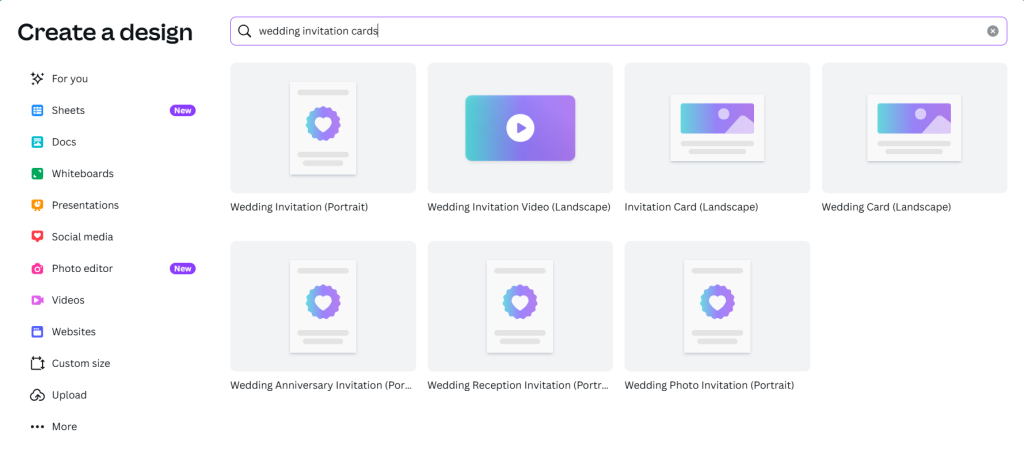
Step 3: Choose a Wedding Invitation Template
1. Search for “rsvp wedding card” in the search bar.
2. Browse available templates and click one to apply it to your canvas.
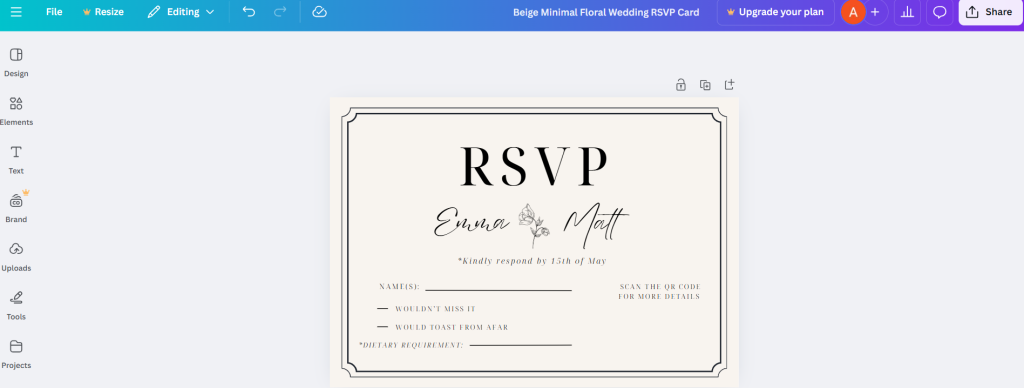
Step 4: Customize the Text
1. Click on any existing text box in the template to edit it.
2. Replace placeholder text with your actual wedding details, for example, couple’s names, date, optional message, and so on.
3. Customize the template to match your style. I made a few tweaks to mine and left some space to insert a QR code.
4. Don’t forget to add a placeholder for the guest’s name, this will be used later to personalize each invitation.
Step 5: Save or Download Your Design
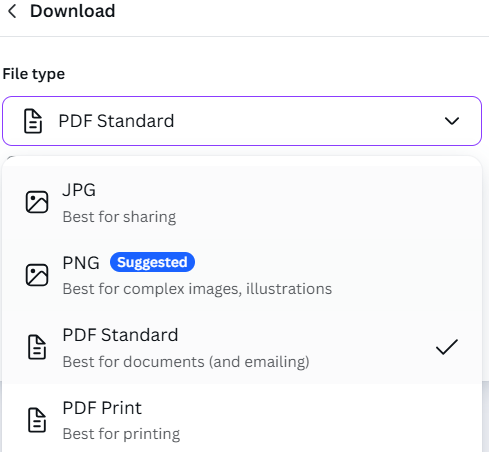
i. Click Share > Download.
ii. Select PDF Standard or PDF Print (choose Print if you want high quality).
iii. Download the file so you can upload it to CraftMyPDF later.
3. How to Set Up Dynamic Fields in CraftMyPDF
Now that your invitation design is ready, it’s time to make it dynamic using CraftMyPDF, so each guest receives a personalized version with their name and a QR code they can scan for more information. Here’s a step-by-step guide to setting up dynamic fields in CraftMyPDF:
1. Go to CraftMyPDF and log in or create a free account.
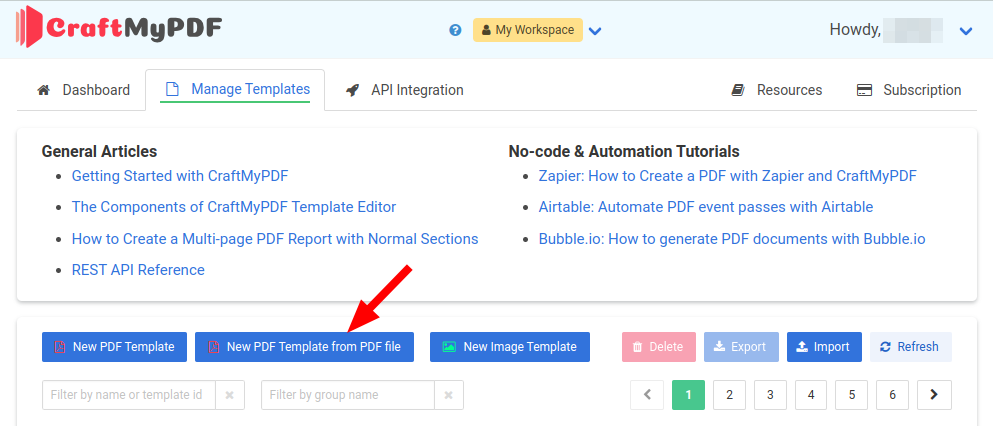
2. Go to your Manage Templates page and click on New PDF Template from PDF File
3. You should be able to see the newly uploaded template in your template section. Click on Edit
4. Go to your Data tab and create JSON data. This will help us map our dynamic fields. Here’s a sample JSON data created
{
    "name": "khloe",
    "dietary_requirement": "veggies and salad",
  	"attending": "true",
  	"not_attending": " "
}
5. In the Designer tab, drag in the appropriate label elements to match your placeholders.
6. Go to components located on your left hand side, drag in a QR Code component. You can even assign a unique link to the QR code, so when it’s scanned, it takes guests directly to their personalized RSVP page, map location, or wedding website.
Still having troubles figuring the steps out? Check out our well-detailed tutorial on how to create dynamic PDFs or Images with Canva Design
If you prefer watching videos, then I suggest you also check out our Youtube tutorial on how to auto-generate wedding invitation cards
4. Setting Up Airtable As The Data Source
Before setting up the trigger, you will need to have your Airtable environment ready. Here are the steps required to prepare your base and table:
Step 1. Sign In to Airtable
Visit Airtable and log in with your existing account. If you’re new to Airtable, you can create a free account in just a few steps, no credit card required.
Step 2. Create a Workspace
Once you’re logged in, create a new Workspace to keep your projects organized. This acts as a container for all your related bases (databases).

Step 3. Add a Base
Within your new workspace, click “Add a base” to create a project. This base will store all the information related to your workflow
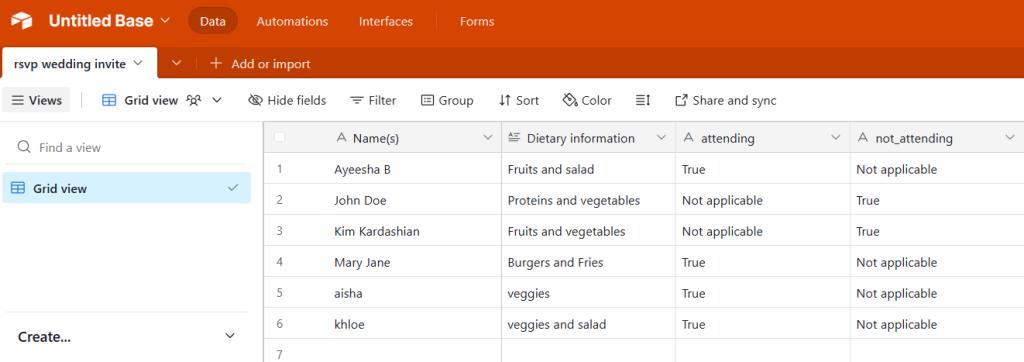
Step 4. Set Up Your Table
Inside the base, create a table with all the dynamic fields you’ll need (e.g., Name, Dietary information, etc.). Each row will represent a unique record.
Feel free to populate your own table with your data.
5. Automating The Workflow With Zapier
With your PDF template ready, the next step is to automate the process using Zapier. Zapier is a powerful no-code automation platform that connects apps and services through API-based integrations. For this tutorial, we’ll use this no-code automation tool to connect CraftMyPDF with Airtable for an rsvp invitation workflow.
Step 1. Sign Up for Zapier
Head over to zapier and create a free account. While the free plan is sufficient for testing and setting up your automation, you can also choose to upgrade to a paid plan later to enable production-ready workflows and additional task runs.
Once you’re signed in, you’ll be redirected to your Zapier dashboard.
Step 2. Setting Up the Trigger
A trigger is the event that starts your automation. In this case, the trigger will be a new record added to Airtable. Here are the steps to configure this:
i. Create a New Zap: Click on “Create Zap” from your dashboard and give it a meaningful name (e.g., Ticket Automation).
ii. Choose the Trigger App: Select Airtable as the trigger app.
iii. Select Trigger Event: Choose “New Record” as the event, which fires every time a new row is added to your Airtable table.
iv. Connect Your Airtable Account: Authenticate with your Airtable API key or OAuth credentials when prompted.
v. Configure Trigger Settings: Select the Base and Table that stores your wedding invite data. Optionally, specify the View if you want to filter incoming records.
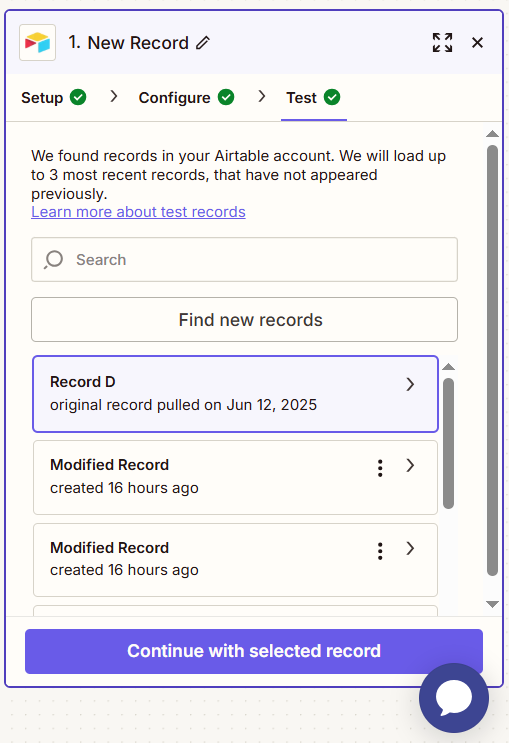
vi. Test the Trigger: Zapier will fetch a sample record to verify the connection. Make sure you have at least one row in your Airtable table before testing.
Step 3. Add CraftMyPDF module as an Action
In Zapier, an action is the task that happens after a trigger. It’s the resulting step Zapier performs automatically in another app. So, we are going to add a CraftMyPDF as an action to automate what should happen next in our workflow
i. Add Action: Select CraftMyPDF as the app and choose “Generate PDF Document” as the event. This is because we have already uploaded the Canva template to CraftMyPDF.
ii. Connect CraftMyPDF: Sign in and connect your CraftMyPDF account to Zapier.
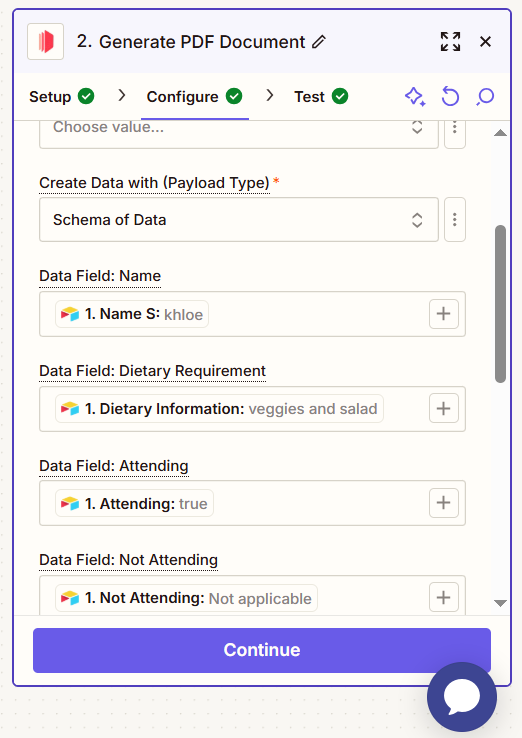
iii. Configure Action: Choose the template you uploaded earlier in CraftMyPDF. Then, map the relevant fields from Airtable to the placeholders in your template. You can also increase the expiration time to probably 500 minutes to avoid errors when generating your PDF.
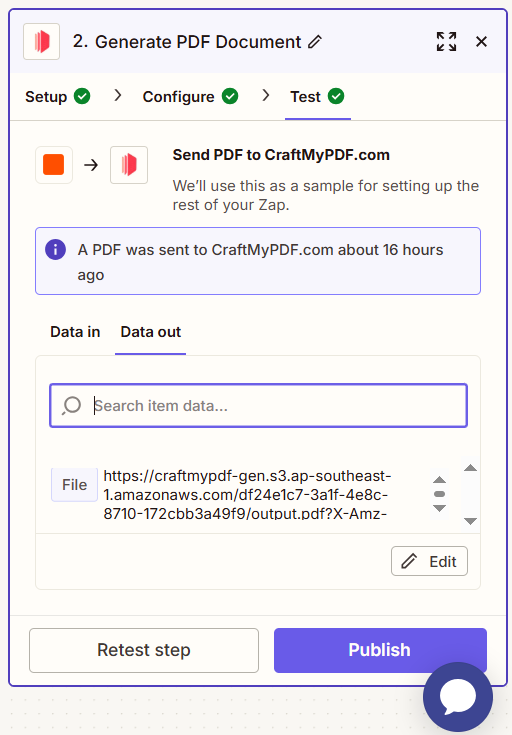
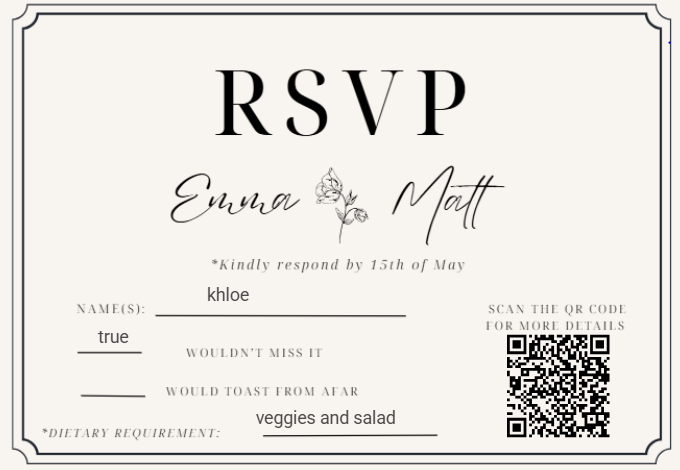
iv. Test Action: Run a test to ensure everything is working correctly. Zapier should return a downloadable PDF URL, simply copy and paste it into your browser to preview the result.
To make the QR code in your template dynamic, start by creating a new Zap and use Webhooks by Zapier as the trigger.
There’s already a helpful tutorial available on how to dynamically create a trackable QR code in your PDF, be sure to check it out if you’d like to dive deeper.
Step 4. Send the PDF as an Email Attachment
With Zapier, you can easily automate the process of emailing your PDF, no manual uploads needed. Once the PDF invitation is generated, Zapier can automatically send it to your inbox or directly to your guests as an attachment. Here’s how to set it up:
i. Choose an App: For this example, we will be using the Gmail app to send the invitations to out guest. Search for Gmail and select.
ii. Choose an Event: Select “Send Email” as the action, since your goal is to send the PDF via email.
iii. Connect Your Account: Log into your Gmail account and give Zapier the necessary permissions.
iv. Set Up the Action: Fill in the email fields like the recipient’s email, subject line, and message body.
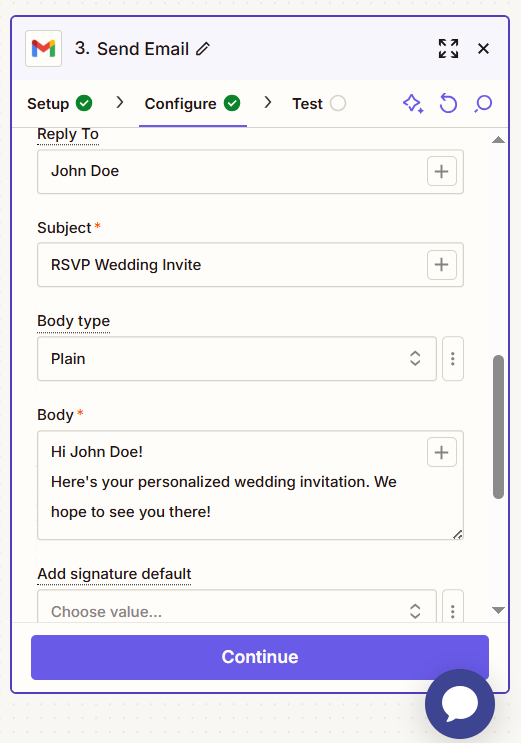
Then, in the attachments field, insert the URL or file path of the PDF from the previous step (usually from CraftMyPDF).
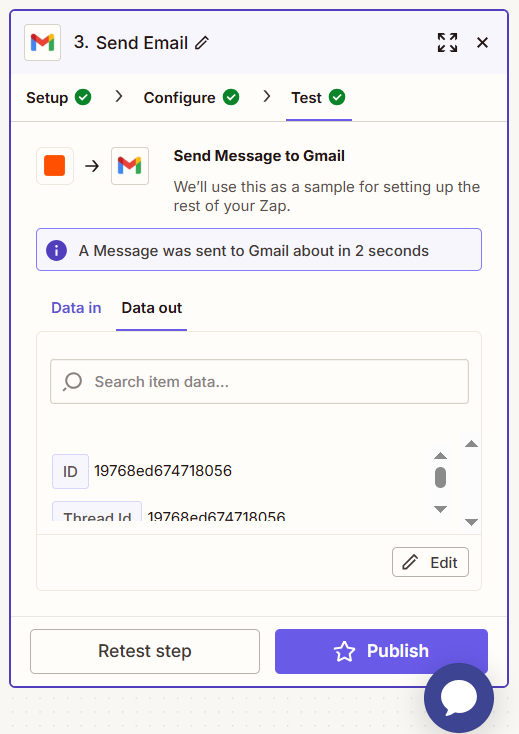
v. Test Action: Test to make sure everything works.
6. Personalization Best Practices and Tips
Now that you’ve set up the automation using Canva, CraftMyPDF, Airtable, and Zapier, let’s talk about making each invitation feel personal and polished.
Little details like names, dietary information, and unique QR codes can make a big difference , but only if they are done right. This next section covers some simple tips to help you keep your invites consistent, easy to read, and print-ready without any last-minute surprises.
1. Defining Your Personalization Scope
Start by deciding which parts of the invite will be unique for each guest. For example, you might personalize: Their name (s), custom messages, and QR code that links to their personal RSVP page or gift registry.
You might also want to create different designs for different roles, like one template for bridesmaids (with a floral border), one for general guests, and another more elegant version for VIPs like your parents’ friends.
2. Ensuring Consistency Across All Invitations
Imagine using a modern font on one invite and a cursive script on another — it feels disconnected. So, even if the wording changes, the look should stay the same.
For example, if you’re using a dusty rose color for the wedding theme, make sure every template uses that same shade, not slightly different pinks.
Also, if your Airtable column is labeled GuestFirstName, don’t use {{FirstName}} in your CraftMyPDF template — they won’t connect. A friend once used {{Email}} instead of {{GuestEmail}} and ended up with blank fields on 50 invites!
3. Optimizing for Readability and Print
Let’s say you want the wedding details to stand out. Try using at least 24px for important names and avoid fonts with too many flourishes for small fields.
And for QR codes, keep them simple and scannable. One user created a gorgeous layout but placed the QR code too close to the edge once printed, it got cut off. Always leave enough margin.
4. Testing a Sample Invitation
Before you hit send, test it like you’re the guest. Generate a sample PDF from CraftMyPDF using your Airtable data. Check things like, are names pulling through correctly? Does the QR code actually lead to the right page?
One bride printed 20 invites before realizing that her test name “John Doe” was showing up on every invite because the dynamic field wasn’t mapped. Testing just one or two invites can save you time, money, and stress.
7. What else CraftMyPDF can automate?
CraftMyPDF is a go-to solution for creating stunning PDF documents, such as event invitations, invoices, tickets, shipping labels, receipts, and many more, with no design experience or coding needed.
CraftMyPDF also works seamlessly with other no-code tools, making it incredibly flexible. Whether you’re a teacher, HR manager, coach, or event planner, you can use CraftMyPDF to automate all kinds of personalized documents.
You can also embed your CraftMyPDF template directly into your app. To learn how to do this, check out our step-by-step tutorial. Here’s what you can build with CraftMyPDF:
i. Shipping Labels: Generate shipping labels that include barcodes or QR codes using dynamic data from Airtable, Google Forms, or any other database. You can automate the entire process using Zapier, Make, or even Bubble, depending on your workflow. We’ve got tutorials to walk you through the setup, and give you tips on label automation, no coding required.
ii. Invoices: Need branded, professional invoices? Use one of CraftMyPDF’s pre-made invoice templates and connect it to your data source. Tools like Bubble, Zapier, or Retool can automate the creation and emailing of invoices, saving you hours of manual work. Our step-by-step guide shows you exactly how.
iii. Contracts and Reports: Whether you’re generating NDAs, offer letters, or internal reports, CraftMyPDF lets you populate document templates with real-time data. It’s perfect for automating HR or legal workflows. Tools like Make and Bubble give you more control over the logic and flow, while Zapier offers quick plug-and-play options. Be sure to check out our contract automation guide and marketing workflow ideas.
iv. Certificates: CraftMyPDF is perfect for creating stunning certificates and awards, whether you’re celebrating course completions, team milestones, or event achievements. With a variety of beautifully designed certificate templates, it’s easy to add a professional touch to your recognitions.
Want to learn how to design certificates that truly stand out? We’ve put together a helpful tutorial packed with tips for creating elegant, personalized certificates
v. Event Tickets: Automatically generate personalized event tickets with attendee names, seat numbers, Barcodes, and scannable QR codes. You can connect ticketing platforms like Ticket Tailor and send out tickets using Make, Zapier, or Bubble. Our tutorial shows you how to do it all step-by-step.
vi. Banners, Flyers & Posters: If you’re looking to scale your marketing design, CraftMyPDF helps you auto-generate banners, flyers, and posters with dynamic content like promo codes or event dates. Use Make or Zapier to pull in campaign data and create personalized assets on the fly. Want to know what makes a high-performing banner? We’ve got a breakdown in our existing article.
Already Designing in Canva? No Need to Start Over
If you’ve already created a design in Canva, great! You can export it as a PDF and upload it to CraftMyPDF, turning it into a fully dynamic, reusable template.
From there, you can use Zapier, Make, or Bubble to insert dynamic fields like names, dates, table numbers, or QR codes. It’s the best of both worlds: Canva’s creativity + CraftMyPDF’s automation power.
Curious how it works with the Canva API? Check out our guide to see just how easy it is to bring your designs to life automatically.
8. Conclusion
We have walked through how easy it is to create dynamic, personalized wedding invitation cards using CraftMyPDF. With support for tools like Zapier, Make, and Bubble, you can automate your entire document workflow without writing a single line of code.
Whether you’re an event planner, a HR manager, or a teacher, automating documents makes it fast, flexible for your businesses.
Ready to bring your ideas to life? Sign up for CraftMyPDF and start automating your documents today